
User manual


15
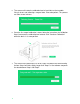
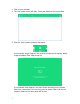
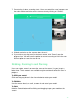
6. Looking at the camera feed, position the object so that the laser line passes
over the lighter Colored area by using the Rotate Right or Rotate Left buttons
provided on screen or moving the object by hand.
7. Click “Confirm Lightest Color”. The software will conduct the tuning process to
determine the best exposure for the light Colored area.
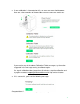
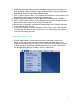
8. Repeat Step 6 for the darker or blue spectrum Colored area of the object.
9. Click “Confirm Darkest Color”. The software will conduct the tuning process to
determine the best exposure for the dark Colored area.
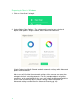
10. Once tuning is complete, scanning will automatically start. Sit back and relax
as the scanner does the rest!
11. If you want to stop the scan for whatever reason, click on the “Finish” button.
You will have the option of saving the scan “as is”, quitting the scan without
saving and resuming the scan.
Preparing to Scan in Mac
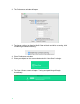
1. Scanning preferences in Mac are preset with single Color scanning as
default. If you are scanning a multi-Color or black and white object (see
Single Color or Multi Color? chart on p. 35), Mac users will need to manually
change settings in Preferences before beginning a new scan. Preferences
can be opened by going to Toolbar > Scan > Preferences.