
Operating instructions
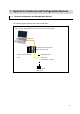

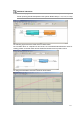
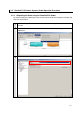
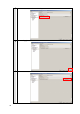
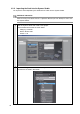
Table Of Contents
- Introduction
- Terms and Conditions Agreement
- Precautions
- Related Manuals
- Revision History
- 1. System to Construct and Configuration Devices
- 2. Before You Begin
- 3. Setting up the System
- 3.1. System Setup Procedures
- 3.2. Simulink PLC Coder & Sysmac Studio Operation Procedure
- 3.2.1. Outputting the Code using the Simulink PLC Coder
- 3.2.2. Importing the Code into the Sysmac Studio
- 3.2.3. Checking the Calculation Accuracy
- 3.2.4. Creating the EtherCAT Network Configuration
- 3.2.5. Setting the Axis
- 3.2.6. Creating Programs
- 3.2.7. Synchronization (Download)
- 3.2.8. System Operation Check
- 4. Appendix
3.2.2. Importing the Code into the Sysmac Studio
You import the code outputted by the Simulink PLC Coder into the Sysmac Studio.
Additional Information
Refer to the Sysmac Studio Version 1 Operation Manual (Cat. No. W504) for how to use
the Sysmac Studio.
1
Start the Sysmac Studio and create a new project.
Set the Select Device Area as shown below.
Category: Controller
Device: NJ301-1200
Version: 1.04
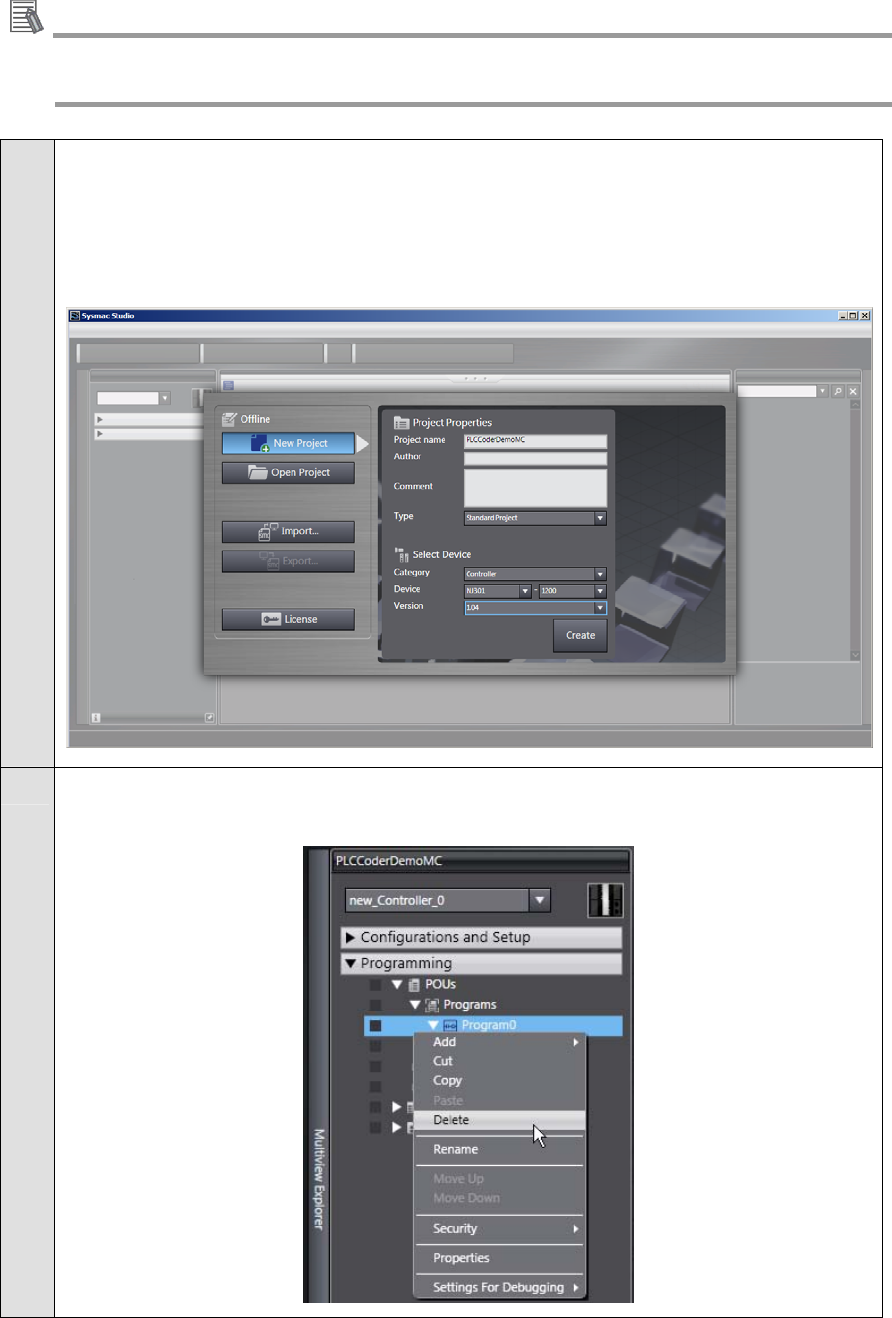
2
Delete the Program0 that is automatically created when a new project is created
because it is not used in this Guide.
18