
User`s guide


10 Examples of GUIDE GUIs
3 Resizing the new axes to use 90% of the figure’s width.
4 Constructing a title string and displaying it in the new figure.
5 Saving the figure and axes handles in the handles structure f or possible
later use or destruction.
Note Handles are saved for both plots, but each time a new figure is
created for either of them, the new handles replace the old ones, if any,
making previous figures inaccess ible from the GUI.
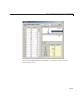
Create Two Context Menus. To create the two context menus, from the
GUIDE Tools menu, select the Menu Editor. After you create the two
context m enus, a ttach one to the each axes,
axes1 and axes2.IntheMenu
Editor, for each menu:
1 Click the Context Menus tab to select the type of menu you are creating.
2 Click the New Context Menu icon .
This creates a context menu in the Menu Editor workspace called
untitled.
It has no menu items and is not attached to any GUI object yet.
3 Select the new menu and in the Tag edit field in the Menu Properties
panel, type
plot_axes1.
4 Click the New Menu Item icon .
A menu item is displayed underneath the
plot_axes1 item in the Men u
Editor workspace.
5 In the Menu Properties panel, type Open pl ot in new window for Label
and
plot_ax1 for Tag. Do not set anything els e for this item.
6 Repeat the last four steps to create a second context menu:
• Make the Tag for the menu
plot_axes2.
• Create a menu item under it and make its Label
Open plot in new
window
and assign it a Tag of plot_ax2.
10-48