
User`s guide


Create Menus in a GUIDE GUI
some accelerators may be used for other purposes on your system and that
other actions may result.
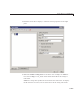
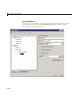
• Di splay a sepa rator above the men u item b y checking Separator above
this item.
• Display a check next to the menu item when the menu is first opened by
checking Checkmarkthisitem. A check indicates the current state of
the menu item. See the example in “Add Item s to the Context Menu” on
page 6-116.
• Enable this item when the menu is first opened by checking Enable this
item. This allows the user to select this item when the menu is first
opened. If you clear this option, the menu item appears dimmed when the
menu is first opened, and the user cannot select it.
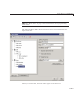
• Specify a string for the routine, i.e., the Callback, that performs the
action associated w ith the menu item. If you have not yet saved the G UI,
the default value is
%automatic. When you save the GUI, and if you
have not changed this field, GUIDE automatically sets the value using
a combination of the Tag field and the GUI filename. See “Menu Item”
on page 8-59 for more information about specifying this fie ld and for
programming menu items.
The View button displays the callback, if there is one, in an editor. If you
have not yet saved the GUI, GUIDE prompts you to save it.
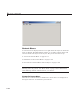
• Open the Property Inspector, where you can change all menu properties,
by clicking the More options button. For detailed information about the
properties, see Uimenu Properties .
Note See “Menu Item” on page 8-59 and “Updating a Menu Item C heck” on
page 8-61 for programming information and basic examples.
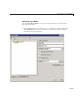
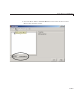
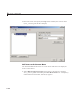
Additional Drop-Down Menus
To create additional drop-down menus, use the New Menu button in the same
way you did to create the
File menu. For example, the follow ing figure also
shows an
Edit drop-down menu.
6-111