
User`s guide
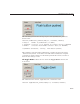


Add Components to the GUI
For another example describing how to couple uitables with graphics, see
“GUI to Interactively Explore D ata in a T able (GUIDE)” on page 10-31.
Find more about how to work with the GUI components used in
controlsuite
in “Add Code for Components in Callbacks” on page 8-30 and in the following
sections:
• “Define User Interface Controls” on page 6-38
• “Define Panels and Button Groups” on page 6-56
• “Define Axe s” on page 6-62
• “Define Tables” on page 6-66
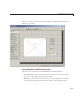
Add Components to the GUIDE Layout Area
This topic tells you how to place components in the GU IDE layout area and
give each component a unique identifier.
Note See “Create Menus in a GUIDE GUI” on page 6-101 for information
about adding menus to a GUI. See “Create Toolbars” on page 6-122 for
information about working with the toolbar.
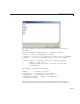
1 Place components in the layout area according to y our design.
• Drag a component from the palette and drop it in the layout area.
• Click a component in the palette and move the cursor over the layout
area. The cursor changes to a cross. Click again to add the component in
its default size, or click and drag to size the component as you add it.
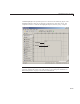
Once you have defined a GUI component in the layout area, selecting it
automatically shows it in the Property Inspector. If the Property Inspector
is not open or is not visible, double-clicking a component raises the
inspector and focuses it on that component.
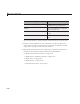
The components listed in the following table have additional considerations;
read more about them in the sections described there.
6-31