
User`s guide

Table Of Contents
- Getting Started
- Using Instrumentation in a Model
- Categories of ActiveX Controls
- Placing ActiveX Controls in a Different Window
- Library Reference
- Index
Linear Gauges
3-17
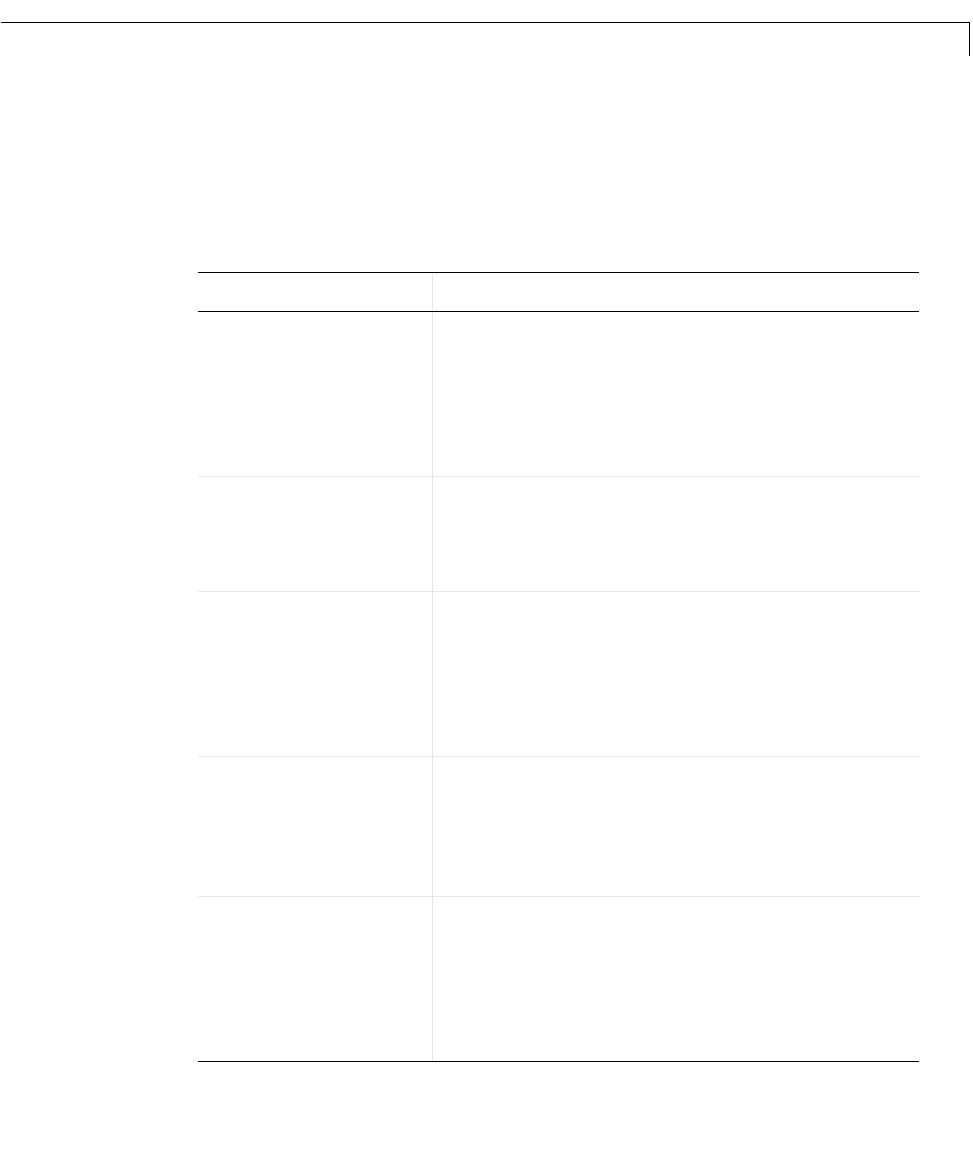
Customizing Linear Gauges
The table below lists some common customizations involving the ActiveX
Control Properties
dialog box that are specific to blocks in the Linear Gauges
library.
Task Description
Change the shape or
size of a pointer
On the Pointers panel, set PointerID to the ID of
the pointer you want to change (
0 if there is
exactly one pointer). Then use the
Style property
to choose the shape, the
Inner and Outer
properties to determine the length, and the
Width property to determine the thickness.
Label a pointer by
displaying the
corresponding
number
On the
Digital panel, set PointerID to the ID of
the pointer you want to label and check the
PointerDigital check box.
Change the
appearance of a
pointer label
On the
Digital panel, first set PointerID to the
ID of the pointer whose label you want to change.
Then use
Decimals to set the number of digits
after the decimal point,
PointerDigitalColor to
set the color of the number, and
FontID to refer
to a previously defined font (on the
Fonts panel).
Move a pointer label
to a fixed position
On the
Digital panel, first set PointerID to the
ID of the pointer whose label you want to change.
Uncheck the
PointerDigitalAttach check box
and use
PointerDigitalX and PointerDigitalY to
set the fixed position for the label.
Move a pointer label
to a position relative
to the pointer
On the
Digital panel, first set PointerID to the
ID of the pointer whose label you want to change.
Check the
PointerDigitalAttach check box. For a
vertical (respectively, horizontal) linear scale, use
PointerDigitalX (respectively, PointerDigitalY)
to set the independent coordinate for the label.