
Specifications


Things to Try
4-18
4.10 Things to Try
To explore using Code Composer Studio, try the following:
❏
Add processingLoad to the Watch window. When you use the Load GEL
control, the processingLoad value is updated in the Watch window.
❏
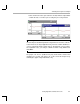
Right-click on the Watch window and choose Insert New Expression.
Click the Help button and read about the display formats you can use.
Experiment with various display formats. For example, you can type
*input,x
as the expression to view the sine input in hexadecimal format.
❏
Change BUFSIZE in volume.h to 0x78 (or 120) and rebuild, then reload
the program. Change the Length in the File I/O dialog to 0x78. For both
graphs, change the Acquisition Buffer Size and the Display Data Size to
0x78. This causes a buffer to contain 3 full sine waves rather than 2.5
waves. Animate the program and notice that the input and output buffer
graphs are now in phase. (You may need to halt the program to see
whether the graphs are in phase.)
❏
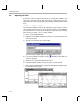
Instead of using profile-points to gather statistics, try using the clock as
an alternative. Replace the profile-points with breakpoints. Choose
Profiler
→
View Clock. Run the program to the first breakpoint.
Double-click on the clock area to clear it. Run the program again. The
clock shows the number of cycles it takes to reach the second breakpoint.
❏
Experiment with Probe Points by repeating section 4.3, page 4-6 through
section 4.5, page 4-10. This time, use only Probe Points and the Run
command. Note that you need to create three Probe Points. This is
because a Probe Point can be associated with only one action. There are
two graphs to be updated and one file to use as input. Each of these
actions requires its own Probe Point.
Also notice that each Probe Point must go on a different line of code. As
a result, the target is halted three times as often and actions are not
performed at the same point in target execution. For these reasons, the
combination of a Probe Point and a breakpoint used in this lesson is more
efficient than using Probe Points only.
❏
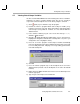
To practice building projects with Code Composer Studio, copy all the
files in the c:\ti\c6000\tutorial\volume1 folder to a new folder. Delete the
volume.mak file. Then, use Code Composer Studio to recreate the
project using the Project
→
New and Project
→
Add Files to Project menu
items. See section 4.1, page 4-2 for a list of the files to add to the project.
4.11 Learning More
To learn more about Probe Points, graphs, animation, and GEL files, see the
online help for Code Composer Studio or the
Code Composer Studio User’s
Guide
(which is provided as an Adobe Acrobat file).