MA000-095-00-00 Doc. ver.: 1.
A publication of Altium BV Documentation Department Copyright 2004 Altium BV All rights reserved. Reproduction in whole or part is prohibited without the written consent of the copyright owner. TASKING is a brand name of Altium Limited. The following trademarks are acknowledged: CodeWright is a registered trademark of Starbase Corporation. IBM is a trademark of International Business Machines Corporation. PVCS is a trademark of Intersolv, Inc.
The information in this document has been carefully reviewed and is believed to be accurate and reliable. However, Altium assumes no liabilities for inaccuracies in this document. Furthermore, the delivery of this information does not convey to the recipient any license to use or copy the software or documentation, except as provided in an executed license agreement covering the software and documentation. Altium reserves the right to change specifications embodied in this document without prior notice.
CONTENTS TABLE OF CONTENTS
Table of Contents CONTENTS CONTENTS IV
Table of Contents V OVERVIEW 1.1 1.2 1-1 EDE Program Development . . . . . . . . . . . . . . . . . . . . . . . Working in an Embedded Environment . . . . . . . . . . . . . GETTING STARTED WITH EDE 2.1 2.2 2.3 2.4 2.4.1 2.4.2 2.5 2.6 2.7 2.8 2.8.1 2.9 2.10 2.11 Starting EDE . . . . . . . . . . . . . . . . . . . . . . . . . . . . . . . . . . . . EDE Overview . . . . . . . . . . . . . . . . . . . . . . . . . . . . . . . . . . Selecting a Toolchain . . . . . . . . . . . . . . . . . . . . . . . . . . . .
Table of Contents VI PYTHON 1 2 2.1 2.2 3 4 5 5.1 6 7 8 8.1 8.2 8.3 CONTENTS INDEX A-1 Introduction . . . . . . . . . . . . . . . . . . . . . . . . . . . . . . . . . . . . Installation and Configuration . . . . . . . . . . . . . . . . . . . . . Popup menu . . . . . . . . . . . . . . . . . . . . . . . . . . . . . . . . . . . EDE Python Options . . . . . . . . . . . . . . . . . . . . . . . . . . . . . Running Python Scripts . . . . . . . . . . . . . . . . . . . . . . . . . . .
Manual Purpose and Structure MANUAL PURPOSE AND STRUCTURE PURPOSE This manual is aimed at users of the TASKING Embedded Development Environment (EDE). It assumes you are familiar with the Windows 95/98/NT/2000 graphical user interface. MANUAL STRUCTURE Related Publications Conventions Used In This Manual 1. Overview Highlights specific EDE features and capabilities, and shows the EDE program development flow. 2. Getting Started with EDE Gives you information how to start and use EDE. 3.
Manual Purpose and Structure VIII RELATED PUBLICATIONS MANUAL STRUCTURE • CODE COMPLETE A Practical Handbook of Software Construction [Steve McConnel, Microsoft Press] • On-line CodeWright Documentation [Starbase/TASKING] • PVCS Documentation [Intersolv] • SourceSafe Documentation • TLIB Documentation • RCS Documentation • C and C++ Cross-Compiler User's Manuals [TASKING] • Cross-Assembler User's Manuals [TASKING] • C Compiler, Assembler, Linker Reference Manuals [TASKING] • CrossView Pro Debugger User'
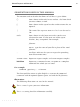
Manual Purpose and Structure CONVENTIONS USED IN THIS MANUAL The notation used to describe the format of call lines is given below: {} Items shown inside curly braces enclose a list from which you must choose an item. [] Items shown inside square brackets enclose items that are optional. | The vertical bar separates items in a list. It can be read as OR. italics Items shown in italic letters mean that you have to substitute the item. If italic items are inside square brackets, they are optional.
Manual Purpose and Structure X This illustration indicates actions you can perform with the mouse. This illustration indicates keyboard input. This illustration can be read as See also". It contains a reference to another command, option or section. Terminology Conventions MANUAL STRUCTURE "EDE" is used as a shorthand notation for the TASKING Embedded Development Environment, a Windows based integrated development environment for embedded development tools..
CHAPTER 1 OVERVIEW
OVERVIEW CHAPTER 1-2 Chapter 1 1
Overview 1-3 1.1 EDE PROGRAM DEVELOPMENT The TASKING Embedded Development Environment EDE can be divided into three main parts: 1. Edit / Project management 2. Build 3. Debug The figure below shows how these parts interface with each other. EDE toolchain selection editor project management tool options EDIT makefile make compiler assembler linker locator BUILD absolute file debugger DEBUG Figure 1-1: EDE development flow In the Edit part you make all your changes.
Chapter 1 1-4 In the Build part a makefile (created by the Edit part) is used to invoke the needed toolchain components, resulting in an absolute object file. In the Debug part you can use this absolute file to debug your project. 1.2 WORKING IN AN EMBEDDED ENVIRONMENT The TASKING EDE differs from a native program development; a native program development is often used to develop applications for systems where the host system and the target are one.
CHAPTER 2 GETTING STARTED WITH EDE
STARTING CHAPTER 2-2 Chapter 2 2
Getting Started with EDE 2.1 STARTING EDE You can launch EDE by double-clicking on the EDE shortcut on your desktop. Or you can launch EDE via the program folder created by the installation program (Start -> Programs -> TASKING toolchain -> EDE). 2.2 EDE OVERVIEW EDE is an integrated software development platform that combines a powerful editor, project manager and a make facility. EDE supports all TASKING tools for all targets and is at the same time designed to be open and extensible (i.e.
Chapter 2 2-4 Project Options Compile Build Rebuild Debug On-line Manuals Document Windows Used to view and edit files. STARTING Project Window Contains several tabs for viewing information about projects and other files. Output Window Contains several tabs to display and manipulate results of EDE operations. For example, to view the results of builds or compiles.
Getting Started with EDE 2.3 SELECTING A TOOLCHAIN EDE supports all the TASKING toolchains. When you first start EDE, the toolchain of the product you purchased is selected and displayed in the title of the EDE desktop window. If you have more than one TASKING product installed and you want to change toolchains, do the following: 1. From the Project menu, select Select Toolchain... The Select Toolchain dialog appears. 2. Select a toolchain in the Toolchains list box and click OK.
Chapter 2 2-6 2.4 PROJECT MANAGEMENT EDE is a complete project environment in which you can create and maintain project spaces and projects. EDE gives you direct access to the tools and features you need to create an application from your project. A project space holds a set of projects and must always contain at least one project. Before you can create a project you have to setup a project space. All information of a project space is saved in a project space file (.
Getting Started with EDE 2.4.1 CREATE A NEW PROJECT SPACE WITH A PROJECT Creating a project space is in fact nothing more than creating a project space file (.psp) in an existing or new directory. Create a new project space 1. From the File menu, select New Project Space... The Create a New Project Space dialog appears. 2. In the Filename field, enter a name for your project space (for example demo). Click the Browse button to select a directory first and enter a filename. 3. Click OK.
Chapter 2 2-8 Add a new project to the project space 4. In the Project Properties dialog, click on the Add new project to project space button. STARTING The Add New Project to Project Space dialog appears. 5. Give your project a name, for example examples\demo\demo.pjt (a directory name to hold your project files is optional) and click OK.
Getting Started with EDE A project file with the name demo.pjt is created and the Project Properties dialog box appears with the project selected. Add files to the project 6. Add all the files you want to be part of your project using one of the 3 methods described below. Method 1: Add new files to a project Use this method if you want to create a new source file and add it to your project. a. Click on the Add new file to project button. The Add New File to Project dialog appears.
Chapter 2 2-10 b. Enter a new filename and click OK. A new empty file is created and added to the project. Method 2: Scan existing files into a project Use this method to add existing files to a project by specifying a file pattern. For example, to add all C files in a specific directory to your project. a. Click on the Scan existing files into project button. STARTING The Scan Existing Files into Project dialog appears. b.
Getting Started with EDE d. Click OK. The files that match the specified pattern(s) are added to your project. Method 3: Add existing files to a project Use this method to add existing files to a project by selecting individual files. a. Click on the Add existing files to project button. The Select One or More Files to Add to Project dialog appears. b. In the Look in box, select the directory that contains the files you want to add to your project. c.
Chapter 2 2-12 EDE automatically creates a makefile for the project. This file contains the rules to build your application. EDE updates the makefile every time you modify your project. 2.4.2 ADDING PROJECTS TO AN EXISTING PROJECT SPACE When you already have a project space (your own project space or one of the delivered examples), you can either add a new project or add an existing project to the open project space. Open an existing project space 1. From the File menu, select Open Project Space..
Getting Started with EDE Include a sub-project Projects not only contain files, but can also contain sub-projects. This can be useful for including libraries in a project: you can include the project that builds the library as a sub-project in the project that uses the library. Whenever the main project is built, it will first check if the library (the sub-project) is up-to-date. If not, the library is rebuilt before the main project is built. To include a sub-project: 1.
Chapter 2 2-14 2. Select the file(s) you want to open (hold down the Ctrl key to select more than one file) and click OK. EDE loads the selected files in the editor in separate document windows. 3. Optionally, edit the file(s). 2.6 SETTING DEVELOPMENT TOOL OPTIONS The next step in the process of building your application is to specify the options for the different parts of the toolchain, such as the C and/or C++ compiler, assembler, linker and debugger.
Getting Started with EDE The Cancel button closes the dialog without saving your changes. With the Defaults button you can restore the default project options (for the current page, or all pages in the dialog). If available, the Options string field shows the command line options that correspond to your graphical selections. 2.7 CHECK THE DIRECTORY PATHS EDE and the development tools use several directories to find executable programs, include files and libraries.
Chapter 2 2-16 2.8 HOW TO BUILD YOUR APPLICATION The next step is to compile the file(s) together with its dependent files so you can debug the application. Build your Application • Click on the Execute 'Make' command button. The following button is the execute Make button which is located in the toolbar. If there are any unsaved files, EDE will ask you in a separate dialog if you want to save them before starting the build.
Getting Started with EDE 2.8.1 ADVANCED BUILD OPTIONS These steps are optional. Follow these steps if you want to specify additional build options such as to stop the build process on errors and to keep temporary files that are generated during a build. 1. From the Build menu, select Options... The Build Options dialog appears. All EDE command settings are handled in this dialog, unless you disable the Use TASKING build and error parser settings check box.
Chapter 2 2-18 2.9 STARTING THE CROSSVIEW PRO DEBUGGER Once the files have been compiled, assembled, linked, located and formatted they can be executed by CrossView Pro. To execute CrossView Pro: • Click on the Debug application button. The following button is the Debug application button which is located in the toolbar. CrossView Pro is launched. CrossView Pro will automatically download the compiled file for debugging.
Getting Started with EDE 2.10 HOW TO LOAD/SAVE OPTIONS You can save the settings of your toolchain options into an option file (.opt) so that you can restore a specific configuration whenever you want. You can also specify to automatically load an option file when a project is opened. To save options to a file 1. From the Project menu, select Save Options... The Save Options dialog appears. 2. Optionally, select Save Custom Options and select the tool options you want to save.
Chapter 2 2-20 2. Enter the filename of a previously saved option file. 3. Optionally, enable the Load Options from the specified file when the project is opened check box. 4. Click OK. 2.11 TECHNICAL SUPPORT EDE has an automated technical support attendant to ease the communication between you and Altium's support engineers. The attendant prepares an Email which will be exported to your Email software (you can inspect the mail and all attached files before you transmit them via your Email software).
CHAPTER 3 USE EDE WITH CODEWRIGHT
CHAPTER EDE AND CODEWRIGHT 3-2 Chapter 3 3
Using EDE with CodeWright 3.1 INTRODUCTION Instead of using the editor delivered with EDE (which is also based on CodeWright technology) you can use EDE with the popular CodeWright editor. Therefore, we deliver EDE as a dynamic link library (EDE32.DLL for Windows 95/98/XP/NT/2000) which can be loaded by your existing CodeWright configuration at startup. All you have to do is: 1. Add two lines to the LibPreload section of the configuration file CWRIGHT.
Chapter 3 3-4 3.2 FILES USED BY EDE EDE AND CODEWRIGHT The following files are used by EDE: \product\bin\ede32.dll EDE program as a 32-bits DLL \product\bin\edesrc.dll EDE DLL delivered with some toolchains to provide toolchain specific ChromaCoding \product\bin\wmk.exe TASKING Make utility (32-bits) \product\bin\cwright.
CHAPTER 4 EDITOR
Chapter 4 CHAPTER 4-2 EDITOR 4
Editor 4-3 4.1 INTRODUCTION EDE is based on CodeWright technology. For a detailed description of the editor refer to the on-line manual of the editor: CodeWright User's Manual. 4.2 HELP EDE offers several types of Help services: Context-sensitive Help Provides you with information about dialog boxes and other topics as you are using EDE. You access this feature by pressing F1. EDE API Help Provides information about the functions in the EDE API.
Chapter 4 4-4 4.3 PRACTICAL TIPS Keystroke Macros Dialog You can record keystrokes and play them back by pressing the F7 and F8 keys respectively. On the Edit menu, you will find the Keystroke Macros dialog and the Record and Playback items. The Keystroke Macros dialog provides a powerful extension of this capability. You copy keystroke recordings to and from the numbered storage areas listed in this dialog.
Editor 4-5 Language Dialog This is a place where a lot of the "good stuff" is hiding. You turn on ChromaCoding from here, Language Templates and other bells and whistles. Tab Setting and Examples This is one of several ways to set up tabs for buffers. This is used for all new buffers that bear the extension in the File Type edit box. The method of specifying tabs is the same throughout CodeWright. You specify the interval between tab stops by specifying one or more columns at which there are tab stops.
Chapter 4 4-6 Environment Dialog Let us consider the settings available under the Environment dialog. Select Environment from the Customize menu. There are a number of things here you want to overlook. Remember, for more details about these options or other Environment options just press F1. Here are some questions worth asking: • Do you want system prompts to pop-up in a dialog, or to be displayed on the status line? For most people, the status line has some advantages.
APPENDIX A PYTHON
APPENDIX A-2 PYTHON A Appendix A
Python A-3 1 INTRODUCTION You can configure EDE to use Python scripts. The purpose of integrating the Python interpreter with EDE is to control EDE or external applications by using Python scripts. This is useful to connect multiple CrossView Pro debuggers with arbitrary third-party tools, like Matlab, RiMC or Consystant. 2 INSTALLATION AND CONFIGURATION In order to use Python with EDE you must have the Python 2.0 interpreter installed.
Appendix A A-4 Horiz. Scrollbar Toggles the presence of a horizontal scrollbar the Python Output Window. Run... Executes a Python script, selected using the Select Python Script to Load dialog which appears. The directory where this dialog starts is always the current project's directory. Hint: By removing the filename of the path, and typing Enter, the directory is changed to the last script's directory. Control-break Stops the running Python script.
Python A-5 3 RUNNING PYTHON SCRIPTS The Python extension adds API calls to EDE which you can issue as regular API function calls. To give an API command, enter the command via the Tools | API Command dialog. To execute a Python script, use the PythonExec API call or right-click on the Python Output Window, select Run... and specify a Python script. To execute a single Python statement, use the PythonExecStr API call.
Appendix A A-6 4 FILES USED BY PYTHON FOR EDE The following files are present in the bin directory: cwpythoni.dll Provides language support for Python scripts and adds the Python tab to the Output Window. cwpythoni.mnu Menu file that holds the menus for the right mouse click in the Python tab of the Output Window. _ddeclt.py A strings based DDE client module, including Advise hot-link support. The module does not rely on MFC. ddeclt.pyd An OO wrapper around _ddeclt, to ensure Uninitialize() invocation.
Python A-7 5 DDECLT PYTHON EXTENSION MODULE ddeclt is a strings data based DDE client. A module which does not rely on MFC. It provides a DDE service object class DDEclient, which must be instantiated to enable using the DDE API. The DDEclient object is a Python wrapper around a C module, _ddeclt, which provides the C API binding into Python. Example: import ddeclt dde = DDEclient() dde.Connect('application', 'topic') dde.Execute('command') del dde Known problems 1.
Appendix A A-8 3. Failure to handle errors when using synchronous transactions. DDE is an asynchronous process, but is made to appear synchronous when the message sender chooses to suspend execution while waiting for a reply. If the timeout period specified is not long enough, the transaction will appear to have failed. Further problems may arise when the message from the server finally arrives.
Python A-9 GetAdvisedItemNoWait(connection, itemname) Returns a tuple (value, data-event) where value is the data received accompanying a data changed Advise event, and data-event is a boolean, which is true when a data changed event has been received. This event is to be used in case use_NODATA has been specified to Advise(), signalling data can be requested from the server. If no data change event has been received None is returned.
Appendix A A-10 Uninitialize() Frees all Dynamic Data Exchange Management Library (DDEML) resources associated with the specified application. Returns nothing. Also implicitly done when deleting the DDEclient object. Disconnect(connection) Terminates a conversation started by either the DdeConnect or DdeConnectList function and invalidates the specified conversation handle. Any incomplete transactions started before calling DdeDisconnect are immediately abandoned. Returns nothing.
Python A-11 Execute(connection, command_string[, timeout]) Send a command to the connected DDE peer, usually a server. The timeout is default set to 25 days, and has to be specified in milliseconds. The timeout cannot be disabled. Returns nothing. If the DDE exchange fails, e.g. if the server is busy, an exception occurs. Initialize( ) Registers an application with the Dynamic Data Exchange Management Library (DDEML). An application must call this function before calling any other DDEML function.
Appendix A A-12 Advise(connection, item[, timeout][, use_ACKREQ=0][, use_NODATA=0]) Establish an advise loop with a server. The server will send data changed Advise events when new data is present. If an advise loop already is present for the specified item, the existing advise loop will be replaced. The timeout is default set to 25 days, and has to be specified in milliseconds. The timeout cannot be disabled. use_ACKREQ has the server wait for us to tell we are ready for the next data.
Python A-13 6 PY2CWAPI This module wraps most of the EDE API functions, for direct usage from Python. The number of API functions is far too big to be included here though. Check the directory, using the Python built-in function dir(py2cwapi) , for all functions provided by this module. Start Python in the directory bin directory of toolchain (the directory where py2cwapi.pyd is located). A prompt appears. Type import py2cwapi and then dir(py2cwapi) .
Appendix A A-14 7 REDIR2CW ConsoleHorScrollBar( request ) Determine the new state of the scrollbar, or query its current state. Value Function >0 Turn on the scrollbar. 0 Turn off the scrollbar. -1 Return a value >0 indicating if the scroll bar is on, else 0. -2 Toggle the scrollbar state. <-2 No op. In all cases except -1, the return value indicates whether or not the scrollbar was on prior to the call.
Python A-15 CallCwFunction( function_name [,arg...] ) Invoke an EDE API function. Conversions are done under water. The function name and arguments are expected in a tuple. ATTENTION: Python cannot specify C type characters, so specify an integer value instead. Returns the value returned by EDE. See also LibFunctionExec and LibExport in the EDE API manual.
Appendix A A-16 8 MATLAB VIA ACTIVEX WRAPPER CLASS A Python module has been included which declares the class Matlab, wrapping Matlab instantiation and execution. You can test the Matlab connection by running the module as a Python script. 8.1 CLASS MATLAB METHODS GetSingleton(variablename, workspace = 'base') Read a single value from a Matlab variable. PutSingleton(variablename, value, workspace = 'base') Write a single value to a Matlab variable.
Python A-17 The imaginary matrix has the same dimensions as the real one. Always returns them as a matrix, even if they have one row. Both matrices are returned in one list, and each matrix itself is a list of lists. GetComplexMatrixOfSameSize(matrixname, real_placeholder, imaginary_placeholder, workspace = 'base') Get both the real as the imaginary matrices. Instead of the dimensions, as with GetComplexMatrix , two matrices with the expected dimensions must be passed. Their values will not be changed.
Appendix A A-18 8.2 INSTALLATION REQUIREMENTS Matlab must be registered as an automation server before it can be used as an ActiveX object. Run matlab /Regserver to enable ActiveX usage. 8.3 PYTHON SCRIPT EXAMPLE import matlab m = matlab.Matlab() m.SimplePlot(1, 1, 10, [[1,2,3,4,5,6,5,4,3,2]]) print m.Execute('m2=[1,2,3; 4,5,6]') print "get m2:", m.GetMatrix('m2', 3, 2) print 'imaginary 2x2' print "/ \\" print "| 1 + 9i , 2 + 8i |" print "| 3 + 7i , 4 + 6i |" print "\\ /" m.
INDEX INDEX
Index INDEX INDEX Index-2
Index Index-3 A Advise, A-12 auto-save, 4-6 B build, viewing results, 2-16 C CallCwFunction, A-15 ClearConsole, A-14 compile, 2-16 Connect, A-10 ConnectList, A-11 ConsoleHorScrollBar, A-14 ConversationHandle, A-9 creating a makefile, 2-12 CwConstantValue, A-15 D DDE client methods, A-8 debugger, starting, 2-18 dependencies, 2-6 development flow, 1-3 Disconnect, A-10 E EDE build an application, 2-16 create a project, 2-8, 2-12 create a project space, 2-7 editor, 4-1 • • • • • • • • files used, 3
Index Index-4 I Initialize, A-11 M makefile automatic creation of, 2-12 updating, 2-12 Matlab, A-16 MaximizeCommandWindow, A-17 MinimizeCommandWindow, A-17 O overview, 1-1 INDEX P Poke, A-12 PollControlBreak, A-14 ProcessAllPendingMessages, A-8 program development, 1-3 project create, 2-8, 2-12 include sub-project, 2-13 project file, 2-6 project hierarchy, 2-13 project management, 2-6 project space, 2-6 add projects, 2-12 create, 2-7 project space file, 2-6 PutComplexMatrix, A-17 PutMatrix, A-16 P