
Assembly Instructions


Page 16 Page 17
ASSEMBLY AND OPERATION
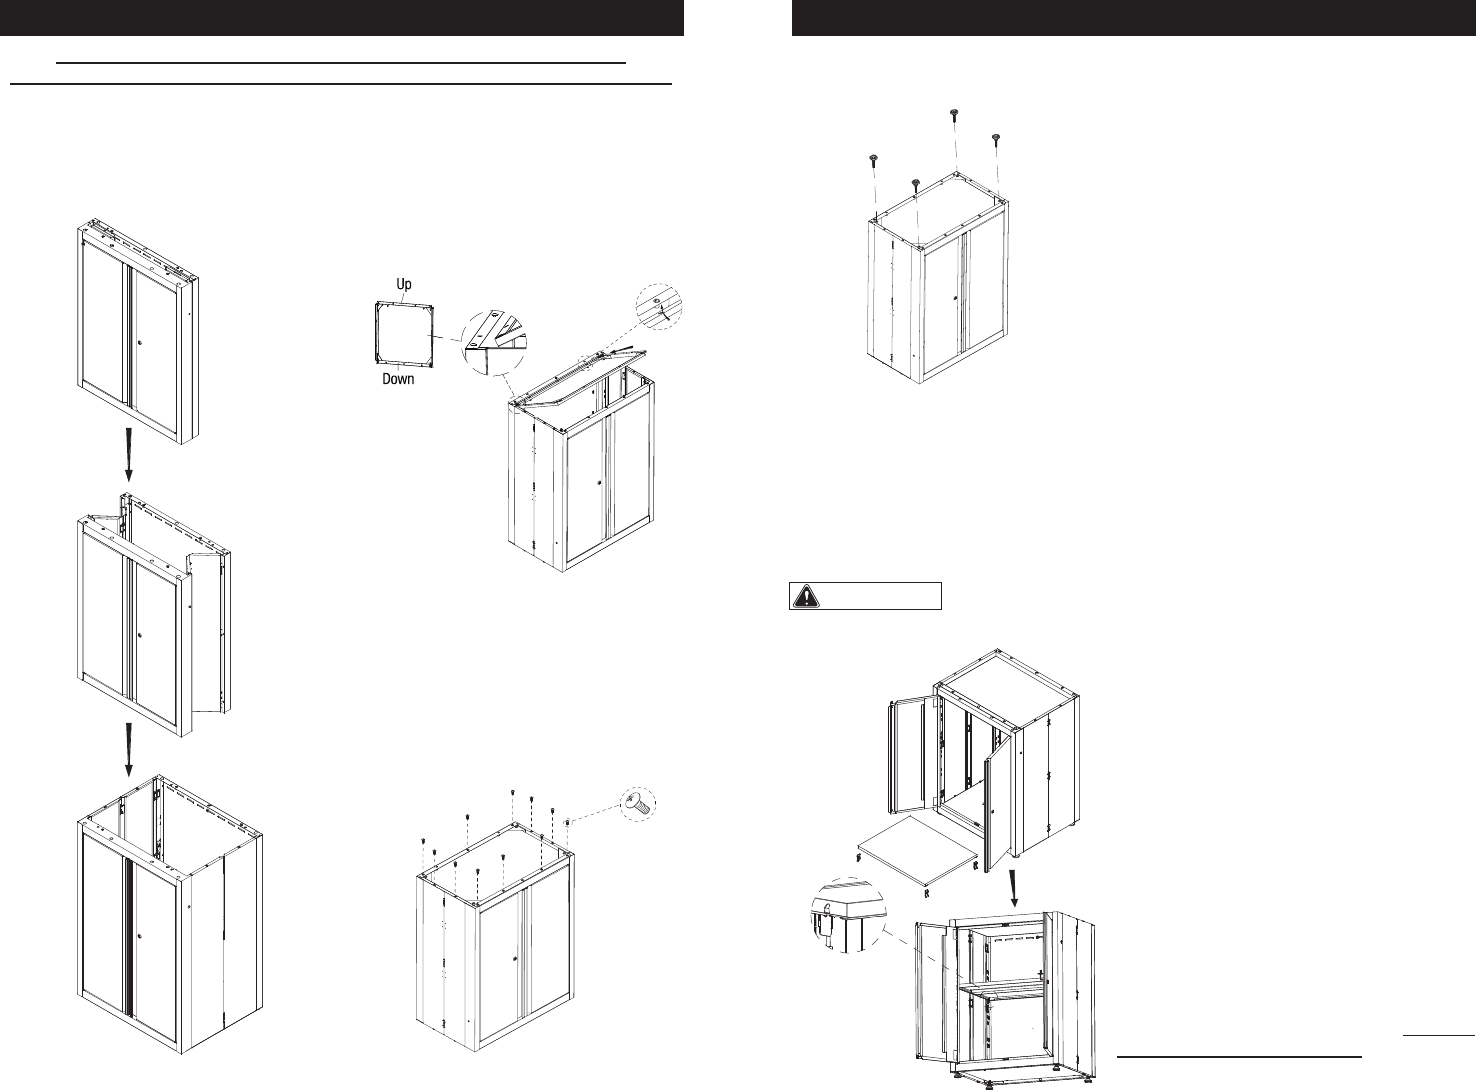
Carefully separate the front and back
panels, allowing the side panels to unfold
completely.
NOTE: IF YOU ARE STACKING TWO
CABINETS, YOU NEED TO PICK ONE
CABINET TO BE ON THE TOP AND ONE
CABINET TO BE ON THE BOTTOM.
ASSEMBLE THE BOTTOM CABINET
FIRST. Start by turning the cabinet on its
top and attaching the bottom as shown
below.
TILT THE BOTTOM PANEL ONTO THE
BOTTOM OF THE CABINET.
INSERT THE LIP OF THE BOTTOM
PANEL INTO THE SLOT ON THE BACK
OF THE CABINET, MAKING SURE THAT
THE HOLES ALIGN.
Attach the bottom panel to the cabinet
using eleven M6x16 Phillips head bolts.
2-DOOR STACKING CABINET
Continue on the next page
Assembly is VERY EASY, however there are a few key steps that must be followed.
THESE KEY STEPS ARE HIGHLIGHTED IN BOLD CAPS. FOLLOW THESE TO EXPEDITE ASSEMBLY.
ASSEMBLY AND OPERATION
Screw four adjustable feet into the bottom
of the cabinet.
Turn cabinet over, setting it on the four
leveling feet.
Insert four shelf supports inside the cabinet
at the desired height.
Note: to use the locking mechanism, the
shelf must be placed in the center position.
Place the shelf on the shelf supports.
For the top cabinet, assembly continued on the next page
The maximum shelf
capacity should be no more than 150 lbs
CAUTION:
FOR THE BOTTOM CABINET, PLACE THE
TOP PANEL ON THE CABINET, BUT
DO NOT
ATTACH WITH THE BOLTS.