
Assembly Instructions


Page 8 Page 9
PARTS LIST
For service regarding parts, assembly or warranty information, please call: 1-800-459-4409.
The keys are placed
inside the cabinet.
1
5
2
3
4
6
8
9
7
1
10
Ref# Description Part# Qty
1 M6 x 16 Phillips
Head Bolt
320174 21 pcs
2 M6 x 35 Hex
Flange Bolt
321208 4 pcs
3 Washer 324050 1 pc
4 M6 x 65 Hex
Tapping Screw
320316 1 pc
5 End Cup 314195 2 pcs
6 Lock and Key
(001)
304075 1 pc
7 Adjustable Feet 110 06 8 4 pcs
8 Shelf Support 226078 4 pcs
9 Shelf 116214 1 pc
10 M6 Hex
Flange Nut
323085 1 pc
2-DOOR STACKING CABINET
These bolts
and nuts are
used to secure
the sides of
the cabinets
together
for a better
appearance.
This are the
longer bolts to
tie the cabinet
together.
NECESSARY TOOLS REQUIRED
FOR ASSEMBLY
• Phillips head screwdriver
• Drill/driver optional to speed up the assembly
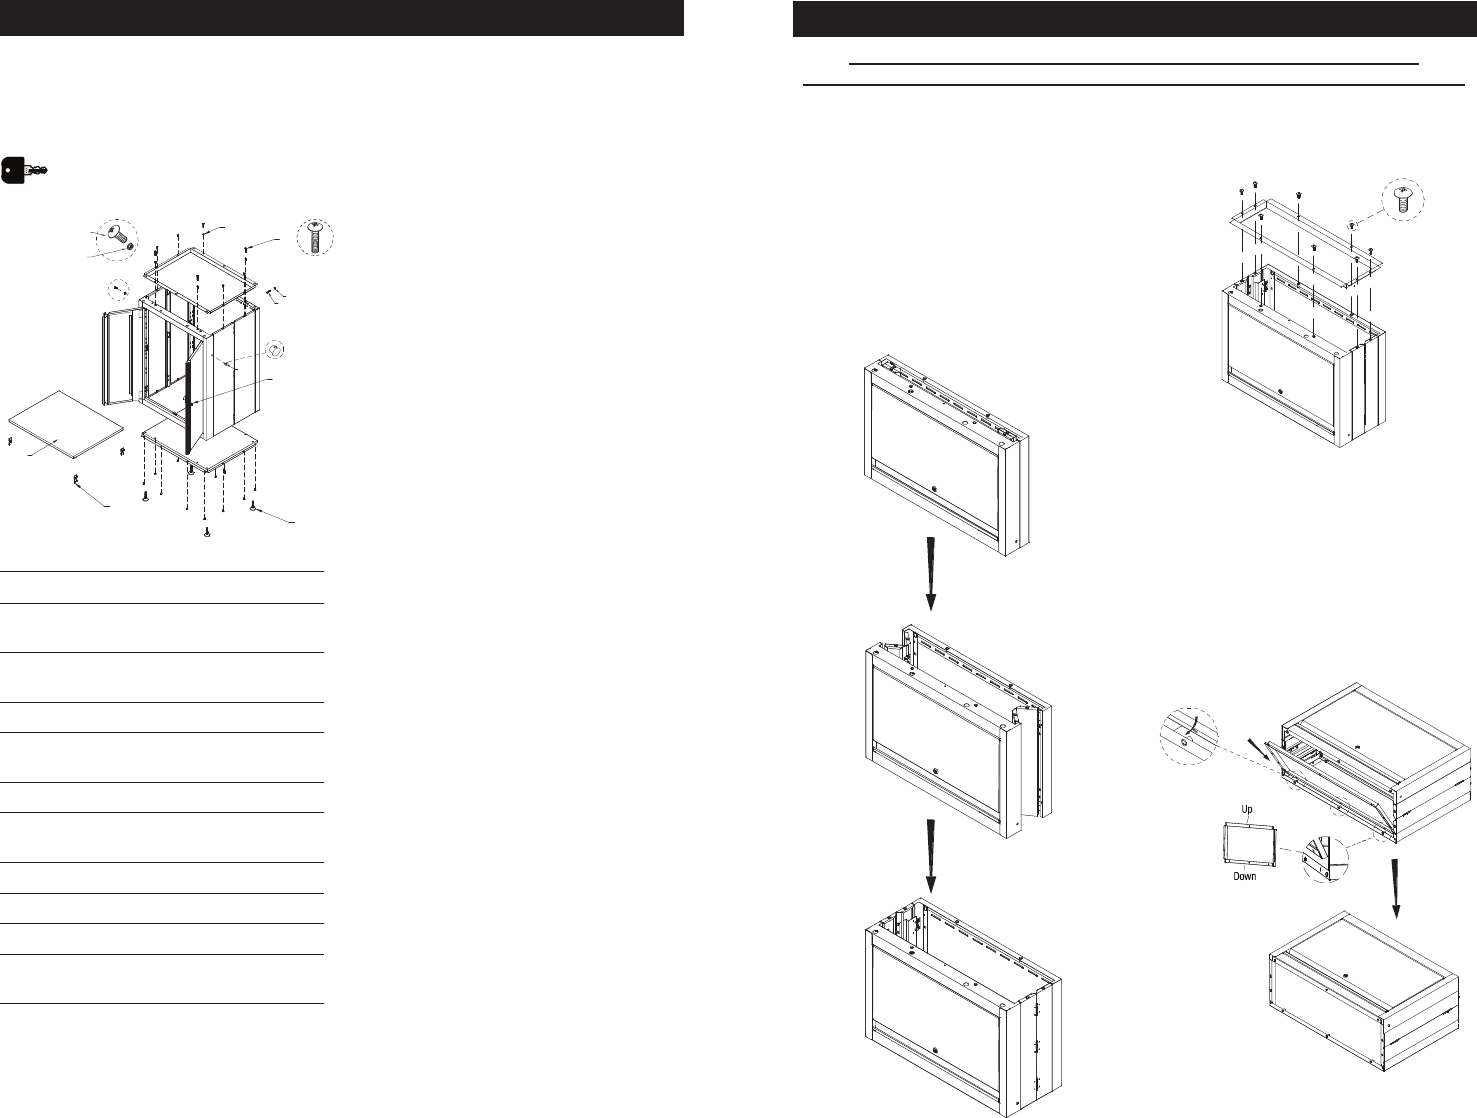
1-DOOR WALL CABINET
Carefully separate the front and back
panels, allowing the side panels to unfold
completely.
Attach the top panel to the cabinet using
eight M6 x 16 Phillips head bolts.
Carefully lay the cabinet on its back on a
soft surface to protect the finish.
INSERT THE LIP OF THE BOTTOM
PANEL INTO THE SLOT ON THE BACK
OF THE CABINET, MAKING SURE THAT
THE HOLES ALIGN.
TILT THE BOTTOM PANEL ONTO THE
BOTTOM OF THE CABINET.
ASSEMBLY AND OPERATION
Continue on the next page
Assembly is VERY EASY, however there are a few key steps that must be followed.
THESE KEY STEPS ARE HIGHLIGHTED IN BOLD CAPS. FOLLOW THESE TO EXPEDITE ASSEMBLY.
Not all parts are available under warranty.
Those parts not available may be purchased.