
User manual

Masterclock RC 500 User Manual – v2014.01.01
19
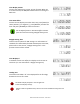
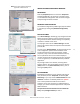
INSIDE THE DROP DOWN MENU WINDOW:
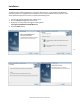
PROPERTIES
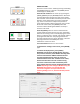
Click the [Properties] button to view the “Properties”
window (middle left). This presents a summary of the
current Network Configuration and cannot be changed
except through the other windows.
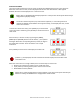
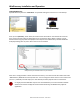
NETWORK CONFIGURATION
The network configuration (middle right) may be viewed
in summary by clicking the [Network Configuration]
button.
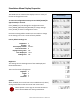
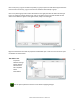
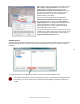
DEVICE SETTINGS
The “Device Settings” window (pg. 22) configures the RC
500 to receive and display in the format that you prefer,
using Time Zone offsets and DST settings to completely
customize it relative to UTC time.
The top right section of the “Device Settings” window
shows a list of the firmware and options associated with
your RC 500.
The rest of the “Device Settings” window includes access
to all configuration options for the network. These
include time reference inputs and outputs, display
properties, relay control and administrative functions,
such as password. There is also a status display to
monitor remote clocks and devices from your computer
screen using the free, included WinDiscovery software
application.
Any changes made in this window, including all the
buttons thereon, will not be applied until you click the
[Save] button or the [Save and Close] button, prior to
clicking the [Exit] button.
SET PASSWORD
Each Masterclock device in your network may have its
own password (see the “Properties” window to [Set
Password]) or you may create a Global Password on the
“Discover” window. The default password is “public”.
Your custom password should be one to eleven
characters and is case-sensitive. For added password
strength, you should use both alphanumeric and special
ASCII characters.
The password must be entered twice to confirm the
entry. Click [Change Password] to save it.
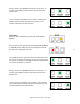
Below: This menu appears following a
right click on device name.
Properties Window
Network Configuration