
User manual

Masterclock RC 500 User Manual – v2014.01.01
13
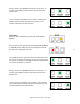
Custom Time Menu
There are situations where the end-user needs to display time differently than from a time reference.
When the custom time is used, the time displayed will not have Time Zone offsets or DST applied.
However the time can be displayed in 12 or 24 hour format.
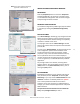
Please refer to “Standalone Menu Display Properties” in the previous section of this document for
configuration of display settings.
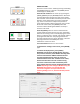
To use the custom time feature, any external time reference (i.e. time stamp) has to be
removed or disabled. If the RC500 is receiving time stamps, it will display this time, not the
custom time entered.
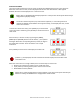
To enter the custom time menu, press [CLOCK]. If you entered the
custom time menu accidently, press [CLOCK] to cancel and return to
clock mode.
Enter the time, in 24 hour format, by pressing the [HOUR],
[MINUTE] and [SECOND] buttons until all dashes (--) are replaced
with digits. With each corresponding button pressed, the digit on
the display will increment. Press and hold to enter a rapid
movement.
Press [CLOCK] to exit the menu and display the custom time.
If dashes (--) are displayed, the time will not be set and the display will revert back to the
internal RTC time.
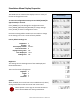
When the custom time is no longer needed, there are three ways to restore time.
Receive time stamps from TCDS or lock to a NTP time server
Cycle power by removing the AC power cord for a few seconds
Reset RC500 to factory defaults
Please refer to “Reset Configuration to Factory Default” in the next section of this document for
details on resetting the RC500. All user configurations will be cleared.