
Technical information


88
88
NOTE 1: Your Photosmart printer model must have two (2) good ink cartridges installed to operate/print
(unlike all HP Deskjet printer models which may operate using only one (1) ink cartridge ).
IMPORTANT: First verify the age of the ink cartridge(s)....look at imprinted date on front of ink cartridge.
If this ‘warranty expiration date’ has expired, then potential internal electrical cartridge failures can (and
frequently do) occur due to prolonged internal corrosion of cartridge micro-circuits, etc.
NOTE 2: Unfortunately, alignment pages and internal self test prints will usually print Ok even if the
cartridge is internally electrically damaged. Do not use these test pages as a proxy for determining
whether a cartridge is good or bad, only the ‘Tap 41/43’ diagnostic test report can yield this i nformation.
An internal electrical failure of a cartridge can be confirmed by performing the following steps which will
help rule out other variables which could also be causing the issue.
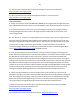
A. Ensure BOTH carriage/flex cables and BOTH ink cartridge contacts are thoroughly clean before
proceeding: http://inkjet411.com/?page_id=1519
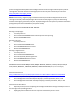
B. Print Self Test Page:
1. Press and hold the CANCEL button.
2. Press the COLOR COPY button. Release both buttons.
3. The self test page should print. The printed pattern will verify printer is generally functional
--- The self test page is a ‘forced’ test print whether the ink cartridges are good or bad. Inspect color bars
to verify proper nozzle/jetting health. If normal/regular printing is still not permitted then the problem is
with either one, or both, of the ink cartridges. Activate Tap 41 test to confirm which cartridge is causing
the issue.
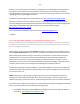
C. Validate the cartridge’s electrical health by running the ‘Tap 41’ diagnostics test. Refer to video
procedure or .pdf document at the following links on how to activate and read the service test report:
http://inkjet411.com/?page_id=536
1. Load Letter/A4-size paper into paper feed tray.
2. If any lights are blinking, first press Cancel to attempt to clear.
3. Press and HOLD the Cancel button, press Ok button once.
4. At ‘Mfg Commands’ menu, click Right Arrow once until ‘uiaux service’ menu is displayed.
5. At ‘uiaux service’ menu, click the Right Arrow until Special Reports menu is displayed.
6. Select Ok, then click Right Arrow until the ‘print-mech button tap’ menu is displayed.
7. Select Ok (Code = 0 will be displayed); click and hold Right Arrow until ‘code = 41’ is displ ayed.
Use the Left Arrow if you need to decrease numerical count.
8. Select Ok. Within one minute the Tap 41 diagnostic test report should be initiated and print
(whether ink cartridges are good or not, i.e. this is a forced print test). See following 4 paragraphs (or
video) on how to interpret diagnostic report.....