
Technical information


207
207
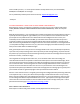
1) If you received an "Unauthorized ink", "non-HP ink", "counterfeit ink" or similar message, you can
simply ignore/dismiss these messages by pressing 'OK' once for each cartridge, so that the printer
resumes its normal operation. NOTE: Receiving these kinds of ongoing alert messages is COMPLETELY
NORMAL when using refilled ink cartridges. Refer to NOTE 2 below for more information. Refilling the
ink cartridges does not include reprogramming of the ink cartridges, so this will not be a factor.
http://inkjet411.com/?page_id=1407
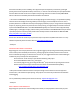
2) Remove ink cartridge and inspect for smart chip surface – check for scratches or ink residue. See
pictures of cartridge chips at following link for reference (see ‘Abnormal Cartridge Errors’):
http://inkjet411.com/?page_id=1925
- Replace cartridge if suspected damaged.
3) Perform Tap 41 PRINTHEAD Health Diagnostics Test (menu access varies by printer model, refer to HP
printer diagnostics document, page 45, to view normal display messages,
http://inkjet411.com/?page_id=1813 )
1. Turn ON the printer.
2. Press and Hold the “Print Photos” & “Red Eye Removal” buttons.
3. Release both buttons - screen should display “Enter Special Key Combo”
4. Press and release in sequence the “Red Eye Removal”, “Print Photos”, and then “Red Eye
Removal”
5. Scroll through the menu by pressing the right arrow button until the display says ‘Special
Reports’.
6. Select Ok, then press the arrow button until the ‘print-mech button tap’ menu is displayed.
7. Select Ok (Code = 0 will be displayed); click and hold Right Arrow until ‘code = 41’ is displayed.
8. Select Ok. The test page prints. If not, repeat steps 2-7 and enter ‘code = 43’, select Ok.
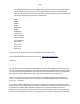
9. Check the 4th line at the top of the printed report; an electrically good/stable PRINTHEAD ‘Pen
Status’ will state "Pen Status: Pen OK"………if any other message is displayed then the PRINTHEAD may
have failed and may need to be replaced (as available). It is suggested to perform the 'Printer Reset'
procedure below to rule out printer firmware related problem.
a. If Step 2. does not allow service menu access, then press the 'Return' and 'Home' keys
simultaneously so the Engineering Menu is displayed [or depress the 'Return' button four (4) times]
b. Select Service Menu. Use arrow keys to advance to the Special Reports Menu. Select OK.
Perform steps 6-9.
NOTE: The Tap 10 extended self-test print may also be initiated via ‘code = 10’ (use to verify ink
nozzle/jetting performance for each color).
* Failure of the PRINTHEAD has nothing to do with refilled ink cartridges; the PRINTHEAD assembly is a
separate electronic unit in which the cartridges plug into and feed ink into. Refer to NOTE below.