
Technical information


180
180
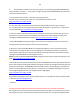
b. Remove the printhead – in most cases you will need to pull up on the lever at right side of
carriage assembly to unlock the printhead. Lift printhead straight up to remove.
c. Over a sink, run warm tap water directly into the 4 ink ports for approximately 2 minutes – this
will effectively saturate the foam ports and blow ink out/thru the nozzle plate bottom.
d. Using a lint-free towel, remove water from rear/bottom electrical contacts. Ensure printhead
electrical contacts and exposed surfaces are fully dry.
e. Install the printhead into the printer. You may observe a “Replace Printhead message” so you
will need to cycle printer power by turning printer off and then on to clear the error.
f. Install ink cartridges and retest printer. You should observe a New PRINTHEAD alert message
followed by an approx. 4-minute preparation countdown prompt.
g. If permissible, activate the ‘Clean Printhead’. This can be done from the printer’s control panel
or software printer driver (for example, by selecting ‘Tools’ – ‘Clean Printhead’, or similar).
h. If you have reached this point of the troubleshooting and all the previous troubleshooting steps
did not work, then the printhead is likely damaged or at end of life* and may need to be
replaced. To check the electrical state of the HP920 printhead, perform the following
PRINTHEAD Health Diagnostics Test procedure.
3) You can verify the HP920 PRINTHEAD's electrical performance by activating the PRINTHEAD
Health Diagnostics Test Report (NOTE: only applicable to printer models with keypad, i.e. 1-9):
a. Load Letter/A4-size paper into paper feed tray.
b. Press the * and # keys simultaneously.
c. Enter 123 (or 124) at keypad. The ‘Support xxxxxx’ menu should be displayed.
d. Use the arrow keys to navigate to the Reports Menu. Select Ok.
e. Use the arrow keys to navigate to the 'print-mech button tap' menu.
f. Select Ok. Screen should display “code = 0”.
g. Use the arrow keys to enter “code = 43” (or just enter 43 on keypad). Select Ok. The Tap 41
diagnostic test pattern prints.
NOTE 1: On newer printer models you may need to input ‘code = 41’.
NOTE 2: The Tap 10 self-test print (or extended self-test) also be initiated via ‘code = 10’ (use to
verify color output and general ink nozzle performance)
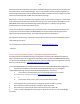
h. Check the 4th line at the top of the printed report; an electrically good/stable PRINTHEAD will
state “Pen Status: Pen OK”………if any other message is displayed then the PRINTHEAD may
have failed and may need to be replaced.
i. Re-seat the PRINTHEAD and repeat ‘Tap 43’ test to verify connectivity is not the issue. Refer to
HP.com for PRINTHEAD removal procedures or general instructions here:
http://inkjet411.com/?page_id=1495
4) As an outside chance, the internal suction pump might be faulty = new printer unfortunately. Best to
troubleshoot this with HP personnel if that is the case. You could run a 'Tap 21' test (using procedure
similar to ‘Tap 41’ test, except enter ‘code = 21’).