
Technical information


177
177
6. When ‘code = 41’, select ‘OK’. The ‘Tap 41’ diagnostic test pattern will print.
7. Check the 4th line at the top of the printed report; an electrically good/stable PRINTHEAD will
state “Pen Status: Pen OK”………if any other message is displayed then the PRINTHEAD has likely failed,
or has marginal electrical performance issues, and may need to be replaced. Re-seat PRINTHEAD and
repeat ‘Tap 41’ test to verify connectivity is not the issue.
Question: Do you happen to know if you have exceeded 4000 printed pages to date? The HP PS 6525 is a
relatively new printer model, so we suspect this is probably not the case.....(At the 'Mai ntenance' menu
you can print the Print Quality Diagnostic Report; in the lower-center portion of the report refer to #7:
Total Pages Printed: XXXX)
Is the printer still under the 1 year warranty?....you may have a defective PRINTHEAD, so 'the printer'
should be covered.
Now, we are not completely convinced the current printer issue can be fully resolved by just installing
new/fully loaded ink tanks (following numerous cleaning actions with no resolve). Assuming you are not
observing any PRINTHEAD error messages (see NOTE below, i.e. "Incompatible Printhead"), then the
PRINTHEAD is either severely clogged with ink residue or the ink port(s) are completely dry (i.e. the foam
pads that you can see in the bottom when you remove one of the ink cartridges from the carriage
assembly). The ink ports can easily dry out if the printer is rarely used, a color has been depleted for
awhile or if cartridges are not installed for long periods of time.
Suggested next steps - refer to both videos at links below:
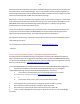
1) Remove all 4/5 ink cartridges, then remove the internal PRINTHEAD and thoroughly clean rear
electrical contacts and carriage electrical contacts. Inspect ink foam ports to see if they are ‘wet with
ink’…this will confirm whether ink is being pulled into the PRINTHEAD or not. If the ink foam ports are
completely dry (no significant amount of ink present when blotted with a paper towel, etc.), then the
PRINTHEAD is likely considered too dry to support proper ink flow and subsequent printing operations.
Refer to PRINTHEAD removal process at HP.com (link down below) or at the following Inkjet411 link to
provide general guidance: http://inkjet411.com/?page_id=1451
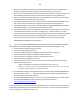
2) If after thorough electrical contact cleaning the problem persists, you may need to replace the
PRINTHEAD ASSEMBLY (i.e. get from HP or Amazon), however, as a last ditch effort, you might want to
perform a hot water flush on the PRINTHEAD: http://inkjet411.com/?page_id=2412
a. Remove all ink cartridges from the printer.
b. Remove the printhead – in most cases you will need to pull up on the lever at right side of
carriage assembly to unlock the printhead. Lift printhead straight up to remove.
c. Over a sink, run warm tap water directly into the 4 (or 5) ink ports for approximately 2
minutes – this will effectively saturate the foam ports and blow ink out/thru the nozzle plate
bottom.