
Operation Manual

15
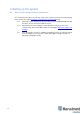
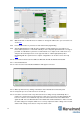
4.2.7 Write down and use later the beacon’s address or change the addressed to your convenience as
shown here
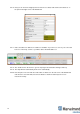
4.2.8 Press RESET button on your beacons and modem after programming
4.2.9 After programming devices with the latest software, modem and beacons are ready for use.
Place stationary beacons on the walls vertically in such a way that optimal ultrasonic coverage is
provided. To start with the system it is recommended to use a simple room of 4x6 meters or so
and place the stationary beacons on the opposite walls on 1.85m height (default). After
familiarizing with the system far more complex configurations can be done. Here is the help
video
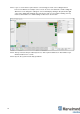
4.2.10 Connect the modem/router via USB to the Windows PC with the Dashboard installed.
4.2.11 Run the Dashboard
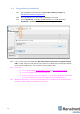
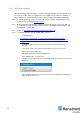
4.2.12 In the left corner of the Dashboard Modem shall appear connected
4.2.13 Wake up all beacons by clicking on the buttons in the Dashboard on the below panel
4.2.14 It may take up to 8 seconds for beacons to wake up
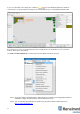
4.2.15 If modem is not active and is not powered, the beacons will go asleep automatically after 1
minute. The system may run for the frequency search, if it is you’re the very first waking up the
beacons. If doesn’t succeed with this step, disconnect the modem and connect that beacon
again via USB. Press the Default button in the Dashboard and Read all button to make sure that
the radio settings are really the default ones. You may compare the radio settings on the modem
and the radio settings on the beacon. They must be the same