
Operation Manual

75
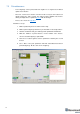
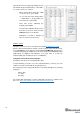
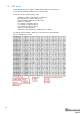
Then take the beacon (hedgehog) and tilt it to each
side towards the ground (like 6 times). rotate a little.
You need to achieve x y z values:
‐ When antenna directs down z ≈ - 1000
=> antenna directs up z ≈ 1000
‐ So, one of the axis values always will be
- + 1000. Others ⩽ 10 (preferably less
10, but 25 is also permissible)
‐ Every time before calibrating the
hedgehog click Pause
‐ Accelerometer calibrator will choose the
best value for each axe. At the end click
Calibrate and close the window
‐ Calibration is needed to determine g
value for each accelerometer axe
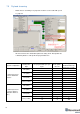
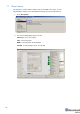
Start the system:
Setup the system as usual. It is described in paragraph Setting up the system
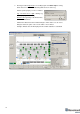
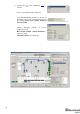
After the ultrasound tracking has started, select the hedgehog in the Dashboard, go
to menu Interfaces (on the right) and enable Processed IMU data. After that, it is
recommended to bring the hedgehog to real estate and press the ZERO IMU button
(right-bottom) for additional sub-calibration of the gyro. After 5 seconds the
hedgehog will begin streaming the processed IMU data.
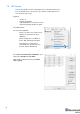
Using Data in the Python Library Example:
Description of the protocol for streaming data: (link)
To work with data, you need to use some ready-made library, or develop your own
software tools that can work with the described protocol.
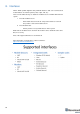
Our company provides ready-made libraries for working with IMU in the following
languages:
- python (link)
- c ++ (link)
- java (link)
An example with 3D imaging of a path on IMU with a frequency of 100Hz in real
time, here: https://marvelmind.com/pics/marvelmind-imu-tracker.zip.