
User manual


7Setup
Check voltage and frequency settings
Verify that the settings printed on the S/N label match your local power supply. If the volt-
age is not within 5 percent of the local supply, or if the frequency (50/60 Hz) is different,
then the ballast and/or transformer must be rewired by a qualified technician before power
is applied. Please contact your Martin dealer.
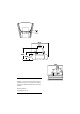
Prepare the power cable
The SynchroZap QX250 has a 3-pin IEC power inlet. To use the supplied power cable, you
must install a grounding-type cord cap that fits your supply. Following the manufacturer’s
instructions, connect the yellow/green wire to the ground (earth) pin, the blue wire to the
neutral pin, and the brown wire to the live pin. The table shows some pin identification
schemes; if the pins are not clearly identified, or if you have any doubts about proper instal-
lation, consult a qualified electrician.
Apply power
Note: Do not power the SynchroZap on a variable dimmer circuit. Disconnect the fixture
from power when not in use.
1.
Check the voltage and frequency settings.
2.
Verify that the supply cable is undamaged and rated for the current
requirements of all connected devices.
3.
When ready to operate, plug the prepared power cord into the mains
input on the rear panel and the AC power supply.
Rigging
WARNING!
Always use an approved safety cable.
The SynchroZap may be installed by fastening the mounting bracket directly to a structural
support or by using a rigging clamp. See page 22 for clamps available from Martin.
Connections Possible Markings
Wire Pin Typical US UK
brown live “L”
yellow or
brass
red
blue neutral “N” silver black
yellow/green ground green green