Stagebar 2 RGBAW user manual TM
Dimensions All dimensions are in millimeters Stagebar 2 S Stagebar 54 S 230 190 420 105 Stagebar 2 L Stagebar 54 L 230 190 630 105 ©2011 Martin Professional A/S. All rights reserved. No part of this manual may be reproduced, in any form or by any means, without permission in writing from Martin Professional A/S. Information subject to change without notice.
Safety Information WARNING! Read the safety precautions in this section before installing, powering, operating or servicing this product. The following symbols are used to identify important safety information on the product and in this manual: Warning! Warning! Warning! Warning! Safety hazard. LED light Refer to Hazardous Risk of severe emission. Risk manual before voltage. Risk of injury or death. of eye injury. installing, lethal or severe powering or electric shock. servicing. Warning! Fire hazard.
• Before using the fixture, check that all power distribution equipment and cables are in perfect condition and rated for the current requirements of all connected devices. • Do not use the fixture if the power cable or power plug are in any way damaged, defective or wet, or if they show signs of overheating. • Do not expose the fixture to rain or moisture. • Refer any service operation not described in this manual to a qualified technician.
Contents Dimensions . . . . . . . . . . . . . . . . . . . . . . . . . . . . . . . . . . . . . . . . . . . . . . . . . . . . . . . . . . . . . . . . . . . . . . . . 2 Safety Information . . . . . . . . . . . . . . . . . . . . . . . . . . . . . . . . . . . . . . . . . . . . . . . . . . . . . . . . . . . . . . . . . . 3 Product overview . . . . . . . . . . . . . . . . . . . . . . . . . . . . . . . . . . . . . . . . . . . . . . . . . . . . . . . . . . . . . . . . . . . 6 Introduction . . . . . . . . . . . . . .
Product overview Stagebar 2 L Stagebar 54 L Stagebar 2 SS Stagebar 54 J I F E H F A D G A B C F - Quarter-turn mounting points Use to attach an omega bracket or floorstand/mounting bracket accessory. A - End cap release screws B - Cooling fan C - Data output connector (5-pin female XLR) Use to relay DMX control data to the next fixture. D - Safety attachment eye Use only this attachment point for secondary attachment (e.g. safety cable).
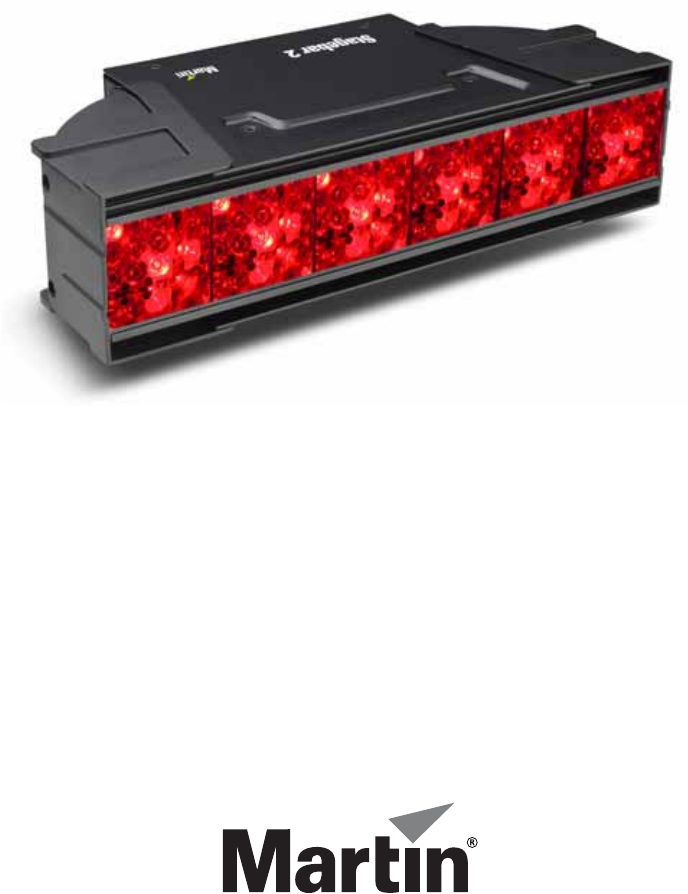
Introduction Thank you for selecting the Stagebar 2™, a modular LED-based color changer and pixel display fixture from Martin™.
Physical installation The Stagebar 2 can be placed on a level, stable surface, installed on the floorstand/mounting bracket available as an accessory (P/N 71606007) or suspended in any orientation from a truss or supporting structure using the supplied omega bracket and a rigging clamp. Suitable rigging clamps are available from Martin. Warning! Read the “Safety Information” section that starts on page 3 before installing the Stagebar 2.
AC power Warning! Read the “Safety Information” section that starts on page 3 before connecting the Stagebar 2 to AC power. Warning! For protection from electric shock, the Stagebar 2 must be grounded (earthed). The power distribution circuit must be equipped with a fuse or circuit breaker and ground-fault (earth-fault) protection. Warning! The Stagebar 2 does not have a power on/off switch.
Relaying power to other devices Warning! The total current draw of all devices connected to the first fixture’s power outlet must not exceed 11 amps. Fixtures can be linked in a chain, power outlet to power inlet, so that they all draw power via the first fixture. Power throughput cables must meets the same specifications as power input cables (see above).
Control data link Stagebar 2 fixtures must be connected via a control data link for DMX controller operation.The following considerations must be taken into account when planning the data link: • DMX cable of a suitable type and 5-pin XLR connectors must be used. Flexible cable with good bend and torsion recovery is required for touring installations. Martin DMX cables are recommended. • The maximum permitted control data cable length before a control signal amplifier is required is 500 meters (1640 ft.
Fixture setup The control panel and backlit LCD display on the Stagebar 2’s rear panel allows you to set DMX addresses and alter various fixture settings. The Stagebar 2’s onboard battery makes the most important fixture setup functions – such as DMX address setting – available when the fixture is not connected to AC power. • Press Menu to access the menu or go up one level. • Press Enter to confirm a selection. • Press Up and Down to navigate in the menus.
Pixel left/right inversion The DMX MODE → pixel invert command allows you to swap the pixels from left to right so that pixel 1 becomes pixel 6, pixel 2 becomes pixel 5, and so on. This feature can be used to obtain mirror effects, or to simplify control if certain fixtures are installed upside-down in your installation.
DMX link info Gives information about the characteristics and quality of the DMX signal the fixture is receiving. Other control menu features Adjustment The ADJUSTMENT menu gives manual control of the output for individual colors. This feature allows you to test LEDs or set a static color display without using a DMX controller. Test sequence TEST SEQUENCE runs a test of all LEDs, fans, indicator LEDs and the LCD display for service purposes.
Operation Once the Stagebar 2 is connected and set up as described earlier in this manual, adjust color and intensity using the DMX controller following the applicable DMX protocol (see page 21). Color control See “Color control mode” on page 12 for a description of RGB, RGBAW, HSI and HSIC modes. RGBAW is a ‘raw’ (i.e. uncalibrated) control mode.
Service and maintenance Warning! Read the “Safety Information” section that starts on page 3 before carrying out service or maintenance work on the Stagebar 2. Lock out power to the entire distribution system before servicing, cleaning or opening any cover. Refer any service operation not described here to a qualified service technician. Important! Excessive dust, smoke fluid, and particle buildup degrades performance, causes overheating and will damage the fixture.
Do not use abrasive, caustic or solvent-based products for cleaning, as they can damage plastic or painted surfaces. To clean the fixture: 1. Disconnect the fixture from power and allow it to cool for at least 10 minutes. 2. Vacuum or gently blow away dust and loose particles from the fan blades and grilles in the fixture’s end caps with compressed air. 3. Clean the front cover with a soft cloth dampened in a warm water/detergent solution. 4.
4. Lift the reflector out of the fixture. 5. See Figure 5. Lens arrays are retained by magnetic mountings. To remove a lens array, press on one side until you can grip the other side. Lift the lens array off the magnets and store for possible future use. To install a lens array, place it into position on its magnetic mounting posts and check that it is held securely. 6. Reinstall components in reverse order of disassembly before reconnecting the fixture to power.
Fuse replacement Warning! Disconnect from power before opening covers. Replace fuses with ones of the same type and rating only. Primary fuse Stagebar 2 fixtures are protected by a 4 amp slow-blow primary fuse located in a fuseholder on the rear panel (see Figure 1 on page 6). If a fixture is completely dead (apart from the battery-powered functions available in the control panel and display), the primary fuse may have blown. To replace the primary fuse: 1.
5. Check that the fixture resets correctly. If a checksum error occurs, cycle power off and on again and check that the fixture now resets correctly.
DMX protocols In all the DMX protocols for the Stagebar 2, the start code is 0. All pixels controlled together The tables in this section explain DMX commands for a fixture with all its pixels controlled as one group (DMX MODE → Pixel grouping → All in the control panel).
HSIC Mode, pixels = All Channel Value Percent Function 1 0 - 255 0 - 100 Hue Red → Orange → Amber→ Yellow → Green → Cyan → Blue → Indigo → Violet → Magenta → Red 0 - 255 0 - 100 0 - 255 0 - 100% 0 - 255 0 - 100 2 3 4 Saturation Zero (white) → Full saturation Intensity Intensity 0 →100% Color Temperature Control 2000 - 10 000 K Pixels controlled in groups When a fixture’s pixels are set to individual or grouped control (DMX MODE → Pixel grouping → 1, 2 or 3 in the control panel), the fixture
Onboard control panel menus Default settings are shown in bold print All temperatures are displayed in both °C and °F Menu Options ADDRESS 1-X control mode DMX MODE pixel grouping Notes HSI HSIC Set the fixture’s DMX address using up and down buttons (where X is the last useable address depending on the mode the fixture is set to) HSI color control HSIC color control RGB RGB color control RGBAW RGBAW color control 1 2 3 Individual control of pixels Pixels controlled in 3 groups of 2 pixels P
Menu Options Notes softw. version Display main fixture software versions Display number of hours fixture powered on since last reset (to reset, display hours then press Up key for 5 secs.
Display messages Message Appears if... What to do... MERR ...there is an error communication with EEPROM memory ...there is a fan error on fan 1 or 2 Contact Martin Service for assistance ...there is a driver temperature sensor error ...there is a pixel temperature sensor error ...the fixture temperature cutoff is activated Contact Martin Service for assistance F1ER F2ER DTER PTER FTCO D1CO D2CO D3CO D4CO D5CO D6CO P1CO P2CO P3CO P4CO P5CO P6CO DPER ...
Troubleshooting Problem Probable cause(s) Remedy No power to fixture. Check power and connections. Primary fuse blown (located in fuseholder on rear panel). Isolate fixture from power. Check fuse and replace. Power output circuit is defective (may have been overloaded). Contact Martin Service for assistance. Fault on DMX link. Inspect connections and cables. Correct poor connections. Repair or replace damaged cables. Incorrect fixture addressing. Check fixture is set to correct DMX mode.
Stagebar 2™ specifications Physical Stagebar 2 S Length . . . . . . . . . . . . . . . . . . . . . . . . . . . . . . . . . . . . . . . . . . . . . . . . . . . . . . . . . . . . . . . .420 mm (16.5 in.) Width . . . . . . . . . . . . . . . . . . . . . . . . . . . . . . . . . . . . . . . . . . . . . . . . . . . . . . . . . . . . . . . . . .190 mm (7.5 in.) Height . . . . . . . . . . . . . . . . . . . . . . . . . . . . . . . . . . . . . . . . . . . . . . . . . . . . . . . . . . . . . . . . .105 mm (4.1 in.
Typical power and current 100 V, 50 Hz. . . . . . . . . . . . . . . . . . . . . . . . . . . . . . . . . . . . . . . . . . . . . . . . . . . . . . . 100 V, 60 Hz. . . . . . . . . . . . . . . . . . . . . . . . . . . . . . . . . . . . . . . . . . . . . . . . . . . . . . . 110 V, 60 Hz. . . . . . . . . . . . . . . . . . . . . . . . . . . . . . . . . . . . . . . . . . . . . . . . . . . . . . . 120 V, 60 Hz. . . . . . . . . . . . . . . . . . . . . . . . . . . . . . . . . . . . . . . . . . . . . . . . . . . . . .
www.martin.