
User Guide


II. Set-up
A. Paper guide set up. Not all paper widths are necessarily equal from ream to ream and paper guide
adjustment may be needed for each size. To adjust paper guides, follow the steps below:
1. Turn slitter off and unplug.
2. Slide a single sheet of stock into the appropriate feed shelf.
First pass (3 ½” cut) goes on lower shelf; second pass (2”
cut) goes on the shelf above. Registration marks on stock
must be face up.
3. Push stock all the way in to the blades.
4. Check location of registration marks to
blades. If they do not align, loosen both
and move the paper guides with stock left
or right until the registration marks (see Figure #6) align
themselves with the cutter blades. You may need a flashlight to
see the cutter blades from the feed side. Tighten paper guides down so that side-to-side
movement of stock is no more than 1/64”. Paper guides too tight will result in inconsistent
feeding; too loose will result in skewing.
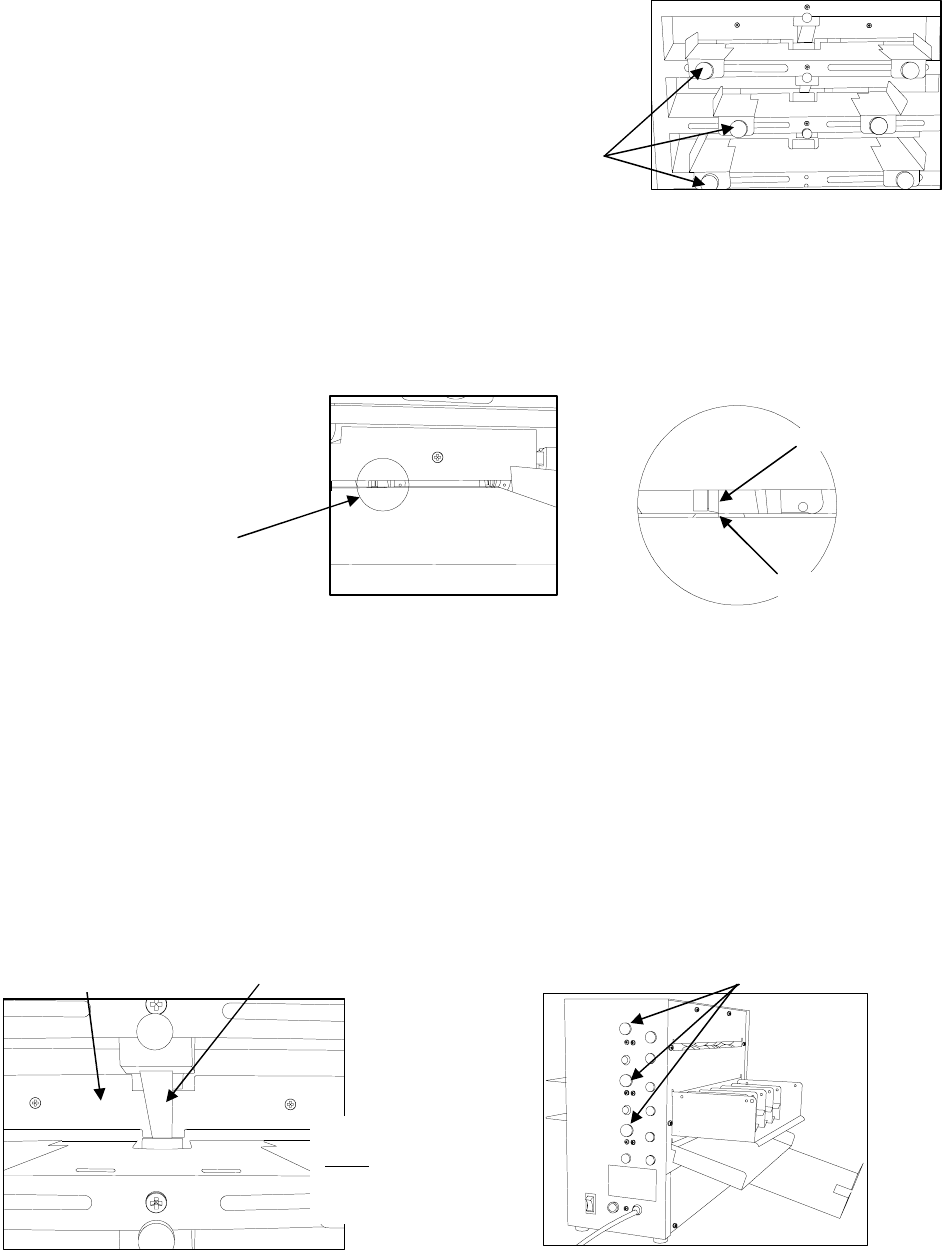
B. Retarder set-up. See Figure #7 for picture of retarder
location. Retarder is raised or lowered by turning the
retarder adjustment knob as shown in Figure #8. Proceed as listed below.
1. Turn off and unplug machine.
2. Turn all retarder adjustment knobs 1 turn counter clockwise; you should see the paper retarder
rise slightly. Do not turn retarder knob more than 1 turn counter-clockwise.
3. Place a piece of stock between retarder and feed wheel. Slowly turn the appropriate retarder
adjustment knob clockwise until a distinct drag is felt on the feed tire while the stock is moved
in and out. Fine tuning of the retarder can be accomplished by slightly turning the retarder
knob while the slitter is running with stock in it. Note: Retarder should not touch feed
roller.
Figure #7 Figure #8
Align Registration Marks
with Blades (See Inset)
Registration Marks
(on Layout Sheets)
Blade
Paper Guide
Thumb Knobs
Figure #5
Figure #6
Retarder should
never
contact the
feed wheel at this
point
Retarde
r
Pressure Ar
m
Retarder ad
j
ustment knobs