BetaGauge PI & PI PRO Digital Pressure Test Gauge User Reference Manual This document includes information for both the CSA and CSA/ATEX certified versions of the BetaGauge PI.
1. Introduction The BetaGauge PI combines the high accuracy of digital electronics with the convenience and ease of use of an analog test gauge. Accurate to ± 0.05% FS, the BetaGauge PI can be used as a calibration reference, or in any application where high accuracy pressure measurement is required. Many user configurable functions have been designed into the BetaGauge PI including sampling rate, TARE, damping, auto shut off, and min-max.
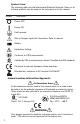
Symbols Used The following table lists the International Electrical Symbols. Some or all of these symbols may be used on the instrument or in this manual. Symbol Description Power OFF Power ON Earth ground Risk of Danger. Important information. Refer to manual. Battery Hazardous Voltage Conforms to ATEX requirements Certified by CSA as conforming to relevant Canadian and USA standards Conforms to relevant European Union directives.
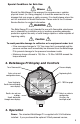
Special Conditions for Safe Use: Misuse Should the BetaGauge PI be exposed to overpressure or sudden physical shock (i.e. being dropped) it should be examined for any damage that may cause a safety concern. If in doubt please return the unit for evaluation to Martel Electronics. Please refer to the Customer Service Section for contact information.
batteries are not installed. Connect a 24V power supply to the terminal block on the rear of the gauge, noting proper polarity. Do not install batteries when external power will be used. Push the power button momentarily to turn the unit on. Push it again to turn it off. Set-up and configuration: Push the CONFIG button to access the user-settable functions on the gauge. Each time the CONFIG button is pressed; the display advances to the next function.
The tare value is set manually with the ▲ and ▼ keys, and is based on the engineering units and resolution selected for display. TARE value can be set to the maximum range of the gauge. The bar graph will always display the actual pressure based on the full range of the gauge regardless of the tare setting. This is done for safety to insure that even with a “0” reading that pressure is being applied to the gauge. 8.
5. Setting a custom engineering unit or scale: The last menu choice in supervisory mode is SET FACTR. This allows you to set a multiplier factor from 0.001 to 100, creating a custom scale. The set factor will be multiplied by the PSI measured, the result will be displayed. For example: 40 PSI is the equivalent of 1000 lbs of product in a tank. You want to display the product weight , using a 100 PSI gauge. By setting a factor of 25, a 40 PSI pressure would display as 1000 (40 x 25).
clip. Reassemble the case making certain that the face is properly oriented. If you purchased the optional 24 Volt powered version, the terminals for power input are located on the rear of the gauge. To apply power simply connect 24 volts to the rear terminal block taking care to observe proper polarity. BetaGauge PI PRO Loosen the captive screw on the battery door, then remove the battery door to expose the 3 AA batteries.
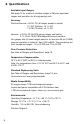
8. Specifications Available Input Ranges See page 13 for a table of available ranges in PSI plus equivalent ranges and resolution for all engineering units Accuracy Positive Pressure: ±0.05% FS (all ranges except as noted) 10” WC (25mbar) ±0.1% FS 1.0 PSI (70 mbar) ±0.1% FS Vacuum: ±0.25% FS (500 PSI gauge ranges and below) 0.1% FS for 15/30 PSI compound/vacuum versions For gauges with full scale ranges equal to, or less than 30 psi (2 BAR), vacuum operation is limited to -5psi (-350 mBAR).
Mechanical Dimensions 4.5” (diameter) x 2.2” (depth) x 5” (height) (11.4cm x 5.6cm x 12.7cm) (PI PRO depth is 1.5” or 3.7cm) Pressure Connection: ¼” NPT Male Housing: Stainless steel, meets NEMA 4/IP65 (PI PRO: cast ZNAL) Display 5-1/2 Digits, 0.65” (16.
vacuum to the full-scale range of the unit under test. In order to maintain the specified accuracy of the BetaGauge PI, standards should have a TUR of 4:1 or better. Connections: The BetaGauge PI uses a 1/4 NPT male connection in the pressure input port. Various adapters may or may not be needed to connect to the pressure standard. Always make sure the hose, tubing, and fittings etc have a rated working pressure at or above the pressure of the unit.
PSI 375.00 CAL MODE Use the Pressure Standard to output 375.00 psi (75%). After the output has stabilized, press the ENTER key to continue. As the unit takes readings, the screen will show ———-. When the readings are complete the screen should look as shown below. PSI 312.50 CAL MODE Use the Pressure Standard to output 312.50 psi (62.5%). After the output has stabilized, press the ENTER key to continue. As the unit takes readings, the screen will show ———-.
Use the Pressure Standard to output 125.00 psi (25%). After the output has stabilized, press the ENTER key to continue. As the unit takes readings, the screen will show ———-. When the readings are complete the screen should look as shown below. PSI 62.50 CAL MODE Use the Pressure Standard to output 62.50 psi (12.5%). After the output has stabilized, press the ENTER key to continue. As the unit takes readings, the screen will show ———-. When the readings are complete the screen should look as shown below.
13 0.9243 0.9236 0.8989 703.089 704.336 0.703089 0.704336 27.68067 27.72977 27.70759 2.306726 2.310814 2.308966 mmH2O @ 4°C mmH2O @ 20°C mH2O @ 4°C mH2O @ 20°C inH2O @ 4°C inH2O @ 20°C inH2O @ 60°F ftH2O @ 4°C ftH2O @ 20°C ftH2O @ 60°F 20.686 0.2740 11.083 11.092 11.072 0.2817 281.24 28.173 20.686 0.0281 51.715 0.6849 2.2472 2.3090 2.3108 2.3067 27.708 27.730 27.681 0.7043 0.7031 704.34 703.09 70.434 70.309 2.0360 51.715 0.0703 0.0069 6.8948 68.948 1.
9. BetaGauge PI Serial Interface Instructions Initiating Communication The terminal communications can be setup using terminal communication software on a PC. The terminal settings need to be set as follows: • Bits per second: 9600 • Data bits: 8 • Parity: None • Stop bits: 1 • Flow control: None • Local echo on List of Commands Command Description CAL_START Puts the calibrator in calibration mode *CLS Clears the error queue.
CAL_STORE Stores calibration data.
Error Codes Error Description 101 A non-numeric entry was received where it should be a numeric entry 102 Too many significant digits entered 103 Invalid units or parameter value received 105 Entry is above the upper limit of the allowable range 106 Entry is below the lower limit of the allowable range 108 A required command parameter was missing 109 An invalid pressure unit was received 117 An unknown command was received 120 The serial input buffer overflowed 121 Too many entries in t
10. Warranty Martel Electronics Corporation warrants all products against material defects and workmanship for a period of twelve (12) months after the date of shipment. Problems or defects that arise from misuse or abuse of the instrument are not covered. If any product is to be returned, a “Return Material Authorization” form can be obtained from our website www.martelcorp.com under customer service. You can also call 1-800-821-0023 to have a form faxed.
www.martelcorp.com e-mail: sales@martelcorp.