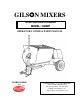
GILSJ JN MIXERS MORTAR-PLASTER MIXER MODEL: 1000MP OPERATOR’S GUIDE & PARTS MANUAL GILSJ J N MIXERS BY 4343 Easton Road · St. Joseph, MO 64503 816-233-4840 · 800-253-3676 Fax 816-233-4624 · 888-253-3676 E-Mail: cleform@ccp.com Web Address: www.cleform.
INTRODUCTION This operator’s manual has been prepared to provide the information you need to correctly operated and maintain your mixer. For maximum satisfaction, carefully read and follow the instructions in this manual. Should you need repair parts or service, refer to the parts breakdown on pages 14 through 26. Information regarding operation and maintenance of the factory-installed engine or motor can be found in a separate engine/motor owner’s manual supplied with the mixer.
TABLE OF CONTENTS 1. SAFETY PRECAUTIONS . . . . . . . . . . . . . . . . . . . . . . . . . . . . . .3 2. ASSEMBLY AND PREOPERATIONAL CHECKS . . . . . . . 4 3. CONTROLS AND OPERATION Clutch Control Lever . . . . . . . . . . . . . . . . . . . . . . . . . . . . . .5 Tow Pole Assembly . . . . . . . . . . . . . . . . . . . . . . . . . . . . . . .6 Safety Chains . . . . . . . . . . . . . . . . . . . . . . . . . . . . . . . . . . .6 4. MIXER TRANSPORT . . . . . . . . . . . . . . . . . . . . . . . . . . . . . . . .
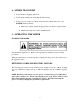
1 – SAFETY PRECAUTIONS THE FOLLOWING PRECAUTIONS ARE SUGGESTED TO HELP PREVENT ACCIDENTS. A CAREFUL OPERATOR IS THE BEST OPERATOR. MOST ACCIDENTS CAN BE AVOIDED BY OBSERVING CERTAIN PRECAUTIONS. READ AND PRACTICE THE FOLLOWING PRECAUTIONS BEFORE OPERATING THIS EQUIPMENT TO HELP PREVENT ACCIDENTS. EQUIPMENT SHOULD BE OPERATED ONLY BY THOSE WHO ARE RESPONSIBLE AND HAVE BEEN PROPERLY INSTRUCTED. Read all operating and maintenance instruction before operating or servicing the mixer.
Never charge or fill the unit prior to starting the mixing blades as an overload encountered in starting a loaded unit could damage the engine/motor or drive components. Connect safety chains as instructed when towing the mixer. Connect only to correct hitch or coupler. Keep warning, caution and safety instruction labels clean and in good condition. Replace missing, damaged or illegible labels.
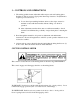
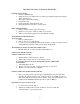
3 – CONTROLS AND OPERATIONS 1. The mixing paddles feature adjustable rubber wipers and steel backing plates. Paddles are factory preset for appropriate drum wrap clearance. If adjustment is required, proceed as follows: A. Loosen the wiper attaching hardware and move the wiper outward to maintain contact with the drum but without folding over when in operation. B.
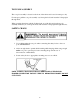
TOW POLE ASSEMBLY The tow pole assembly is located on the front of the mixer and is used for transport only. For transport, pull the tow pole assembly out, line up the hold and insert the L-shaped pin through holes. When operating the mixer, pull the L-shaped pin out of the hole and push tow pole assembly all the way in. Line up the holes and insert the L-shaped pin through the holes. SAFTEY CHAINS 1. Cross chains under the tow pole when connecting the safety hooks to the tow pole. SEE FIGURE 2 2.
4 – MIXER TRANSPORT 1. Secure drum by engaging drum lock. 2. Secure all moveable parts, including the rear housing. 3. Secure tow pole coupler to vehicle and attach safety chains and hooks. (See FIGURE 2, Safety Chains). A. Pintle type couplers require the appropriate tow vehicle coupler retainer. B. Match ball coupler size exactly with hitch ball. 5 – OPERATING THE MIXER STARTING THE MIXER Start the mixer engine/motor. Refer to the engine/motor manual for proper starting procedures.
LOADING THE MIXER When the mixing blades are rotating, pour the required amount of water into the drum, then add cement, sand and lime. The desired mixing speed is 33 RPM. DISCHARGING THE MIXER Allow the entire mixture to mix for one (1) full minute. DO NOT STOP MIXER FROM ROTATING. Hold the tilt handle and disengage the drum lock. Dump mortar to the side by pulling the tilt lever downward. After the mixture is dumped, return the drum to the operating position and engage drum lock.
TROUBLE SHOOTING GUIDE FOR MP MIXERS. ENGINE WON’T START: 1. Check for sufficient fuel. 2. Check oil level (some engines have an oil alert, preventing the engine from starting when oil level is low) 3. Was engine choked when starting? 4. Is engine flooded? 5. Check spark plug. (Clean and check gap). 6. If engine still won’t start, take to service center. BELT DRIVEN MODELS: 1. Check condition of belts, replace if necessary. 2. Check for oil or grease on belts as well as for loose belts. 3.
6 – OPERATING GUIDELINES MASONRY CONSTRUCTION GUIDELINES The strength and durability of brick masonry depends upon the quality of the brick, the quality of the mortar and the workmanship in laying. The strength also depends upon adequate bond and the shape of the masonry unit. Brick quality – Characteristics are hardness and density. Brick for masonry which is exposed to weather or where strength is desired should have a crushing strength of not less than 2500 PSI.
7 – LUBRICATION DRUM SEAL HOUSINGS Drum seals are provided on each end of the drum where the mixing shaft passes through to the bearings. It is important to pump grease into the housings through use to retain seal efficiency. Use enough grease to flush out old grease and carry away any grit. Use lithium based grade 2 multi-purpose grease. SEE FIGURE 3 MIXING SHAFT BEARINGS The mixing shaft bearings are permanently factory sealed and lubricated, and should not require further service.
DRUM SHAFT BEARING HANGERS Drum yoke bearing hangers are located on each side of the drum, and are equipped with grease fittings. These bearings should be lubricated once each week with lithium based grade 2 multi-purpose grease. ENGINE/MOTOR Refer to the engine/motor operating instructions for all maintenance and lubrication instructions and requirements. JACK SHAFT BEARINGS Pillow block style bearing are used on the drive train counter-shaft.
ENGINE/MOTOR DRIVE SEE FIGURE 4. 1. Align pulleys correctly 2. Tighten locking collars in the direction of rotation and tighten setscrews. 3. Adjust tension on the engine belt as follows: A. Place clutch lever in the engaged (drive) position. B. Move the engine/motor to tighten the belt until the engine plate is slightly above the horizontal position (about 1-2 degrees). Tighten engine/motor securely. 4.
14
Concrete Mixer Parts List REF NO. PART NO.
16
Concrete Mixer Parts List MIXING BLADES REF NO. PART NO.
18
Concrete Mixer Parts List ENGINE HOUSING AND AXLE REF NO. PART NO.
20
Concrete Mixer Parts List FRAME, DRIVE AND CLUTCH CONTROL REF NO. PART NO.
22
Concrete Mixer Parts List ENGINE AND POWER OPTIONS REF NO. PART NO.
24
Mixer Parts List REF. # PART # 14 245200 15 245400 16 245723 17 245721 18 245722 19 *70170 *-Local Source ADDITIONAL POWER OPTIONS MP1000 Model 59315 DESCRIPTION Engine, Honda GX240HA 8 HP Engine Mount Plate Belts (set of 2) Pulley, Drive 3 3/8 O.D. Pulley, Driven 8 3/4 O.D.
MP1000 MODEL 59321 REF. NO. P A R T N O . DESCRIPTION QTY 14 5328 M O T O R , 3 H P # 5 K 6 7 5 245496 MOTOR MOUNTING ADAPTER (NOT SHOWN) 15 245449 MOTOR MOUNT PLATE 16 5115 B E L T S ( S E T O F 2 ) 17 5118 PULLEY, DRIVE 3 IN. O.D. 18 5121 PULLEY, DRIVEN 13 3/4 O.D. 19 *70170 CAPSCREW, HEX HD 5/16-18 X 1 3/4 GR 5 14 15 16 17 18 5341 245434 5115 5118 5121 MP1000 MODEL 59325 MOTOR, ELECTRIC 230V 5 HP #6KO26 MOTOR MOUNT PLATE BELTS (SET OF 2) PULLEY, DRIVE 3 IN. O.D. PULLEY, DRIVEN 13 3/4 O.D.
GILSON MIXER WARRANTY WARRANTY: This mixer is warranted to the original purchaser only, to be free of defects in material and workmanship under normal use, for one year from purchase date. Cleform Tool Corp. shall without charge for parts and labor, repair or replace such parts which are found to be defective. All transportation charges for replacement parts must be borne to the purchaser.
TO THE EXTENT PERMITTED BY LAW ANY AND ALL IMPLIED WARRANTIES ARE EXCLUDED AND DISCLAIMED AFTER THE EXPIRATION OF SUCH PERIOD. Some states do not allow limitations on how long an implied warranty lasts, or the exclusion or limitations of incidental or consequential damages, so the above limitations or exclusions may not apply to you. This warranty gives you specific legal rights, and you may also have other rights, which vary from state to state.