
Technical information


STEP 4: Installing the choke and filter caps (part 1)
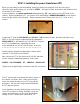
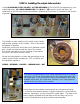
Locate the Mercury Magnetics MMC-3H choke, 3/8” RUBBER GROMMET and (4) #6 – 3/8” machine screw and
Nyloc nuts. Install the 3/8” grommet into the chassis (directly to the RIGHT of the OT). Feed the RED and BROWN
choke wires through the hole until the choke sits flush on the chassis. Assure that the wires are routed directly through
the chassis hole so they do not get pinched when you secure the choke.
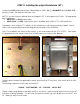
Mount the choke to the chassis using (4) #6 screws with NYLOC nuts. Secure using a Philips screwdriver and 5/16”
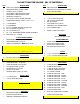
nut driver. The hardware sequence is:
SCREW – CHOKE – CHASSIS – NUT
Preparing filter caps for installation.
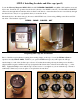
Part 1 of the filter cap installation is putting the mounting clamps on the caps. Locate (6) CE 50uf x 50uf can
capacitors and (6) CAP CLAMPS. NOTE: if you opted for F&T brand caps, they will replace the CE caps.
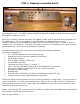
Attach clamps to each of the (6) filter caps as shown. Note that the mounting tab near the clamp screw should be
aligned with the negative terminal of the cap (designated with a black circle on the CE and a minus sign “-“ on the
F&T). Tighten the Philips screw until the cap is secure, but don’t over-tighten as you can crush the cap. The nut is
technically 5.5mm, but you can use pliers or an equivalent size nut driver.