
Technical information


STEP 1: Preparing to assemble the kit.
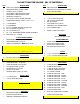
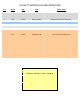
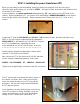
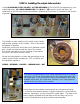
When your kit arrives, we suggest unpacking it and examining the parts. Get familiar with what we
have shipped to you. Compare the parts to the Bill of Materials included in these instructions and the
packing slip included in your kit.
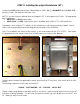
When you’re ready to start the assembly, we suggest a clean, well-lit area with decent ventilation for
the solder fumes. The more organized you are the better your build is likely to turn out.
Though some builders can assemble from start to finish in one marathon event, it’s best to work in
several 2 to 4 hour segments. That way, each time you return to your build you can review the work
you did previously. And correct any mistakes if necessary.
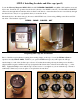
Assembly requires only basic hand tools, a multi-meter and soldering equipment.
Here are our suggestions:
• 25 - 40 watt soldering iron with cleaning sponge
• Medium and small Philips and standard screw drivers
• Small diagonal cutters
• Wire strippers suitable for 22g wire
• Small needle-nose pliers
• Fractional nut drivers, sizes ¼” through ½”
• 5/64” (or metric equivalent) Allen wrench for Marshall set screw knobs
• Multi-meter capable of reading 500V AC/DC and DC resistance
• Heat gun for shrink tubing
• Masking tape
• Drill bits and/or a Dremel tool if you’ll be installing the optional FX loop
• Contact cement for the brushed aluminum rear panel
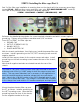
Follow the step-by-step instructions and your kit will go together in a logical way. If you get stuck on
a step, let us know or consult the Metroamp forum. Chances are you will not be the only person to
find something confusing or a bit vague. With your feedback we can revise these instructions until
everything is eloquent and concise.
Keep in mind that the PDF format allows full zooming on images. We have made sure to keep steps at
high resolution specifically for this function.
Now, let’s get started…………………………………………………………….