
Specifications

6. Slide the external SDI cable through the either the left or right cable slot in
the bottom filler panel.
For easy access to the cable slot, you can remove the cable retainers on the
filler panel. Replace the cable retainers after routing the cables.
5.7.4 Completing the Installation
Complete the installation as follows:
1. Restore power to the cabinet as explained in Section 3.9.
2. Turn on all storage devices in the cabinet.
3. Spin up all drives and put them on line.
4. Check out all storage devices as described in the component user guide or
service manual.
5. Make sure that the rear panel will clear the external cables.
If necessary, adjust the rear panel assembly to provide additional clearance as
described in Steps 6 through 10.
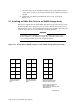
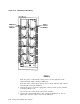
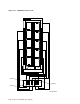
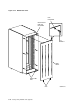
6. Loosen the three 1/4-20 hex nuts located on the top, middle, and bottom of
each sliding side panel, as shown in Figure 5–22.
7. Loosen the two wing nuts on both the top filler panel and the bottom filler
panel.
8. Position the rear panel assembly (that is, the sliding panel, the top filler
panel, and bottom filler panel) so that it will clear the SDI cables.
9. Tighten the wing nuts on the top and bottom panel.
10. Tighten the three 1/4-20 hex nuts on each sliding panel.
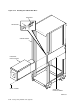
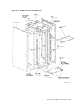
11. Replace the rear panel, as shown in Figure 5–23, and close the front panel.
Storage Array Add-Ons and Upgrades 5–35