
User Manual
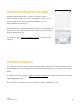


Table Of Contents
- What’s in the box
- Set up Qubii (the product)
- Set up Qubii App
- Multiple devices
- Qubii desktop
- Register for a 10-year extended warranty
- Navigate Qubii
- Introduction (before connecting Qubii)
- Introduction (after connected to Qubii)
- Main menu
- Setting icon
- Regulatory Compliance
- Environmental Compliance
- Limited-Warranty Information
- Extend Warranty
- Returns
- Exchanges Due to Damaged in Shipment
- Refunds

Memory | MicroSD Card
Recommend a sizable microSD card capacity that is greater than the capacity of your
smartphone device. MicroSD Card is sold separately. Strongly recommend purchasing a
microSD Card from a trusted seller for an optimal experience. Beware and avoid
counterfeit microSD Cards.
When in doubt, you may always visit us.maktar.com or Maktar Amazon Store to purchase
Maktar vetted MicroSD card.
Navigate Qubii App
Now that the initial setup is done, your content can be organized, viewed, and backed up
using Qubii App.
During the Qubii setup process, the Qubii App will ask for the auto-backup feature to be
enabled. Enable this feature by consenting Qubii as your trusted device and the backup
process will manage itself. If the Auto Backup feature for Qubii is not enabled, follow
these steps to turn it on:
1. Access the Qubii device with the Qubii app.
2. Go to “Setting” in the upper right-hand corner of the screen.
3. Then select “Trusted Device” to review your current status.
4. If you Qubii has no trusted device, please go back to Main Menu and select “Begin
Backup.”
Introduction (before connecting Qubii)
Launching Qubii App without connecting to Qubii, you will see the following user
interface:
•
When having a connection issue, please select “Help.”
•
Want to contact our customer support, select the “3 dotted line conversation icon” on
your top-left corner.
Qubii
User Manual v 2.0.1
9