
User manual


43
2
1
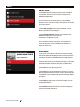
PRINTING
During a print, you will be able to view print progress
information as well as other details about your print.
The dial will glow red during printing.
1. Percentage of the print completed.
2. Time elapsed and estimated time remaining in the
print. While the Smart Extruder+ is heating, this
area will display the current and target temperatures.
3. Location in active print screens. Turn the dial to
scroll between the following screens:
· Print progress
· Rendering of your model or layout
· File information
· Print options information
· Extruder temperature
4. Print Menu. Press the control panel’s Menu button to open the Print menu. The Print menu contains
the following options:
· Pause - Select this option to temporarily pause your print. You can also pause by pressing the
control panel dial.
· Change Filament - Select this option to load or unload filament.
· Extruder Info - Select this option to view more information about the Smart Extruder+ in use.
· Printer Info - Select this option to view more information about the MakerBot Replicator+,
including firmware information, network information, and print statistics.
· Take a Picture - Select this option to take a picture of the build area with the camera built into the
MakerBot Replicator+. Push the dial to take the picture. Next, choose if you wish to save the
picture to the internal storage of the MakerBot Replicator+ or to a USB drive and push the dial
with your selection. When the picture has saved, you will see a message on the control panel
stating the file saved successfully. Select Continue on the dial to return to the Print Menu Screen.
· Cancel - Select this option to cancel your print. You can also cancel a print by pressing the back button.
PRINT COMPLETE
Aer the print is complete, the dial will glow white. Push the dial to continue to the next menu. You will then
be asked if you would like to print the object again, or return to the storage menu screen. Select your choice
with the dial.
If you wish to print the object again, make sure to clear the build plate.
THE CONTROL PANEL 23