
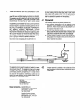
Technical data


5.
5.1
COMMISSIONING
Putting into Service
5.1.1.
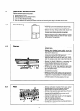
Open the gas and water service cocks beneath
the appliance, purge the gas supply (CP331:3). Turn
on an adjacent tap and purge the water side of the
installation.
Test for water soundness at all appliance and exter-
nal pipework connections.
Switch on electrical supplv, fan will run at low speed.
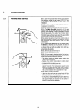
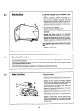
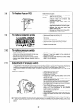
5.1.3. To light the pilot
temporarily fit the gas
control knob (A) and light the pilot by turning the
knob 90’ anti-clockwise. It may be necessary to purge
the pilot gas supply, if so, wait a few minutes, return
the gas control knob to the OFF position and repeat.
(The pilot supply will only purge when the gas control
knob has been turned 90’ anti-clockwide).
5.1.4.
When the pilot is lit turn the control knob (A)
fully anti-clockwise as shown in the diagram. Test for
gas soundness using leak detection fluid on all gas
connections.
5.1.5. Check the operation of the flame failu-
re device
by blowing out the pilot light, the flow of
gas to the pilot will cease and the thermoelectric val-
ve should drop out with an audible ‘click’ within ap-
proximately 30 seconds.
5.1.6.
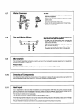
Remove gas control knob (A).
5.1.7.
Switch off electrical supply.
5.1.8.
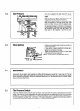
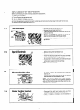
Fit front case by locating bottom first and en-
suring top of case locates over bracket. Secure with 4
screws and washers previously removed.
- The centre screw and plastic washer retains the
fascia mounting bracket.
- Replace the control fascia plate by sliding down
onto the support bracket.
- Fit bottom trim by sliding onto rails.
-
Fit the gas control knob (A) and the temperature
selector knob (B). The temperature selector knob
should be pushed onto the spline until it locates.
Turn fully clockwise to (+I, reposition knob as requi-
red, so that indicator dot is opposite the (+) sign.
5.1.9.
Switch on electrical supply.
- Light the pilot and turn gas control knob (A) fully
anti-cockwise to, the main gas position.
- If the pilot is now extinguished for any reason re-
turn the gas control knob to the OFF position and
wait approximately 30 seconds for the safety in-
terlock to reset before repeating.
12
5.