
user manual


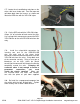

178. Cut the RED wire with the YELLOW stripe.
Strip a 1/4” of insulation off each end of the wire.
Use a crimp/shrink connector to connect the RED/
YELLOW wire to the solid YELLOW wire from the
relay.
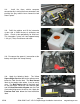
179. Install the crimp/shrink connectors by
inserting one end of the RED/YELLOW
wire into each end of the crimp shrink
connector. Into one end of the connector, insert the
YELLOW wire from the relay. Crimp both ends
of the connector securely. Using a heat gun or
blow-dryer set on high, shrink the plastic
covering of the connector until the plastic covering
completely around the wire. Crimping the
connector alone is not enough to ensure a
permanent connection; you must
shrink the plastic covering! When you
are fi nished cover the wires and connec-
tors with the piece of split loom supplied.
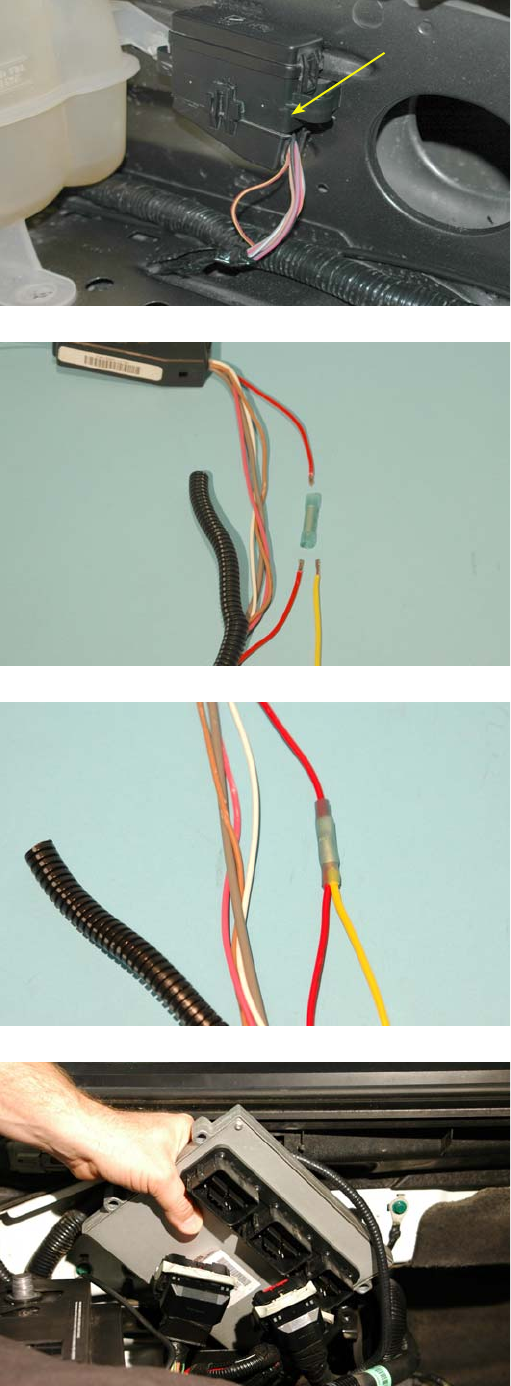
180. Re-install the re-programed computer into
the vehicle with the four original bolts. Tighten
them securely with a 10mm socket wrench.
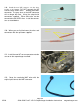
177. Locate the air conditioning relay box on the
driver side inner fender well. Peel the tape and
split-loom back from the harness as shown and
locate the RED wire with the YELLOW stripe.
A/C Relay
Box
05/06
Page 47
2004-2006 Ford F-150 3V Supercharger Installation Instructions magnacharger.com