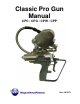
Classic Pro Gun Manual CPC / CPG / CPW / CPP Rev.
Classic Pro Gun Manual CORPORATE HEADQUARTERS and MANUFACTURING th 11692 56 Court * Clearwater, FL 33760 * Tel 727-573-2955 * Fax 727-571-3636 TECHNOLOGY CENTER and MANUFACTURING 1862 Ives Ave. * Kent, WA 98032 * Tel 253-854-2660 * Fax 253-854-1666 MVP Plastech UK Chilsworthy Beam, Gunnislake, Cornwall, PL18 9AT UK, * Tel: +44 (0) 1822 832621 Fax: +44 (0) 1822 833999 www.mvpind.com Rev.
Classic Pro Gun Manual Table of Contents SECTION: Page TERMS & CONDITIONS OF SALE 4 SAFETY & WARNINGS 6 INTRODUCTION 15 GUN BLOCK DISASSEMBLY 19 GUN BLOCK ASSEMBLY 24 ACTUATOR REBUILD 31 CLASSIC PRO GUN HANDEL REBUILD 33 PARTS DRAWINGS 39 REVISION INFORMATION 101 Rev.
Classic Pro Gun Manual Terms & Conditions of Sale: GSSC, Inc.’s Terms & Conditions of Sale (“Terms & Conditions”) 588284v4 1. ACCEPTANCE: Acceptance of any purchase order from a customer or potential customer (“Buyer”) is subject to credit approval by GSSC, Inc. (“Seller”), acceptance of the purchase order by Seller and, when applicable, any manufacturer, vendor, or other third party that provides goods to Seller for resale to Buyer (“Vendor”).
Classic Pro Gun Manual 15. WARRANTIES: (a) SELLER’S WARRANTIES: Seller warrants that all Goods sold shall mechanically operate as specified and shall be free from faults in respect to materials and workmanship for a period of: (i) for parts, twelve (12) months from the date of invoice, and (ii) for systems, twelve (12) months from startup, or, if earlier, eighteen (18) months from the date of the bill of lading.
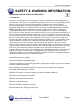
Classic Pro Gun Manual SAFETY & WARNING INFORMATION: OPERATING YOUR POLYESTER SYSTEM SAFELY 1. Introduction Any tool, if used improperly, can be dangerous. Safety is ultimately the responsibility of those using the tool. In like manner, safe operation of polyester processes is the responsibility of those who use such processes and those who operate the equipment. This manual outlines procedures to be followed in conducting polyester operations safety.
Classic Pro Gun Manual Type of Fire Extinguishing equipment recommended: Fire Extinguisher – code ABC, rating number 4a60bc. Extinguishing Media – Foam, Carbon Dioxide, Dry Chemical, Water Fog. Copies of the above bulletins are available, at a nominal charge from: National Fire Protection Association 470 Atlantic Avenue Boston, MA 02210 Research Report No.11 of the American Insurance Association deal with “Fire, Explosion and Health Hazards of Organic Peroxides”.
Classic Pro Gun Manual 2.2 Catalyst (Methyl Ethyl Ketone Peroxide) MEKP is among the more hazardous materials found in commercial channels. The safe handling of the “unstable (reactive)” chemicals presents a definite challenge to the plastics industry.
Classic Pro Gun Manual C. Prevent contamination of MEKP with other materials, including polyester over spray and sandings, polymerization accelerators and promoters, brass, aluminum and non-stainless steels. D. Never add MEKP to anything that is hot, since explosive decomposition may result. E. Avoid contact with skin, eyes and clothing. Protective equipment should be worn at all times. During clean-up of spilled MEKP, personal safety equipment, gloves and eye protection must be worn.
Classic Pro Gun Manual When all three elements are present, the result can be an extremely violent explosion. The reaction can be sustained with very little aluminum or galvanized metal; any amount of aluminum is too much. A. The reaction is unpredictable. Prior use of an HHC solvent without incident (corrosion or explosion) does NOT mean that such use is safe. These solvents can be dangerous alone (as a clean-up or flushing agent) or when used as a component or a coating material.
Classic Pro Gun Manual G. Adequate ventilation (as covered in OSHA Section 1910.94 and NFPA No.91) is important wherever solvents are stored or used, to minimize, confine and exhaust the solvent vapors. H. Solvents should be handled in accordance with OSHA Section 1910.106 and 1910.107. 2.4 Catalyst Diluents Magnum Venus Plastech spray-up and gel-coat systems currently produced are designed so that catalyst diluents are not required. Magnum Venus Plastech, therefore, recommends that diluents not be used.
Classic Pro Gun Manual 2.7 Toxicity of Chemicals A. Magnum Venus Plastech recommends that you consult OSHA Sections 1910.94, 1910.106, 1910.107 and NFPA No.33, Chapter 14, and NFPA No.91. B. Contact your chemical supplier(s) and determine the toxicity of the various chemicals used as well as the best methods to prevent injury, irritation and danger to personnel. C. Also determine the best methods of first aid treatment for each chemical used in your plant. 2.
Classic Pro Gun Manual 3.0 Equipment Safety WARNING Magnum Venus Plastech suggests that personal safety equipment such as EYE GOGGLES, GLOVES, EAR PROTECTION, and RESPIRATORS be worn when servicing or operating this equipment. Ear protection should be worn when operating a fiberglass chopper to protect against hearing loss since noise levels can be as high as 116 dB (decibels).
Classic Pro Gun Manual 3.2 Grounding Grounding an object means providing an adequate path for the flow of the electrical charge from the object to the ground. An adequate path is one that permits charge to flow from the object fast enough that it will not accumulate to the extent that a spark can be formed. It is not possible to define exactly what will be an adequate path under all conditions since it depends on many variables.
Classic Pro Gun Manual Introduction: The Pro Gun is an air trigger gun; meaning when the trigger is pulled an air cylinder pushes on the actuator stem and rotates the gun block into the on position. The Pro Gun works very similar to a dual ball valve in that the valve rod rotates and the catalyst and resin holes line up with the ports in the gun block allowing material to flow.
Classic Pro Gun Manual This manual covers the following Classic Pro Gun assemblies: CPG-1000-W CPG-1000-X CPG-1000-X-INT CPG-2000-X CPG-2000-X-INT CPC-1000-X CPC-1000-X-INT CPC-2000-X CPC-2000-X-INT CPP-3000 CPP-6000 CPW-1000-X CPW-1000-X-INT CPW-2000-X CPW-2000-X-INT CPW-4000 CLASSIC PRO GUN ASSEMBLY – WETOUT PRO GEL COAT GUN PRO GEL COAT GUN – INTERNATIONAL PRO GEL COAT GUN – FIT PRO GEL COAT GUN – INTERNATIONAL FIT CLASSIC PRO CHOPPER GUN CLASSIC PRO CHOPPER GUN – INTERNATIONAL CLASSIC PRO CHOPPER GUN
Classic Pro Gun Manual Release System Pressure 1. Turn off air supply to pumping system. 2. Release fluid pressure from lines by holding the gun over an appropriate empty container and pulling the trigger. 3. Flush gun into appropriate container 4. Turn off air supply to the solvent tank. 5. Release any pressure in the flush tank by gently pulling upwards on the ring attached to the pressure relief valve. 6. Disconnect air line from rear of gun handle. 7.
Classic Pro Gun Manual Remove Hoses Note: Although previous steps should have removed all pressure from the lines, there may still be trapped fluids under pressure in the lines. Read the recommended safety procedures below. WARNING: Wear appropriate eye protection. Pressurized fluids may cause eye injuries. WARNING: When removing hoses from fittings, wrap a large rag or shop towel around the wrench and fitting as you remove the fitting.
Classic Pro Gun Manual Gun Disassembly: WARNING: To prevent injury, be sure all air is disconnected from the gun and that all pressure has been relieved before attempting to remove trigger guard. Note: The bolt that secures the trigger guard to the air cylinder also serves as a plug for the end cap. Removing this bolt can result in injury from escaping pressurized air if air pressure is not relieved. 1. Check to be sure all air is disconnected from the gun 2.
Classic Pro Gun Manual Remove Actuating Stem 1. Unscrew the actuating stem from the valve rod. Tightly clamp the actuating stem into a soft jawed vise and rotate the whole gun block. Note: The screw driver slot in the end of the actuating stem should not be used for removal as if it becomes damaged the stem will not fit into the actuator bushing. Make sure the actuating stem is smooth or it will wear out the actuator bushing. ACTUATOR STEM Remove & Disassemble Flush Valve Assembly 1.
Classic Pro Gun Manual Remove Mix Housing 1. Remove the nozzle cap from the mix housing. 2. Remove the nozzle from the cap. 3. Remove the mix housing (5104-20-1) by unscrewing the screws holding the mix housing to the gun block. 4. Pull the injector and injector seal out and set the injector assembly aside. 5. Use the turbulent mixer puller to remove the turbulent mixer by inserting the puller and giving a slight twist. 6.
Classic Pro Gun Manual Remove Hose Fittings 1. Remove and clean the catalyst fitting and o-ring on the rear of the gun block. 2. Remove and clean the resin fitting and o-ring on the rear of the gun block. Remove Valve Rod 1. Use the magnetic handle and packing bit to unscrew the packing nuts (5104-8-1) from both the catalyst and resin side. Use caution not to damage the packing bit. If you are unable to remove the packing nut soak in a solvent or apply heat to the packing nuts. 2.
Classic Pro Gun Manual Remove Catalyst and Resin Seals 1. Insert the seal installation tool into one of the side ports and gently tap it completely through the gun block with a rubber or hammer mallet. As the tool is tapped through the interior of the gun block it will remove the seal sets for both the resin and the catalyst sides. 2. Remove catalyst and resin seal (relief spacer and secondary seal) from the seal installation tool. Clean with solvent.
Classic Pro Gun Manual Gun Block Assembly: Clean Block Assembly Discard o-rings and seals. Clean remaining components with solvent and allow to air dry. You have now disassembled the gun block. Install Secondary Seals 1. Place one of the secondary seals (5104-3-1) into the center of the gun block where the center spacer goes. Gently push the secondary seal into position with something flat, flush with the gun block. Use caution not to damage it the seal. 2.
Classic Pro Gun Manual Reassemble Catalyst Components 1. Place the catalyst components onto the seal installation tool in the following order: Packing ring (5104-7-1) Catalyst seal (5104-6-1) Relief spacer (5104-4-1) Note: The hole in the catalyst seal should be aligned with the port in the gun block before inserting the seal installation tool into the gun block. Valve Rod Relief Spacer Packing Nut Catalyst Seal Packing Ring Packing Ring Resin Seal Packing Nut 2.
Classic Pro Gun Manual Align Catalyst Seal 1. Hold the catalyst alignment tool (6705-3-1) (tapered drill bit) firmly with a pair of pliers. 2. Insert the catalyst alignment tool (tapered end first) into the gun block through the rear of the gun block 3. Gently press and move the alignment tool around until the holes in the catalyst seal aligns with the hole / port in the gun block. Note: At this point, the catalyst side packing nut should only be hand tight. Reassemble Resin Components 1.
Classic Pro Gun Manual Install Valve Rod 1. Insert the valve rod (5104-2-1) into the gun block through the resin side. Use a packing tool to center the valve rod. Note: Make sure that the valve rod is correctly aligned; the larger hole goes on the resin side, while the smaller hole goes on the catalyst side. Note: The middle hole, into which the actuating stem will be inserted, must also be correctly aligned.
Classic Pro Gun Manual Reinstall Check Valve on International Pro Guns DANGER: To replace this valve, contact Magnum Venus Plastech. These valves have undergone specific remanufacture at Magnum Venus Plastech for the Pro Gun ™. Using a check valve not obtained directly from Magnum Venus Plastech may result in contamination and /or dangerous ignition of the catalyst. 1. Reinstall the check valve (5104-04-01) and o-ring (O-S-5-125) into the side port on the catalyst side of the gun block.
Classic Pro Gun Manual Optional Flush Valve Configurations: There are several variations on the flush valve assembly to include air / solvent purge and high pressure flush. Check the parts drawing for the valve assembly installed on your gun assembly. 5104-01-01 SAPV-1000-INT SAPV-1000 BVF-1000 Standard Flush Valve Assembly Solvent / Air Purge Assembly – international Solvent / Air Purge Assembly Ball Valve Flush Assembly – for high pressure flush Assemble Mix Housing 1.
Classic Pro Gun Manual Mix Housing Options Standard Mix Housing (5104-20-1) – Use with all turbulent mixers and most applications. FIT Mix Housing (VPG-1001) – Use with FIT style spray tips. Uses mixer VPG-1003. FIT Low Flow Mix Housing (VPG-1001-1/4) – replacement mixer TRT-1018-1/4 Ratio Block – Pail Dispenser Mix Housing (58735-1) – separates material streams.
Classic Pro Gun Manual Actuator Rebuild: Actuator Disassembly 1. Remove the two o-rings (O-V-013) from the underside of the cylinder body (58631-1). 2. Unscrew the cylinder caps (5106-4-1) from each end of the cylinder body. 3. Remove the o-ring (O-V-020) from each of the cylinder caps 4. Remove the actuating piston (5106-7-1) by pushing it out the back end (long end) of the cylinder body with your fingers or a blunt tool. 5.
Classic Pro Gun Manual Assemble Classic Pro Gun Actuator Cylinder 1. Place a new o-ring (O-V-020) on the actuating piston (5106-7-1). 2. Insert the actuating bushing (5106-5-1) into the actuating piston. Note: The hole in the actuating bushing must be facing up so the bushing hole can receive the actuating stem when the gun block is assembled. 3. Use Magnum Venus Pro Gun Oil (6706-3-1) to lubricate the interior of the cylinder body and the actuating piston. 4.
Classic Pro Gun Manual Gun Handle Rebuild: Remove Chopper Elbow Assembly 1. If the elbow fitting has not already been removed, do the following procedures: A. Use a wrench to loosen the pipe seal on the elbow assembly. B. Unscrew the elbow assembly by hand. Male Elbow 7701-6-18 is used on Gelcoaters and saturtars with special valving. 4 Pipe Plug 09990 is used on Hydrajectors, Saturators and Casting units without special vavling. Note: This elbow assembly is used to supply air to the chopper.
Classic Pro Gun Manual Disassemble the Trigger Retainer 1. Remove the upper screw (02647-3) on the trigger. 2. Pull the trigger retainer (58648-1) off the spool assembly. 3. Remove the o-ring (O-D-010) from inside the trigger retainer.
Classic Pro Gun Manual Clean the Components Discard the used seals and o-rings and clean the remaining parts in solvent. You have now disassembled the gun handle. Assemble Classic Pro Gun Handle: Note: Please refer to parts drawings for proper part numbers to assist you in assembling the gun handle. Replace O-Rings and Seals Discard used o-rings and seals and obtain new ones. Reinstall O-Ring on Spool Assembly 1. Reinstall the two o-rings (O-U-011) on the spool assembly. 2.
Classic Pro Gun Manual A. To prevent the balls from falling through the trigger retainer, insert the tip of the spool assembly into the trigger retainer. Note: This is only temporary; the spool assembly will be inserted later in the other end of the trigger retainer. B. Place a drop of Magnum Venus Pro Gun Oil™ (6706-3-1) into the trigger retainer to help secure the balls. C. Insert the ball (03198) in the trigger retainer, using a scribe to position the ball into the detents in the trigger retainer. 3.
Classic Pro Gun Manual Optional Trigger and Spool Assembly The conversion kit (CPG-1007-CK) offers an alternative to the standard trigger and spool assemblies. The updated trigger (CPG-1007) is used in conjunction with the spool (CPG-1003) to provide a more durable design and eliminates the need for one of the screws in the end of the trigger. Set Screw (ATC-40108) Spool (CPG-1003) Trigger (CPG-1007) Install Elbow Note: This elbow assembly is used to supply air to the chopper.
Classic Pro Gun Manual Assemble Classic Pro Gun Modules 1. Use the two mounting screws (58626-1) to secure the handle assembly to the actuator assembly (58604-1). Note: The hole in the actuating bushing of the actuator must be facing up so the bushing hole can receive the actuating stem of the gun block. 2. Using the four mounting screws (5106-6-1) secure the gun block to the actuator. Note: The actuating stem on the gun block must be in the hole of the actuator bushing.
Classic Pro Gun Manual Parts Drawings: 58603-X 58604-1 PRO GUN HANDLE ASSEMBLY PRO GUN – ACTUATOR ASSEMBLY CPG-1000-W CPG-1000-X CPG-1000-X-INT CPG-2000-X CPG-2000-X-INT CPC-1000-X CPC-1000-X-INT CPC-2000-X CPC-2000-X-INT CPP-3000 CPP-6000 CPW-1000-X CPW-1000-X-INT CPW-2000-X CPW-2000-X-INT CPW-4000 CLASSIC PRO GUN ASSEMBLY – WET OUT PRO GEL COAT GUN PRO GEL COAT GUN – INTERNATIONAL PRO GEL COAT GUN – FIT PRO GEL COAT GUN – INTERNATIONAL FIT CLASSIC PRO CHOPPER GUN CLASSIC PRO CHOPPER GUN – INTERNATIONA
Classic Pro Gun Manual Rev.
Classic Pro Gun Manual Rev.
Classic Pro Gun Manual Rev.
Classic Pro Gun Manual Rev.
Classic Pro Gun Manual Rev.
Classic Pro Gun Manual Rev.
Classic Pro Gun Manual Rev.
Classic Pro Gun Manual Rev.
Classic Pro Gun Manual Rev.
Classic Pro Gun Manual Rev.
Classic Pro Gun Manual Rev.
Classic Pro Gun Manual Rev.
Classic Pro Gun Manual Rev.
Classic Pro Gun Manual Rev.
Classic Pro Gun Manual Rev.
Classic Pro Gun Manual Rev.
Classic Pro Gun Manual Rev.
Classic Pro Gun Manual Rev.
Classic Pro Gun Manual Rev.
Classic Pro Gun Manual Rev.
Classic Pro Gun Manual Rev.
Classic Pro Gun Manual Rev.
Classic Pro Gun Manual Rev.
Classic Pro Gun Manual Rev.
Classic Pro Gun Manual Rev.
Classic Pro Gun Manual Rev.
Classic Pro Gun Manual Rev.
Classic Pro Gun Manual Rev.
Classic Pro Gun Manual Rev.
Classic Pro Gun Manual Rev.
Classic Pro Gun Manual Rev.
Classic Pro Gun Manual Rev.
Classic Pro Gun Manual Rev.
Classic Pro Gun Manual Rev.
Classic Pro Gun Manual Rev.
Classic Pro Gun Manual Rev.
Classic Pro Gun Manual Rev.
Classic Pro Gun Manual Rev.
Classic Pro Gun Manual Rev.
Classic Pro Gun Manual Rev.
Classic Pro Gun Manual Rev.
Classic Pro Gun Manual Rev.
Classic Pro Gun Manual Rev.
Classic Pro Gun Manual Rev.
Classic Pro Gun Manual Rev.
Classic Pro Gun Manual Rev.
Classic Pro Gun Manual Rev.
Classic Pro Gun Manual Rev.
Classic Pro Gun Manual Rev.
Classic Pro Gun Manual Rev.
Classic Pro Gun Manual Rev.
Classic Pro Gun Manual Rev.
Classic Pro Gun Manual Rev.
Classic Pro Gun Manual Rev.
Classic Pro Gun Manual Rev.
Classic Pro Gun Manual Rev.
Classic Pro Gun Manual Rev.
Classic Pro Gun Manual Rev.
Classic Pro Gun Manual Rev.
Classic Pro Gun Manual Rev.
Classic Pro Gun Manual Rev.
Classic Pro Gun Manual Revision Information: Rev. 12/2010 Add this revision information chapter. We updated the parts drawings in the manual and the manual format. Added the optional trigger conversion kit (CPG-1007-CK) information and the flush valve options. Rev. 02/2011 Added information for the Stainless Steel Trigger Guide Pin (58629-1-SS) and Guide Bushing (58628-1-SS). Replaced the Gun Handle drawing (58603-X) with current version.
Classic Pro Gun Manual MAGNUM VENUS PLASTECH CORPORATE HEADQUARTERS and MANUFACTURING th 11692 56 Court * Clearwater, FL 33760 * Tel 727-573-2955 * Fax 727-571-3636 TECHNOLOGY CENTER and MANUFACTURING 1862 Ives Ave. * Kent, WA 98032 * Tel 253-854-2660 * Fax 253-854-1666 MVP Plastech UK Chilsworthy Beam, Gunnislake, Cornwall, PL18 9AT UK, * Tel: +44 (0) 1822 832621 Fax: +44 (0) 1822 833999 www.mvpind.