
Technical data


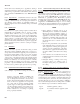

2473, (Preval Power Unit Only). Each power unit is
capable of spraying up to 16 oz. of liquid.
5.8.4 Brush/Roller Touchup.
NOTE
Aerosol spraying is limited in application and
shall be held to a minimum. Using only approved
coatings, it is permitted for touch-up of scratches,
etc., and areas not exceeding one-half square foot
in area.
5.8.4.1 Paint brushes and rollers can be used effectively
for touch-up and maintenance painting, but they will not
produce the esthetic results of a spray application. Some
advantages of brush and roller touch-up over spray applica-
tion are:
5.8.4.2 Masking is minimized, and in most cases, is not
required at all.
5.8.4.3 More economical for small area and low volume
painting because much less paint is required.
5.8.4.4 More efficient for application of stencil type
markings and grit containing anti-slip walkway coatings.
5.8.4.5 Requirements for solvent thinners is very limited.
5.8.4.6 Coating transfer efficiency is almost 100% with no
over spray and very little air pollution that is generated by a
small amount of solvent evaporation.
5.8.4.7 Hazardous and non-hazardous waste is minimized
and limited to used brushes or roller covers and small
amounts of excess primer or paint.
5.8.4.8 Can be performed in standard maintenance facili-
ties without specialized ventilation and air filtering while
other maintenance is being performed.
5.8.4.9 PPE is limited to chemical type gloves and eye
protection (face shield or chemical type goggles).
5.8.5 Brush Application. It is very difficult to get a
smooth professional appearance without brush strokes with
the brush touch-up method on metal surfaces. Therefore,
brush touch-up should be limited to areas of one square foot
or less and preferably to areas of one square inch or less such
as fastener heads. Use a fine, flat nylon or nylon/polyester
blend bristle brush with a chiseled tip or a triangular tip foam
brush having a width appropriate for the job at hand. The
application procedure is as follows:
a. Scuff-sand and solvent wipe the touch-up area per
Chapter 3.
b. Mix and thin the primer or paint for brush application
per Chapter 6 and the manufacturer’s instructions. Mix
the least amount possible for the job at hand.
NOTE
Pint quantities are more economical than quart or
larger quantities to avoid waste of the unused
portions when doing small touch-up jobs.
c. Dip the brush to 1/2 its bristle length into the paint or
primer and no more. Remove the brush, and press it
lightly against the inside of the container to distribute
the liquid throughout the thickness of the brush and
eliminate any excess. Do not drag the brush over the
container rim as this will form bubbles in liquid in the
container.
d. Grasp the brush at the bottom of the handle as if holding
a pencil at a 60° angle to the surface. Start the brush
stroke on one side of the touch-up area with light
pressure in the “feathered” paint area, heavier pressure
in the bare area, and light pressure again in the opposite
“feathered” paint area.
e. If the area is completely covered, blend the paint into all
the “feathered” edges using just the brush tip stroked at
several different angles across the initial stroke; and
proceed to the next area.
f. If the area is not completely covered, begin the next
stroke parallel to the first stroke with an over lap of
about 1/4 of the brush width using the same pressure
methods as in step (4) and replenishing the paint or
primer on the brush per step (3) as needed. When the
entire area is covered blend the paint or primer as in step
(5).
g. If primer was applied, allow the proper cure time; then
apply the topcoat using the same brush techniques as in
steps (1) through (6).
Figure 5-4. Spray Tool
TO 1-1-8
5-15