
User manual


42 EN42 EN
4
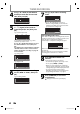
Use [K / L / s / B] or [the Number
buttons] to enter the start and end
time, then press [B].
Date
JAN/02
REC To Mode
DVD SP
SP 2 : 00
Start End
- - : - -
CH
DTV125. 1
12 : 00AM
5
Use [K / L / s / B] to select analog
(“- - -”) / digital (“DTV”) mode or
external input (E1 / E2), then press
[B].
e.g.) external input mode
Date
JAN/02
REC To Mode
DVD SP
SP 1 : 00
Start End
CH
E1
1 : 00AM
12 : 00AM
To record from external input (e.g., cable/
satellite box), select E1 or E2.
Use [K / L] or [the Number buttons] to select
the channel number to record, then press
[B].
For digital mode, select both major and minor
channels. Refer to “How to select a channel
number for the timer recording” on page 43
for more details.
e.g.) analog mode
Date
JAN/02
REC To Mode
DVD SP
SP 1 : 00
Start End
CH
10
1 : 00AM
12 : 00AM
e.g.) digital mode
Date
JAN/02
REC To Mode
DVD SP
SP 1 : 00
Start End
CH
DTV125. 1
1 : 00AM
12 : 00AM
6
Use [K / L] to select the recording
media (“DVD” or “VCR”), then press
[B].
e.g.) recording to DVD
Date
JAN/02
REC To Mode
DVD SP
SP 1 : 00
Start
12 : 00AM
End
1 : 00AM
DTV125. 1
CH
7
Use [K / L] to select a recording
mode.
Date
JAN/02
REC To Mode
DVD
SP 1 : 00
Start End
CH
DTV125. 1
1 : 00AM
12 : 00AM
SP
Refer to “Recording Mode” on page 37.
• When recording to DVD, you can check the
remaining recordable space of the disc when
you select the recording mode.
Date
JAN/02
REC To Mode
DVD
SP 1 : 00
Start End
CH
DTV125. 1
1 : 00AM
12 : 00AM
SP
Auto recording mode select...
When “Auto” is selected as a recording mode, the unit
calculates how much time is available on the disc and
selects the best recording mode available
automatically to complete recording the program.
Date
JAN/02
REC To Mode
DVD
Auto 1 : 00
Start End
CH
DTV125. 1
1 : 00AM
12 : 00AM
Auto
• “Auto” is only available for one program in the timer
program list.
• The recording may be cut short when the available
recording space of the disc is too limited.
8
Press [OK] when all items are
entered.
Your program setting is now stored.
• To set another program, repeat steps 2 to 8.
• To exit, press [TIMER] or [SETUP].
• When 2 or more programs are overlapped,
“Timer program overlapped” appears, and the
overlapped program will be displayed in blue.
• To correct the timer program refer to
“Checking, canceling, or correcting the timer
programming information” on page 43.
9
Press [TIMER SET] to set a timer
programming.
will appear on the front panel display.
TIMER RECORDING
E9H80UD.indd 42E9H80UD.indd 42 2007/03/28 9:56:172007/03/28 9:56:17