Operation and Installation Manual M1-LCD AM / FM / WB Stereo Receiver with CD/DVD Player and Touch Screen Controls
Introduction Please carefully read all of the information in this manual. Familiarity with operation and installation procedures will help you obtain the best possible performance from your new AM/FM/WB Stereo Receiver and CD/DVD Player with Touch Screen Controls. WARNING! To prevent fire or electrical shock hazard, do not expose this product to moisture or remove its cover or bottom screws. No user-serviceable parts inside. Refer servicing to qualified personnel. Index Warnings and Cautions . . . . . . .
Warnings • The driver should neither watch the display nor operate the system while driving. Watching the display or operating the system will distract the driver from looking ahead of the vehicle and can cause accidents. Always stop the vehicle in a safe location and use the parking brake before watching the display or operating the system. In some states and countries, passengers are also prohibited from watching the display.
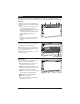
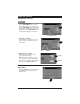
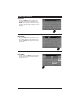
Basics The M1-LCD screen has 3 specific areas: Display area, Source Selection area and Home Row area. Familiarizing yourself with the 3 specific areas will help you obtain the best performance from the M1-LCD. Display Area: The display area is not touch activated, it only displays information. The information displayed includes: 1. Source: Orients the user to which source is being used: Radio, Disc, Satellite, etc. 2. Source Information: Displays secondary information that relates to the source.
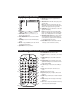
Button Locations and Functions 3 1 2 4 5 6 6. Infrared Eye: Receives the signals from the remote control. 7. SD Card Slot: Insert the SD card to play recorded music data. Notes: This unit may not play all SD cards. The manufacturer of this unit is not responsible for any data loss. We suggest you back up your data. 7 8 8. USB Input: Plug in your USB device. “USB” will appear in the display. Note: This unit may not function with all MP3 players. The M1-LCD will control the USB audio device.
Remote Control Button Locations and Functions (Continued) 12. Numeric Keypad: Inputs the corresponding number. 13. Automatic Station Memory (ASM): Press and hold for automatic station memory storing. Press and release for scanning memorized stations. 14. Traffic Announcement (TA): Activates the traffic announcement function. (See the Radio Operations section for more information). 15. Weather Band (WB): Press for direct access to the weather band radio. 16. Eject: Ejects the loaded disc. 17.
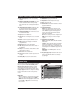
System Setup (Continued) Region: The region button changes the tuner’s configuration so that it can receive frequencies from different regions. To change the region, press the REGION button then use the or to select different AM/FM tuning systems. The default setting is U.S.A. Startup Volume: The startup volume setting controls the initial volume level each time the unit is turned on. The default setting is 12.
Home Row (Continued) Settings Button (continued): Sound Button Sound Button: Press the SOUND button to activate the sound adjustment screen. See “Sound Controls” (Page 11) for operation instructions. Monitor Button Monitor Button: Press the MONITOR button to activate the monitor adjustment screen. Then select from brightness, color, contrast or tint by touching the corresponding button. Use the - and + buttons to adjust the monitor to achieve the desired picture.
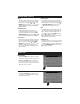
Home Row (Continued) Settings Button (continued): Time Button 1. 12 or 24-Hour Time Format: Press the TIME FORMAT button to select the time format. For a 12-hour clock (am and pm) press the TIME FORMAT button until either AM or PM appear in the display. For a 24-hour clock (military time) press the TIME FORMAT button until neither AM or PM appear in the display. 12 or 24 Hour Indicator 2. Selecting Hours or Minutes: Press the button to select the hours or minutes.
Home Row (Continued) Dim Button: Pressing the DIM OFF button will dim the display. The button will now be highlighted and DIM ON will now appear on the button. Pressing the button again will return the display to normal brightness. Mute Button: Pressing the Mute button will mute the volume level. “MUTE” will flash in the information area. Pressing the MUTE button again will restore the volume level. Back Button: In select screens, the BACK button will appear in the Home Row.
Sound Controls Volume: Increase the volume by pressing the + side of the button. Decrease the volume by pressing the - side of the button. Note: See Startup Volume (page 7) on how to adjust the initial startup volume level. Increase Decrease Volume Level Indicators Bass, Treble, Balance and Fader Controls: To access the Bass, Treble, Balance and Fader buttons, press the SETTINGS button in the home row then press the SOUND button. Touch the button to activate the desired adjustment control.
Sound Controls (Continued) Loudness: To access the Loud button, press the SETTINGS button in the home row then press the SOUND button. Touching the LOUD OFF button will boost high and low tones at lower volume levels. When the item is selected, the button will become highlighted and LOUD ON will appear on the button. “LOUD” also appears in the display area. To deselect, touch the LOUD ON button.
Radio Operation Power On/Off: Press the button to turn the unit 0n. Selecting the Radio Source: Touch the HOME button to activate the source selection screen. Touch the RADIO button to enter the radio operation screen. Home Button Selecting the AM or FM Band: Band Indicator Press the BAND button repeatedly and select from AM1, AM2, FM1, FM2 or FM3. Manually Tuning in a Radio Station: Press and hold either the l or l button until “MANUAL” appears in the display, then release.
Radio Operation (Continued) Programming Radio Stations: 1. Press the BAND button to select from the AM1, AM2, FM1, FM2 or FM3 radio band. 2. Tune in the desired radio station. 3. To program the station, press and hold one of the six Radio Station Recall buttons until you hear a beep. The Radio Station Recall button will now contain the programmed radio station frequency. 4. The Programmed Radio Station Recall Indicator will appear in the display.
Radio Operation (Continued) Scanning for FM Radio Stations According to Program Type (PTY): 1. Press the BAND button to select from the FM1, FM2 or FM3 radio band. 2 2. Press the PTY button to display the program type screen. 3. Press the or button to select the desired program type (PTY) (Example: News, Information, Sports, etc.). The selected program type will be highlighted. 4. Press the ENTER button to search a station with the selected program type (PTY).
Weather Band Operation Power On/Off: Press the button to turn the unit 0n. Selecting the Weather Band Source: Touch the HOME button to activate the source selection screen. Touch the WEATHER button to enter the weather band screen. The weather band can also be accessed through the Radio screen. Touch the WEATHER button to enter the weather band screen. Automatic Weather Band Station Tuning: The strongest weather band station will automatically be selected and start playing. Notes: 1.
Disc Warnings Disc Formats Supported by this Player: DVD 12cm disc (Single-sided disc only) Label side up CD 12cm disc Do not touch the underside of the disc MP3 12cm disc Do not bend Handling: • Dirt, dust, scratches and warping disc will cause non-operation. • Do not place stickers on disc or scratch disc. • Do not place discs in the following places: Direct sunlight, dirty, dusty or damp areas, near car heaters, car seats or dashboard.
CD Operation (Continued) Selecting the CD Source: Press the HOME button to select the source screen. Next, press the DISC button to select the CD player. CD Track Selection: Press the l button to select a lower track. Press the l button to select a higher track. Lower Track Pausing a CD: Press the ll button to pause the disc. Press it again to resume play. Stopping a CD: Press the button to stop the disc. to resume play, press the button.
CD Operation (Continued) Repeating a CD Track: The M1-LCD’s default setting is to repeat the disc. When the CD mode is selected, “REPEAT ALL” appears on the button and the entire disc will play and then continually replay. To repeat a CD track, press the REPEAT ALL button until “REPEAT ONE” appears on the button. The CD track will now play repeatedly.
MP3 Operation (Disc, USB and SD Card) (Continued) USB General Operations: 1. Press the button to turn the unit On. 2. Pull back the rubber cover and insert the USB device or cable into the USB port. The playback source will change to USB operation and the Folder/Track panel will be displayed. Music playback will start automatically. Note: USB devices and cables can only be inserted in one position. DO NOT FORCE it into the slot. Reverse the orientation and try to insert the device or cable again.
MP3 Operation (Disc, USB and SD Card) (Continued) Multiple Folder Selection (continued): VOLUME Method 2: Using the Remote Control 1. Press the button and the current “Folder” in use will be highlighted. 2. Press the or button to scroll up and down through the folders. 3. Press the OK button to select the desired folder. 4. Press the button and the first “Music Track” will be highlighted. 5. Press the or button to scroll up and down through the music tracks on the screen. 6.
MP3 Operation (Disc, USB and SD Card) (Continued) Stop: Touch the screen to activate the control button panel. Press the button to stop play. To resume play, press the button. CARD TRK 3 / 10 00 : 00 : 26 [ ASTROL ~ 1]SMASHM~1 . MP3 01 02 03 04 05 . . . . . 01 02 03 04 05 06 07 08 09 10 ASTROL ~ 1 FUSHYU ~ 1 AMERIC ~ 1 CONSPI ~ 1 TOBIEK ~ 1 Press the button 2 times, then press the button and the first track from the first folder will start playing.
MP3 Operation (Disc, USB and SD Card) (Continued) Random Track Play Order: The random function can only be accessed by using the remote control. This function has 2 settings: On and Off. Press the SHUFFLE button on the remote control while watching the radio display panel for the setting indication. Random Indicator CARD TRK 3 / 10 00 : 00 : 26 [ ASTROL ~ 1]SMASHM~1 . MP3 RANDOM [ON] 01 02 03 04 05 . . . . .
DVD Operation (Continued) DVD General Operations: Label Side Up Inserted Disc Icon 1. Press the button to turn the unit On. 2. Gently insert the DVD into the slot with the label side up. The screen will change to the DVD splash screen while the disc automatically loads. Note: If a DVD does not auto-load, DO NOT FORCE it into the slot, as you may already have a disc loaded indicated by the inserted disc icon. Moving Vehicle Warning: If the vehicle is moving, this screen will be displayed.
DVD Operation (Continued) Pausing/Playing a DVD: Touch the screen to activate the DVD control button panel. PAUSE ll Press the ll button to pause the DVD disc. “PAUSE ll” will appear in the display. Note: The ll “Pause” button has changed into a ”Play” button. To resume playing the DVD, press the button. Stopping a DVD: Touch the screen to activate the control button panel. Press the button to stop play. To resume play, press the button.
DVD Operation (Continued) Title Screen: Touch the screen to activate the DVD control button panel. The TITLE button functions differently depending on the characteristics of the DVD. Note: In some DVDs, the Title function may be invalid. This in not a malfunction. Subtitle Language Menu: Touch the screen to activate the DVD control button panel. .... : [ 1 ENGLISH] : [ 1 ENGLISH Press the SUBTITLE button during playback.
DVD Setup Menu Note: To access the DVD Setup Menu, a DVD disc has to be inserted. Accessing the DVD Setup Menu: VOLUME Press the SETUP button on the remote control to display the Setup Menu.
Sirius Satellite Radio Setup (Option) Note: The vehicle must be equipped with an optional Sirius tuner (SC-C1M) in order to receive a satellite signal. If the Sirius tuner is not activated, call 1-888-539-7474 to activate. The Sirius Tuner ID Number (SID) is required during the activation process. Follow the steps below to access the Sirius Tuner ID Number (SID): Accessing Your Sirius Tuner ID Number (SID): 1. From the Source Selection Screen press the SATELLITE button. 2. Press the MENU button. 3.
Sirius Satellite Radio Operation (Option) Please note that satellite radio signal may be blocked by trees, buildings or other obstacles. Information display during reception: ANTENNA ERROR: When an antenna issue exists. ACQUIRING SIGNAL: When a channel is being tuned-in (no signal is yet received). INVALID CHANNEL: A channel without a broadcast has been selected or the receiver may not be activated.
Sirius Satellite Radio Operation (Option) (Continued) Direct Tuning (continued): 3. Press the numbers of the channel then press the ENTER button. For example: For Sirius Channel 121, press 1, 2 and 1 then press the ENTER button. 4. Once the ENTER button is pressed the channel will start playing. Category Tuning: 1. Press the CATEGORY button. 2. Use the or buttons to select the Category. The Category can also be selected by touching the desired category on the screen.
Sirius Satellite Radio Operation (Option) (Continued) Channel List: 1. Press the CH LIST button to access the Master Channel List menu. 2. Scroll through the channels by pressing the or button. When the desired channel is highlighted, press the ENTER button and the channel will start playing. Programming Preset Sirius Channel: 1. Tune in the desired Sirius channel then press the PRESET button to access the Preset Channel menu. 2.
Sirius Satellite Radio Operation (Option) (Continued) Programming Preset Sirius Channel (continued): Preset Band 4. Additional Sirius channels can also be programmed in the different Sirius Preset Bands (SIR1, SIR2 and SIR 3). Press the SIR BAND button to access the different Sirius Preset Bands. Note: Each band can program 6 channels, so 18 Sirius channels can be programmed in the radio’s memory. Recalling Preset Sirius Channel: 1. Press the PRESET button to access the Preset Channel menu. 2.
Sirius Satellite Radio Operation (Option) (Continued) Skipping a Channel: 1. Press the MENU button. 2. Press the SKIP CH button. 3. Select the Channel by highlighting the Channel to be skipped and press the SKIP button. “SKIPPED” will appear next to the Channel. Channel Skipped Indicator Reinstating a Skipped a Channel: Select the Channel to be reinstated by highlighting the Channel. “SKIPPED” will appear next to the Channel. Press the UNSKIP button and “SKIPPED” will disappear from the display.
CD Changer Operation (Option) Selecting the CD Changer Source: Press the HOME button to select the source screen. Then press the CD CHANGER button to select the CD changer. Track Selection: Press the l button to select a lower track. Press the l button to select a higher track. Lower Track Higher Track Pausing a Disc: Press the ll button to pause the disc. Press it again to resume play. Disc Selection: Press the DISC DOWN button to select a lower disc in the CD changer.
CD Changer Operation (Option) (Continued) Repeating a Track: The M1-LCD’s default setting is to repeat, in order, every disc in the CD Changer. “REPEAT OFF” appears on the button. To repeat a track, press and release the REPEAT OFF button until “REPEAT TRACK” appears on the button. The track will now play repeatedly. To repeat a disc, press and hold the REPEAT OFF button until “REPEAT DISC” appears on the button. The disc will now play repeatedly.
Auxiliary Audio Video Inputs Operation (Option) Note: The M1-LCD will not control the auxiliary source, but can adjust the audio output. Refer to the audio device’s owners manual for proper playback operation. Connecting an Auxiliary Audio/Video Device: Auxiliary Input 1: Connect an auxiliary audio/video device using a 3.5mm jack (not supplied) into the socket mounted on the front of the unit.
Camera Operation (Option) Automatic Camera Selection: Rear View Camera: The rear view camera will automatically activate when the ignition key is turned "On" and the vehicle is put into reverse. The video image from the camera will appear on the screen and the audio from the rear camera only can be heard through the vehicle’s speakers. Note: This system only provides for one way audio, from the camera to the M1-LCD. The M1-LCD is unable to transmit audio to the camera.
IPOD Operation (Option) General Operations: 1. Press the button to turn the unit On. 2. Connect an IPOD to the cable attached to the M1-LCD. 3. The unit will automatically switch to the IPOD source screen and start playing. Note: The controls on the IPOD will become inoperable and the M1-LCD will now control the IPOD. Selecting the IPOD Source: Press the HOME button to select the source screen. Then press the IPOD button to select the IPOD source. IPOD Button Location and Functions: 2 1 2 1.
IPOD Operation (Option) (Continued) Browse for a Song (continued): 3. Press the ENTER button. 4. Press the or button to scroll through the songs. 5. Press the ENTER button and the song will start playing. Pausing a Track: Press the ll button to pause the track. Press it again to resume play. Track Selection: Press the l button to select a lower track. Press the l button to select a higher track.
Navigation Operation (Option) Note: Not all vehicles are equipped with an optional navigation system. Selecting the Navigation Source: Press the HOME button to select the source screen. Then press the NAVIGATION button to select the navigation source. Note: See Navigation Owner’s Manual for operating instructions. Selecting a Different Source: Press the button to leave the navigation screen and return to the last selected source.
Installation Step 1: The radio chassis is designed to be “Sleeve Mounted” through an opening in the dashboard panel. The required opening size is 182mm (7-3/16") x 84mm (3-5/16"). Cut or engage an opening in the dashboard to accommodate the mounting sleeve. Step 2: Insert the mounting sleeve into the opening in the dashboard. Bend the metal tabs on the sleeve to secure the mounting sleeve to the dashboard.
Speaker Connections Left Front Speaker _ White/Black Wire Gray/Black Wire _ + White Wire Gray Wire + Brown/Black Wire Brown Wire _ + Right Front Speaker Center Channel Speaker Subwoofer (Optional LS-SUB-75) Left Rear Speaker 42 _ Green/Black Wire + Green Wire Violet/Black Wire _ Violet Wire + Right Rear Speaker
Input Connections This unit for use only with a 12 Volt DC power source with a negative ground.
Input Connections (Continued) Blue Wire: Power Antenna (12V Out) Audio Input Left (White) Audio Input Right (Red) Video Input (Yellow) External TV Receiver (Optional) CD Changer EAX540 (Optional) Sirius Antenna M9SIR-ANT-WP (Optional) Sirius Receiver SC-C1M (Optional) External Automotive Type Antenna (Optional) 44
Input/Output Connections (Continued) M1-NAV (Optional M7-RGB) M1-NAV GPS Antenna Video Output (Red) Video Output (Green) Video Output (Blue) Sync (Brown) RGB Monitor (Optional) Audio Output Left (White) Audio Output Right (Red) Video Output (Yellow) Note: Audio Output is not controlled by the M1-LCD.
Camera Connections (Continued) 13-Pin Camera Harness C125 (Front) White Wire: Left Trigger Gray Wire: Right Trigger CAM3 (Green Connector) REAR TRIG Green Wire: Rear Trigger CAM2 (Gray Connector) RIGHT TRIG C125 (Rearview) LEFT TRIG C-SDR (Right Side) CAM1 (White Connector) C-SDL (Left Side) 46
Reset Button The LCD display may fail to function normally due to the vehicle’s battery condition, and could require resetting the radio’s microprocessor if: • The vehicle has been “jump started” from a dead battery condition. • The vehicle battery becomes very low and is quick-charged. • The vehicle battery is removed and replaced. Should any of these conditions occur, simply press and release the RESET button on the radio front panel using the tip of a ball point pen.
Warranty ONE (1) YEAR LIMITED WARRANTY Magnadyne Corporation or its authorized agents will within one year from the date of sale to you, repair, replace or refund the retail sales price of said product or any part thereof, at the option of the Magnadyne Corporation or its authorized agents, if said product or part is found defective in materials or workmanship, when properly connected and operating on the correct power requirements designated for the specific product.