
User manual


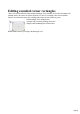

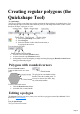
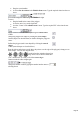
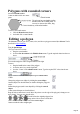

Table Of Contents
- Support
- More from MAGIX
- Welcome to MAGIX Xtreme Print Studio
- Short description
- Document handling
- Object Handling
- The Pen Tool
- Creating rectangles and squares
- Creating circles and ellipses
- Creating regular polygons (the Quickshape Tool)
- Color Handling
- Text Handling
- Printing
- Customizing
- Menus and Keyboard Shortcuts
- Introduction
- File menu
- Edit menu
- Undo (Standard control bar or Ctrl+Z)
- Redo (Standard control bar or Ctrl+Y)
- Cut (Edit control bar or Ctrl+X)
- Copy (Edit control bar or Ctrl+C)
- Paste (Edit control bar or Ctrl+V)
- Paste in place (Ctrl+Shift+V)
- Paste Attributes (Ctrl+Shift+A)
- Delete (Edit & Standard control bars or Delete)
- Select All (Ctrl+A)
- Clear Selection (Esc)
- Duplicate (Edit control bar or Ctrl+D)
- Clone (Ctrl+K)
- Arrange menu
- Utilities menu
- Window menu
- Help menu
- The help system

Drag the corner handles.
Or select Size & rotation in the Editable Items menu. Type the required values into the text
boxes.
You can also nudge the values using the buttons to the right.
To move:
Drag the handle in the center of the polygon.
Or use the arrow keys on the keyboard.
Or select "Center" in the editable items" menu. Type the required X/Y values into the text
boxes.
Apply or remove rounded corners by clicking the round corners
button.
Change the polygon to an ellipse by clicking the create ellipse
button (ellipses are described later) or double clicking the polygon's
center.
Stellate the polygon (make it star-shaped) by clicking the starred
shapes
button (starred shapes are described later).
Drag the sides to make them curved. Move the pointer over the edge of the polygon (it changes to an
arrow shape). You can now drag the sides.
On the left are the original polygons. Just
drag on the sides to create curved sides.
"Ctrl + double click" on a side, or click the restore edges
button to make the sides straight again.
Change the number of sides by typing the number into the menu or
selecting from it.
Page 98