
User manual

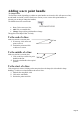
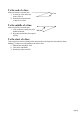
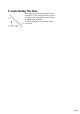

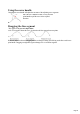
Table Of Contents
- Support
- More from MAGIX
- Welcome to MAGIX Xtreme Print Studio
- Short description
- Document handling
- Object Handling
- The Pen Tool
- Creating rectangles and squares
- Creating circles and ellipses
- Creating regular polygons (the Quickshape Tool)
- Color Handling
- Text Handling
- Printing
- Customizing
- Menus and Keyboard Shortcuts
- Introduction
- File menu
- Edit menu
- Undo (Standard control bar or Ctrl+Z)
- Redo (Standard control bar or Ctrl+Y)
- Cut (Edit control bar or Ctrl+X)
- Copy (Edit control bar or Ctrl+C)
- Paste (Edit control bar or Ctrl+V)
- Paste in place (Ctrl+Shift+V)
- Paste Attributes (Ctrl+Shift+A)
- Delete (Edit & Standard control bars or Delete)
- Select All (Ctrl+A)
- Clear Selection (Esc)
- Duplicate (Edit control bar or Ctrl+D)
- Clone (Ctrl+K)
- Arrange menu
- Utilities menu
- Window menu
- Help menu
- The help system

Adding a new point handle
The Shape Editor
Tool has three modes, depending on whether no point handles are selected (a click will start a new line),
an end handle is selected (a click will add a new section), or one or more other point handles are
selected (you can drag or change the handles).
The InfoBar shows the current mode.
New: Click to start a new line,
Add: Click to extend the line,
Change: Drag or delete point handles to change.
This applies to the Shape Editor Tool only.
To the end of a line:
Make sure the line is selected, then:
1.
If necessary, click on the end
point to select it.
2.
Position the pointer and click
to add a new section.
To the middle of a line:
Make sure the line is selected, then;
1.
Click on the line to add a new point
handle into the line
2.
Drag the point handle to the required
position.
To the start of a line:
If the end point is selected, clicking on the start point closes the shape (this is described in shape
handling). To add a new control handle to the start of a line:
1.
Finish the line using Shift+ click.
2.
Click on the start handle.
3.
Position the pointer and click.
Page 84