
User manual
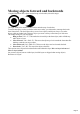


Table Of Contents
- Support
- More from MAGIX
- Welcome to MAGIX Xtreme Print Studio
- Short description
- Document handling
- Object Handling
- The Pen Tool
- Creating rectangles and squares
- Creating circles and ellipses
- Creating regular polygons (the Quickshape Tool)
- Color Handling
- Text Handling
- Printing
- Customizing
- Menus and Keyboard Shortcuts
- Introduction
- File menu
- Edit menu
- Undo (Standard control bar or Ctrl+Z)
- Redo (Standard control bar or Ctrl+Y)
- Cut (Edit control bar or Ctrl+X)
- Copy (Edit control bar or Ctrl+C)
- Paste (Edit control bar or Ctrl+V)
- Paste in place (Ctrl+Shift+V)
- Paste Attributes (Ctrl+Shift+A)
- Delete (Edit & Standard control bars or Delete)
- Select All (Ctrl+A)
- Clear Selection (Esc)
- Duplicate (Edit control bar or Ctrl+D)
- Clone (Ctrl+K)
- Arrange menu
- Utilities menu
- Window menu
- Help menu
- The help system

Scaling using the InfoBar
Type into the Scale Text boxes and press "
¿".
Scalings below 100% reduce the object. 50 halves the size of the object.
Scalings above 100% enlarge the object. 200 doubles the object size.
If Lock Aspect
is set, you can type into either text box to resize the object by the desired percentage. If this button is
unset, you can enter separate values for both the width and height.
Alternatively, type the required size of the object into the W or H text boxes. If the Lock Aspect
button is on, this scales the object and maintains the aspect ratio. You can enter the size in any unit, such
as 1 cm.
Scaling with the InfoBar buttons (or number boxes) always scales around the transformation center. You
can position this anywhere else in the object, as described in "Rotating objects
".
Page 69