
User manual
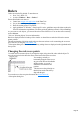
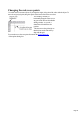
Table Of Contents
- Support
- More from MAGIX
- Welcome to MAGIX Xtreme Print Studio
- Short description
- Document handling
- Object Handling
- The Pen Tool
- Creating rectangles and squares
- Creating circles and ellipses
- Creating regular polygons (the Quickshape Tool)
- Color Handling
- Text Handling
- Printing
- Customizing
- Menus and Keyboard Shortcuts
- Introduction
- File menu
- Edit menu
- Undo (Standard control bar or Ctrl+Z)
- Redo (Standard control bar or Ctrl+Y)
- Cut (Edit control bar or Ctrl+X)
- Copy (Edit control bar or Ctrl+C)
- Paste (Edit control bar or Ctrl+V)
- Paste in place (Ctrl+Shift+V)
- Paste Attributes (Ctrl+Shift+A)
- Delete (Edit & Standard control bars or Delete)
- Select All (Ctrl+A)
- Clear Selection (Esc)
- Duplicate (Edit control bar or Ctrl+D)
- Clone (Ctrl+K)
- Arrange menu
- Utilities menu
- Window menu
- Help menu
- The help system

Rulers
Rulers are turned off by default. To turn them on:
Press "Ctrl + Shift + R".
Or select "Window -> Bars -> Rulers".
Xtreme Print Studio uses rulers to:
Control text margins, tabs and indents in the Text Tool.
Let you know which part of the page you are viewing;
Show the current pointer X/Y position;
Apply guidelines. If "Window -> Snap to grid" is active, guidelines snap to divisions on the ruler.
For more information on guidelines, refer to the guides & guidelines section in "Object Handling".
As you create or scale objects, you can use the rulers to check their size. You can also more accurately
use the Selector
Tool (see "Selecting objects" for more information).
Rulers are displayed at the left and top of the window. A dotted line on each ruler follows the current
pointer position.
The units and number of divisions on the rulers are the same as those set for customizing the on-screen
grid. These are set using the Grid & Ruler Tab
of the options dialog box. The current units and any scaling factor are displayed on the right hand end of
the top ruler.
Changing the ruler zero points
It is often easier to measure objects if you align the origin (0,0) point of the rulers with the object. To
move the origin (0,0) point, drag the square at the intersection of the two rulers.
You can drag vertically or
horizontally along the rulers or over
any part of the Xtreme Print Studio
editing window. As you do, a
dotted line will outline the new
position.
This also moves the grid origin so
that divisions on the ruler always
align with the grid.
You can also move the zero point from under the Grid & Ruler tab
of the options dialog box.
Page 28