
User manual
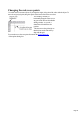
Table Of Contents
- Support
- More from MAGIX
- Welcome to MAGIX Xtreme Print Studio
- Short description
- Document handling
- Object Handling
- The Pen Tool
- Creating rectangles and squares
- Creating circles and ellipses
- Creating regular polygons (the Quickshape Tool)
- Color Handling
- Text Handling
- Printing
- Customizing
- Menus and Keyboard Shortcuts
- Introduction
- File menu
- Edit menu
- Undo (Standard control bar or Ctrl+Z)
- Redo (Standard control bar or Ctrl+Y)
- Cut (Edit control bar or Ctrl+X)
- Copy (Edit control bar or Ctrl+C)
- Paste (Edit control bar or Ctrl+V)
- Paste in place (Ctrl+Shift+V)
- Paste Attributes (Ctrl+Shift+A)
- Delete (Edit & Standard control bars or Delete)
- Select All (Ctrl+A)
- Clear Selection (Esc)
- Duplicate (Edit control bar or Ctrl+D)
- Clone (Ctrl+K)
- Arrange menu
- Utilities menu
- Window menu
- Help menu
- The help system

On-screen grid
To help you lay out your document, Xtreme Print Studio can display a grid on the screen (the grid
appears only on the screen; it is never printed.) The grid helps you align objects (similar to using graph
paper as a drawing aid).
Window -> Show Grid
("#") turns display of the grid on/off.
You can also choose "Window -> Snap to Grid"
. The grid points then act like magnets, and as you move objects, they snap to the nearest grid point.
Refer to the "Object Handling" for details of snapping.
The type of grid (isometric/rectangular), the 0,0 point (the origin), and spacing of grid points is controlled
by the Grid & Rulers tab
of the options dialog box. Any changes you make apply only to the selected document.
You can move the grid relative to the page by moving the rulers (0,0) point (described later).
Page 27