
User manual
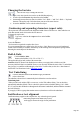
Table Of Contents
- Support
- More from MAGIX
- Welcome to MAGIX Xtreme Print Studio
- Short description
- Document handling
- Object Handling
- The Pen Tool
- Creating rectangles and squares
- Creating circles and ellipses
- Creating regular polygons (the Quickshape Tool)
- Color Handling
- Text Handling
- Printing
- Customizing
- Menus and Keyboard Shortcuts
- Introduction
- File menu
- Edit menu
- Undo (Standard control bar or Ctrl+Z)
- Redo (Standard control bar or Ctrl+Y)
- Cut (Edit control bar or Ctrl+X)
- Copy (Edit control bar or Ctrl+C)
- Paste (Edit control bar or Ctrl+V)
- Paste in place (Ctrl+Shift+V)
- Paste Attributes (Ctrl+Shift+A)
- Delete (Edit & Standard control bars or Delete)
- Select All (Ctrl+A)
- Clear Selection (Esc)
- Duplicate (Edit control bar or Ctrl+D)
- Clone (Ctrl+K)
- Arrange menu
- Utilities menu
- Window menu
- Help menu
- The help system

Condensing and expanding characters (aspect ratio)
The aspect ratio is the ratio between the height and width of the text. Ratios over 100% make the text
wider than normal; under 100% make the text narrower.
To change the aspect ratio:
Type a new value into the Aspect text box on the InfoBar
and press "
¿".
Or use the Selector
Tool to stretch or squash the complete line of text.
It is not recommended to use values below 80% or above 130%. Better to use a special condensed
variant of the font family if available. Alternatively use the tracking control to adjust the spacing without
distorting the actual shapes of the characters.
Bold & Italic
Click the Bold or Italic
button on the InfoBar ("Ctrl + B" or "Ctrl + I")
This applies the bold or italic variant of the current font.
Attention: MAGIX Xtreme Print Studio does not allow you to apply italic or bold to text if the
necessary italic/bold font is not installed. However you can easily emulate the same effect. To embolden a
font, just give it a small line width and apply a line color. To slant a font, use the skew / slant feature of
the Selector Tool. Read more in the "Font menu" section
Text Underlining
Click the underline button on the InfoBar to apply an underline
to the selected text.
The underline color and size is automatically derived from the text color and size.
Underlining links
When you add a web address URL to some text, see the Web address dialog. You can decide to
automatically underline all links. This is a check box option on the web address dialog ("Ctrl + Shift +
W"). If you select this all linked text throughout the document is underlined, and the underline command
does not affect this.
If you apply a URL to a group that contains some text, then the text will not be underlined.
Justification or text alignment
Justification always applies to the complete line. Any selected region is ignored.
When using simple text the initial click position
on the page is taken as the origin for text justification.
Left
justification: Align the left-hand edge of the text to the initial click position.
Center
justification: Centers the text around the click position.
Right
justification: Align the right-hand edge of the text to the initial click position.
Full
justification: This only applies when text is along a curve or in a column and when there is at least one full
line of text to justify.
Page 170