
User manual


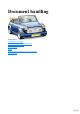
Table Of Contents
- Support
- More from MAGIX
- Welcome to MAGIX Xtreme Print Studio
- Short description
- Document handling
- Object Handling
- The Pen Tool
- Creating rectangles and squares
- Creating circles and ellipses
- Creating regular polygons (the Quickshape Tool)
- Color Handling
- Text Handling
- Printing
- Customizing
- Menus and Keyboard Shortcuts
- Introduction
- File menu
- Edit menu
- Undo (Standard control bar or Ctrl+Z)
- Redo (Standard control bar or Ctrl+Y)
- Cut (Edit control bar or Ctrl+X)
- Copy (Edit control bar or Ctrl+C)
- Paste (Edit control bar or Ctrl+V)
- Paste in place (Ctrl+Shift+V)
- Paste Attributes (Ctrl+Shift+A)
- Delete (Edit & Standard control bars or Delete)
- Select All (Ctrl+A)
- Clear Selection (Esc)
- Duplicate (Edit control bar or Ctrl+D)
- Clone (Ctrl+K)
- Arrange menu
- Utilities menu
- Window menu
- Help menu
- The help system

Entering text
In the Text
Tool if you click and drag diagonally on the page you will create a rectangular text area. The blinking
cursor will be positioned in the top left corner and you can type or paste text.
A text area can contain a "flowing" text story. A text story refers to a single piece of text, flowing from
one text area to another. It's called flowing text because, like water, as you add or remove text in one
area it overflows into connected text areas or flows back from text areas.
If the text overflows the bottom of the text area the overflowing text is shown gray, although you can
continue to edit this text as usual.
If text extends past the bottom of the text area, an overflow indicator is shown on the bottom of the area.
If you drag this over any other text area, the overflow text will flow into the new text area, and the two
areas become connected.
Page 17