
User manual

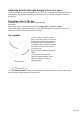
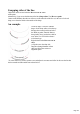
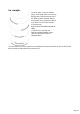
Table Of Contents
- Support
- More from MAGIX
- Welcome to MAGIX Xtreme Print Studio
- Short description
- Document handling
- Object Handling
- The Pen Tool
- Creating rectangles and squares
- Creating circles and ellipses
- Creating regular polygons (the Quickshape Tool)
- Color Handling
- Text Handling
- Printing
- Customizing
- Menus and Keyboard Shortcuts
- Introduction
- File menu
- Edit menu
- Undo (Standard control bar or Ctrl+Z)
- Redo (Standard control bar or Ctrl+Y)
- Cut (Edit control bar or Ctrl+X)
- Copy (Edit control bar or Ctrl+C)
- Paste (Edit control bar or Ctrl+V)
- Paste in place (Ctrl+Shift+V)
- Paste Attributes (Ctrl+Shift+A)
- Delete (Edit & Standard control bars or Delete)
- Select All (Ctrl+A)
- Clear Selection (Esc)
- Duplicate (Edit control bar or Ctrl+D)
- Clone (Ctrl+K)
- Arrange menu
- Utilities menu
- Window menu
- Help menu
- The help system

Text along a curve
To place text along a curve of your choice:
1.
Create either basic text,
text in a column or a text
area (see above).
2.
Select your text object and
one curve.
3.
Choose Arrange -> Fit
text to curve.
Alternatively, select a curve or line and then in the Text
Tool, click on the line, where you want the text to start, and type. This automatically fits the text along
the line. When you reach the end of the line the text will wrap onto a new line, immediately below the
start of the previous one.
If you do not want the text to wrap to a new line, "Shift+ click" on the line.
To hide the curve so it's not visible, select the Shape editor Tool and set the line color to No color or a
width of None
. You can also edit the curve as usual this way.
You can't fit text directly onto an ellipse, quickshape, or rectangle object. First select the Arrange ->
Convert to editable shapes
("Ctrl + Shift +S").
Applying color is described in Color handling
.
Adjusting the left and right margin of text on a curve
If you just start typing or place a column of text on a curve, you can change the start and end position of
the red handles. Just drag them along the curve as required. If you center text it will be between these
two margins.
Swapping sides of the line
Right click on the text and select the Reverse text on curve
menu option.
Alternatively, if you reverse the direction of the line (Shape editor Tool, Reverse paths
button on the InfoBar), then the text will move to the other side of the line or, in the case of a closed
shape, move from the inside to the outside of the shape.
An example
Page 133