Support If you experience any problems with your software, please get in touch with our support team: Support website: http://support.magix.net This website will lead you to the MAGIX user service page, which, among other things, contains the following free offers: FAQs (frequently asked questions) and general tricks and tips. In most cases you'll find the solution to your problem here. If not, use the Email support form: E-mail support form.
More from MAGIX In January 2007 Xara was acquired by MAGIX AG, Xara now operates as a wholly owned subsidiary. MAGIX AG holds the leading market position for the distribution of photo, music and video software in key European markets, as well as being one of the three leading market players in the USA. Xara customers are already benefiting from MAGIX considerable distribution experience and resources. MAGIX online Visit us at www.magix.com .
MAGIX online Visit us at www.magix.com . Here you will find everything you need to know about MAGIX products and any current special offers that may be available. MAGIX Online Album MAGIX Online Print Service Catooh MAGIX Community Support Current news & information and much more. It's worth a visit... Hint: You can register your product with your product registration number at www.magix.com MAGIX Premium Club Our exclusive club for all MAGIX customers who own a registered product.
MAGIX Premium Club Our exclusive club for all MAGIX customers who own a registered product. MAGIX Premium Club members have access to a wide range of services: Free product updates and services Exclusive club events and surprises News and info about the club and much more... Membership is free. You can find more information about this topic on www.magix.
Welcome to MAGIX Xtreme Print Studio Welcome to MAGIX Xtreme Print Studio the ideal program for one-of-a-kind CD/DVD cases and labels. It's great for designing and printing labels, covers, inlays, and booklets quickly and easily. Even complete track listings, shapes, and lines can be added.
Short description To create a cover for a disc quickly, proceed as follows: Select the type of project or format Add and design images, text, and graphics. Print covers, labels, and inlays.
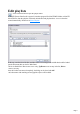
Edit playlists Please click this button to open the playlist editor. If MAGIX Xtreme Print Studio is opened via another program like MAGIX MP3 Maker or MAGIX Movie Edit Pro, then the playlists will already include titles and play durations. A cover is therefore created automatically. Read more in Select template . At the top, enter the title of the disc, and then select a cover image in the middle that should be loaded into the document (this can also be added later).
Select template Now select a template for your cover from the list. A new document will be created based on the selected template. If you select another template later or make changes to the playlist via the playlist editor, a new document will be created. For this reason, make sure that the playlist entries are correct and that you have selected the correct template before you start to add creative work to the cover.
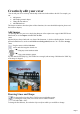
Creatively edit your cover You can edit your cover creatively with the help of the tools in the toolbar to the left.
Type a new line width into the text box on the standard toolbar or choose a default line thickness from the menu. You can create a closed shape by ending a line back at its start point. A "+" beside the mouse pointer indicates that it is positioned over the start handle. Lines and closed shapes can be edited retroactively. Use the square and circle tools to create these shapes as frames for text areas or images . With the "Quickshape" tool, you can create other polygons and stars.
Page 11
Add images To add image files for your cover, simply drag them out of the explorer onto a page in MAGIX Xtreme Print Studio, or use the Import command from the File menu. Imported objects always land at the very front of the document, i.e. before available playlists. In order to put them behind the text, use the command Move to background (shortcut: Ctrl + B) in the Arrange menu. Drag the corners with the Selection tool to make the image the desired size. Tip: You can also fill a shape (e.g.
text areas or images . With the "Quickshape" tool, you can create other polygons and stars. More about this in the reference section. Edit text A text field is an object like an image or graphic and therefore cannot be freely enlarged or diminished with the selection tool. To edit text directly, switch to the text tool. Next, click the text object, and you will be able to edit the text like normal.
Drawing Lines and Shape Use the pencil tool to draw lines. Click for a new straight line section; if you drag the corner points, curved lines will be created. Finish the line with "Shift + click". To change the line thickness, first select the object or objects which you would like to change: Type a new line width into the text box on the standard toolbar or choose a default line thickness from the menu. You can create a closed shape by ending a line back at its start point.
area it overflows into connected text areas or flows back from text areas. If the text overflows the bottom of the text area the overflowing text is shown gray, although you can continue to edit this text as usual. If text extends past the bottom of the text area, an overflow indicator is shown on the bottom of the area. If you drag this over any other text area, the overflow text will flow into the new text area, and the two areas become connected.
Edit text A text field is an object like an image or graphic and therefore cannot be freely enlarged or diminished with the selection tool. To edit text directly, switch to the text tool. Next, click the text object, and you will be able to edit the text like normal. To change properties of the text like font or size, click with the text tool in a text field and then press the "Esc" key. The text field is now completely selected, which can be recognized by the small selection marker to the top-left.
Entering text In the Text Tool if you click and drag diagonally on the page you will create a rectangular text area. The blinking cursor will be positioned in the top left corner and you can type or paste text. A text area can contain a "flowing" text story. A text story refers to a single piece of text, flowing from one text area to another. It's called flowing text because, like water, as you add or remove text in one area it overflows into connected text areas or flows back from text areas.
Printing Use the Print button in the Standard toolbar to print out your finished cover.
Document handling In this chapter Changing the zoom value Sliding the document within the window Normal/full screen modes On-screen grid Rulers Decimal point & thousands separator characters The clipboard Page 19
Changing the zoom value It's often useful to enlarge your view of the document to examine details or reduce your view to get an overall impression. Scalings above 100% show an enlarged view (similar to looking through a magnifying glass); below 100% a reduced view. The only change is your view of the document; the size of the document itself and the objects in it are unchanged (changing the document size is described later). To change the zoom value you can use either the Zoom Tool , mouse, or control bars.
Shortcut "Ctrl + Shift+ Z". Click the Zoom to Selection button. The selected object or objects fill the window. Type a value into the text box. Press " ¿" to implement the change, or select preset zoom values including those above (page, drawing, selected, previous) in the dropdown menu.
Using the Zoom tool To zoom: Select the Zoom Tool from the Main Toolbar. Or press "Alt + Z" to toggle between the current tool and the Zoom Tool. Or press and hold down "Alt + Z" to temporarily swap to the Zoom Tool (release "Alt + Z" to return to the previous tool). Or press "Shift+ F7" to select the Zoom Tool. Changing the zoom value using the mouse If you have a mouse wheel: Hold "Ctrl" and scroll your mouse wheel to change the zoom level.
Changing the zoom value using the mouse If you have a mouse wheel: Hold "Ctrl" and scroll your mouse wheel to change the zoom level. You can also configure a mouse button to zoom in or out. Furthermore, you can change the mouse wheel action between scrolling and zooming in "Utilities > Options > Mouse tab" . The opposite action is available then by pressing "Ctrl". Alternatively, select the Zoom Tool, and Click to zoom in (enlarge).
Changing the zoom using the zoom InfoBar/control bar To change the zoom: Shortcut "Ctrl + R". Click the Previous zoom button. This is the zoom value before the current setting. Using this button lets you flip zoom in and out on the document. This is useful for switching between examining an area in detail and an overall view. The previous zoom value is stored for each window. You can swap between windows and the previous zoom values are retained. Shortcut "Ctrl + Shift+ J". Click the Zoom to drawing button.
Sliding the document within the window The quickest and easiest way to move around the document is to use the middle mouse button (normally the mouse wheel) if you have one. Click and hold the middle button down and then move the mouse. Release the button to return to your previous tool. To move the document within the window you can also: Use the scroll bars and arrows at the side of the window.
Normal/full screen modes In normal screen mode part of the window is occupied by the title bar, menu bar, and scroll bars. This can be inconvenient if you want the maximum possible editing area. Xtreme Print Studio has a second screen mode, i.e.fullscreen, which displays a more streamlined screen. You can configure each screen mode as you wish. For example, each can have its own configuration of the control bars. The configuration is remembered and applies whenever you swap between screen modes.
On-screen grid To help you lay out your document, Xtreme Print Studio can display a grid on the screen (the grid appears only on the screen; it is never printed.) The grid helps you align objects (similar to using graph paper as a drawing aid). Window -> Show Grid ("#") turns display of the grid on/off. You can also choose "Window -> Snap to Grid" . The grid points then act like magnets, and as you move objects, they snap to the nearest grid point. Refer to the "Object Handling" for details of snapping.
Rulers Rulers are turned off by default. To turn them on: Press "Ctrl + Shift + R". Or select "Window -> Bars -> Rulers". Xtreme Print Studio uses rulers to: Control text margins, tabs and indents in the Text Tool. Let you know which part of the page you are viewing; Show the current pointer X/Y position; Apply guidelines. If "Window -> Snap to grid" is active, guidelines snap to divisions on the ruler.
Changing the ruler zero points It is often easier to measure objects if you align the origin (0,0) point of the rulers with the object. To move the origin (0,0) point, drag the square at the intersection of the two rulers. You can drag vertically or horizontally along the rulers or over any part of the Xtreme Print Studio editing window. As you do, a dotted line will outline the new position. This also moves the grid origin so that divisions on the ruler always align with the grid.
Decimal point & thousands separator characters The characters used as a decimal point (1.23) and as a thousands separator (1,000) are those set in the Windows Control Panel. (In Windows XP, the relevant section is the "Regional and Language options".) Similarly, the number of digits following the decimal point is also set in "Regional and Language options".
The clipboard This is a temporary store and is used like a physical clipboard. You can cut or copy part or all of your drawing onto the clipboard. You can then transfer the clipboard contents to another part of the same document or to another document or application. The clipboard can only hold one item or one set of items at a time. Placing something on it overwrites any existing contents. Objects remain on the clipboard until deleted or overwritten by either Xtreme Print Studio or another application.
Object Handling In this chapter The constrain key Undo and Redo Selector tool Moving objects Removing objects from the document Duplicating and cloning Moving objects forward and backwards Scaling (resizing) objects Rotating objects Flipping objects Stretching and squashing objects Skewing objects Create a guideline Page 32
The constrain key The "Ctrl" key has a special function in Xtreme Print Studio. It constrains the action of the current operation in some way. For example, normally you can rotate an object to any angle. But in Xtreme Print Studio, if you hold down "Ctrl" while you rotate an object, and the rotation is constrained to preset angles. The black line on the left can be rotated to any angle within the circle.
Undo and Redo In this chapter What are undo and redo? The undo command The redo command Changing the size of the undo list Page 34
What are undo and redo? We all make mistakes or change our minds. Xtreme Print Studio makes it easy to correct mistakes or cancel unwanted changes. Also, illustrations lend themselves to experimentation. Every action you make is recorded in an undo list which lets you undo not just the last operation, but also to step back by undoing successive operations. In this way, you can experiment freely knowing that you can always remove anything that doesn't look correct.
The undo command "Undo " cancels the effects of the last operation. To undo an operation: Click Undo on the Standard control bar. Or choose "Edit -> Undo" (the exact wording tells you what the next undo step is, i.e. undo scale). Or press "Ctrl + Z". Or press the comma key (in any tool except the Text Tool). You can repeat the undo command to step back through the sequence of previous operations.
The redo command Redo cancels the last undo command. To redo the last operation: Click the Redo button on the Standard control bar. Or choose "Edit -> Redo" (the exact wording tells you what the next redo step is, i.e. redo scale). Or press "Ctrl + Y". Or press the period (full stop) key (in any tool except the Text Tool). You can only redo immediately after undo. You cannot redo after changing the document (for example, by moving or adding an object).
Changing the size of the undo list By default the size of the undo list is limited by the available memory only, and with Xtreme Print Studio being very efficient and today's computers having plenty of RAM you shouldn't run into any problems. However, if you still wish to limit the memory your undo list can take, you can limit the list size. To limit the list size: 1. 2. 3. 4. Choose "Utilities -> Options". Select the "Tune ups" tab. Select a "Limited" undo size.
Selector tool The selection tool is the main tool for selecting, moving, scaling and rotating objects. To use the Selector tool: Click on the Selector tool on the main toolbar, or press "Alt + S", "V", or "F2". Because the Selector Tool is the most used tool, there is an additional shortcut that lets you switch to the Selector Tool to perform a selection or other operation, and quickly switch back to the previous tool.
Selecting objects To select a single object, click on any visible part of the object. Marquee selection To select multiple objects, press and hold down the mouse button. Dragging the mouse draws a selection rectangle, all objects wholly within the selection rectangle are selected. Some other drawing programs call this marquee selection.
Marquee selection To select multiple objects, press and hold down the mouse button. Dragging the mouse draws a selection rectangle, all objects wholly within the selection rectangle are selected. Some other drawing programs call this marquee selection. If you have an object in the way which is preventing you from drawing a rectangle because you end up moving the object, hold down "Shift" while dragging out the selection rectangle.
Extend Selection To select additional objects: Shift+ click on them. Or Shift+ drag the mouse. This draws a selection rectangle and adds objects within the rectangle to the selection. Select under Tutorial movie : Hold down "Alt" to select objects hidden by other objects. By "Alt + clicking" you can step through several overlapping objects.
Select under Tutorial movie : Hold down "Alt" to select objects hidden by other objects. By "Alt + clicking" you can step through several overlapping objects.
Selecting all objects To select all objects: Choose "Edit -> Select all", Or press "Ctrl + A".
Deselecting an object To deselect all objects: Click anywhere on an unused part of the document, Or choose "Edit -> Clear selection", Or press "Esc". To deselect one object from several: Shift+ click on the object. This deselects that object. Other objects remain selected. Selection bounds handles Selection bounds handles let you scale and stretch selected objects see Stretching and squashing objects for more details.
Selection bounds handles Selection bounds handles let you scale and stretch selected objects see Stretching and squashing objects for more details. Successive clicks on an object alternate between showing selection bounds and rotation handles. Tab With any selected object, pressing "Tab" and "Shift+ Tab" will move through the selected objects (previous and next object in the document).
Tab With any selected object, pressing "Tab" and "Shift+ Tab" will move through the selected objects (previous and next object in the document).
Moving objects To slide an object across the page 1. Choose the Selector Tool. 2. Drag the object to the required position. Hold down "Ctrl" to restrict the direction of movement to one of the constrain angles. The constrain angles are user definable. Refer to "Customizing Xtreme Print Studio " Hold down "Ctrl + Alt" and you can drag the selected object even if the pointer is not over it. This is useful when the selected object is hidden behind another object or part of a group.
Cut, copy and paste These let you move or copy an object in the same document or between different documents. The procedure is: 1. Select the object. 2. To remove the object, choose "Edit -> Cut" (or "Ctrl + X"). To copy the object but not remove it, choose "Edit -> Copy" (or "Ctrl + C"). Either option puts the object (or a copy of it) onto the clipboard. 3. Choose "Edit -> Paste", "Ctrl + V", or "Insert".
Drop copy During a move (and while still holding the left mouse button down) click the right mouse button or press + on the numeric keypad to drop a copy of the object. The original object doesn't move. You can do this as many times as you wish to create a series of duplicated objects. You can also hold down the right mouse button and drag a copy of the object. Left click to leave a copy at the current mouse position.
from other programs are always pasted into the center of the current view. The object remains on the clipboard so you can paste the same object several times. Some programs can transfer data on the clipboard in two or more formats. If this applies, the menu option reads Paste Special . Selecting it brings up a dialog box that lets you select a format. Xtreme Print Studio automatically highlights the recommended format.
Fills Usually, moving an object also moves the fill with it: Normal move left to right with a linear filled object. This also applies to rotating, skewing, scaling and stretching objects. Xtreme Print Studio can also move the object but not the fill origin. To do this click the "-" key on the numeric keypad during the move. The same move, but pressing "-" (minus) during the drag.
Nudging objects Usually you can move an object a small amount by using the arrow?keys to nudge the object (these keys sometimes have other uses, especially in the Text Tool). Nudging is not affected by either magnetic or grid snapping (snapping is described later).
Cut, copy and paste These let you move or copy an object in the same document or between different documents. The procedure is: 1. Select the object. 2. To remove the object, choose "Edit -> Cut" (or "Ctrl + X"). To copy the object but not remove it, choose "Edit -> Copy" (or "Ctrl + C"). Either option puts the object (or a copy of it) onto the clipboard. 3. Choose "Edit -> Paste", "Ctrl + V", or "Insert".
Removing objects from the document First select the objects you want to remove. You can then either cut the objects to the clipboard or delete them. Cutting objects Choose "Edit -> Cut", or press "Ctrl + X". The advantage is that you can paste them into a different place or layer. The disadvantage is that the existing contents of the clipboard are overwritten. Deleting objects Choose "Edit -> Delete", or press "Delete", or click the delete button on the Standard control bar.
Cutting objects Choose "Edit -> Cut", or press "Ctrl + X". The advantage is that you can paste them into a different place or layer. The disadvantage is that the existing contents of the clipboard are overwritten. Deleting objects Choose "Edit -> Delete", or press "Delete", or click the delete button on the Standard control bar. The advantage is that no copy is stored, so the clipboard contents are preserved. If you accidentally delete an object, undo retrieves it.
Deleting objects Choose "Edit -> Delete", or press "Delete", or click the delete button on the Standard control bar. The advantage is that no copy is stored, so the clipboard contents are preserved. If you accidentally delete an object, undo retrieves it.
Duplicating and cloning Both these options create a copy of the selected object. The original object is deselected and the duplicate or clone becomes the selected object. You can also duplicate an object during moving, rotating, scaling, or skewing. During the drag action (and while still holding the left mouse button down) click the right mouse button or press "+" on the numeric keypad to drop a copy of the object. The original object doesn't move.
Duplicating Choose "Edit -> Duplicate", or press "Ctrl + D". The copy is displaced slightly, usually down and to the right, from the original. The duplicate distance is user definable, see "Customizing Xtreme Print Studio" Cloning Choose "Edit -> Clone", or press "Ctrl + K". The places a copy exactly on top of the original. Cloning is an easy way to create concentric shapes.
Cloning Choose "Edit -> Clone", or press "Ctrl + K". The places a copy exactly on top of the original. Cloning is an easy way to create concentric shapes. This example uses an original large letter "A" with a black fill and a 4pt thick white outline and a clone with no fill and a 1pt black line.
Moving objects forward and backwards Complex illustrations have objects stacked on top of each other, such as this target: The target on the left is made from three circles stacked on top of each other. To ensure that objects overlay each other in the correct order, you often need to rearrange their order from front to back. The front object always covers lower objects, and objects always cover other objects which are further back. Each new object you create is always created on top of older ones.
Scaling (resizing) objects This is part of the Selector Tool. Scale Line Widths button With the scale line widths button set, scaling an object also scales its line widths. With this button unset, line widths remain unchanged. You can toggle this button during drags by clicking "/" on the numeric keypad. When active, the X/Y width & height values in the InfoBar include the width of the outline or brush.
Type into the Scale Text boxes and press " ¿". Scalings below 100% reduce the object. 50 halves the size of the object. Scalings above 100% enlarge the object. 200 doubles the object size. If Lock Aspect is set, you can type into either text box to resize the object by the desired percentage. If this button is unset, you can enter separate values for both the width and height. Alternatively, type the required size of the object into the W or H text boxes.
Scale Line Widths button With the scale line widths button set, scaling an object also scales its line widths. With this button unset, line widths remain unchanged. You can toggle this button during drags by clicking "/" on the numeric keypad. When active, the X/Y width & height values in the InfoBar include the width of the outline or brush. It's sometimes useful to be able to see and control the exact size of the shape ignoring the line thickness.
Scalings above 100% enlarge the object. 200 doubles the object size. If Lock Aspect is set, you can type into either text box to resize the object by the desired percentage. If this button is unset, you can enter separate values for both the width and height. Alternatively, type the required size of the object into the W or H text boxes. If the Lock Aspect button is on, this scales the object and maintains the aspect ratio. You can enter the size in any unit, such as 1 cm.
Lock Aspect button With the lock aspect button set, the width/height aspect ratio remains constant as you scale the object. In other words, the shape remains in the same proportions as the original. It's recommended that this button remains selected most of the time in order to ensure that when you resize objects they do not become squashed.
".
Scaling using the mouse The Selector Tool must be in scale mode (the selection bounds handles are squares). If necessary, click on the object to change to scale mode. Drag one of the corner handles. The object scales as you move the pointer diagonally. The InfoBar shows the current scaling. The object will scale between the dragged handle and the opposite one. This point of the object is kept in place, while every other move when scaling to the new size.
Scaling using the InfoBar Type into the Scale Text boxes and press " ¿". Scalings below 100% reduce the object. 50 halves the size of the object. Scalings above 100% enlarge the object. 200 doubles the object size. If Lock Aspect is set, you can type into either text box to resize the object by the desired percentage. If this button is unset, you can enter separate values for both the width and height. Alternatively, type the required size of the object into the W or H text boxes.
Rotating objects This is part of the Selector Tool. When in rotate mode, the transformation center (around which the object rotates) initially appears in the center of the object, as shown by a small target like this. Simply click on a object again to put the selector into rotate mode, or click the rotation handles button on the InfoBar. To move the transformation center: Drag the transformation center target where required. Or use the 3x3 matrix on the InfoBar for accurate positioning.
Rotating objects in Resize Mode It is possible to rotate and skew an object even if not in rotate mode. Using resize mode, move the mouse pointer into the according small areas near the selection area handles as illustrated above. The mouse pointer changes into a rotate or skew icon, showing you that you are now able to rotate or skew the object by dragging with the mouse.
Rotating using the mouse The Selector Tool must be in rotate/skew mode (the selection handles are arrow shaped). Dragging the side handles stretches the object. This is described in Stretching and squashing objects . Drag on a corner arrow. As you drag, the object rotates around the transformation center. The InfoBar shows the current rotate angle. "Shift+ drag" to rotate the object around its center (the transformation center is ignored). Hold down "Ctrl" to restrict rotation to the constrain angles.
Rotating by exact angles (using the InfoBar) Type an angle into the rotate box and press " ¿". Positive angles rotate anti-clockwise and negative angles rotate clockwise. Click the arrows to the right to nudge the rotate angle. Rotating objects in Resize Mode It is possible to rotate and skew an object even if not in rotate mode. Using resize mode, move the mouse pointer into the according small areas near the selection area handles as illustrated above.
Rotating objects in Resize Mode It is possible to rotate and skew an object even if not in rotate mode. Using resize mode, move the mouse pointer into the according small areas near the selection area handles as illustrated above. The mouse pointer changes into a rotate or skew icon, showing you that you are now able to rotate or skew the object by dragging with the mouse.
Flipping objects This is part of the Selector Tool. Clicking on the Flip buttons flips the object vertically or horizontally around the transformation center. The scale and aspect ratio do not change; the object just flips.
Stretching and squashing objects This is similar to scaling objects (described in Chapter 7: Object handling) except that the object is scaled in one direction only. Stretching and squashing are basically the same action — stretching makes the object larger, squashing makes it smaller. Stretching/Squashing using the mouse The Selector Tool must be in scale mode. (The selection handles are squares.) If necessary, click on the object to change to scale mode. Drag one of the side handles.
Skewing objects This is part of the Selector Tool. Left is the original object, to the right with a horizontal skew Skewing using the mouse Switch the Selector Tool to rotate/skew mode. (The selection handles are arrow shaped) by clicking on the object. Drag a side arrow to skew the object. As you drag, the object skews in the direction of movement (vertical or horizontal). The InfoBar shows the current skew angle. "Shift+ drag" to skew the object around its center.
Create a guideline Guidelines are vertical or horizontal lines and are a quick and easy way to align a series of objects on the page. To create guidelines: Select Display ruler (shortcut: Ctrl + L) Drag the ruler onto the page. or: Double click the ruler to create a guideline aligned to the click point. Deleting a guideline Using the Selector Tool drag the guideline onto the appropriate ruler (the vertical ruler for vertical guidelines, horizontal ruler for horizontal).
Deleting a guideline Using the Selector Tool drag the guideline onto the appropriate ruler (the vertical ruler for vertical guidelines, horizontal ruler for horizontal). Or, right click on the guideline and then "Delete".
The Pen Tool The Pen Tool has limited functionality. It is included for compatibility with other packages that have a similar tool, although some users prefer this way of creating lines and curves. Drawing a straight line: Click to create point handles. Drawing a curved line: Move the pointer to where you want the point handle. Click and drag the pointer away from the point handle. As you drag a curve is created to this point and two curve handles appear. These control the angle and radius of the curve.
Extending the line Make sure an end point handle is the selected handle (red outline) and then just click again to add a new line or curve section. Each successive click places a new point handle and draws a new line segment to the selected point handle. Applies to the shape editor and pen tools.
Finishing the line Shift+ click completes the line (keeps it selected), or press "Esc" to finish the line and de-select it. After this, additional clicks will start a new line. This applies also to shape editor and pen tools.
Changing the line width (thickness) To change the line thickness or the outline thickness of a shape, first select the object or objects: Type a new line width into the text box on the standard control bar or choose the default line thickness from the menu. Line thickness is traditionally measured in points, abbreviated to pt. 1 point is 1/72nd of an inch (about 0.3mm), which is slightly less than the thickness of one screen pixel when viewed at 100% zoom.
Adding a new point handle The Shape Editor Tool has three modes, depending on whether no point handles are selected (a click will start a new line), an end handle is selected (a click will add a new section), or one or more other point handles are selected (you can drag or change the handles). The InfoBar shows the current mode. New: Click to start a new line, Add: Click to extend the line, Change: Drag or delete point handles to change. This applies to the Shape Editor Tool only.
To the end of a line: Make sure the line is selected, then: 1. If necessary, click on the end point to select it. 2. Position the pointer and click to add a new section. To the middle of a line: Make sure the line is selected, then; 1. Click on the line to add a new point handle into the line 2. Drag the point handle to the required position. To the start of a line: If the end point is selected, clicking on the start point closes the shape (this is described in shape handling).
To the middle of a line: Make sure the line is selected, then; 1. Click on the line to add a new point handle into the line 2. Drag the point handle to the required position. To the start of a line: If the end point is selected, clicking on the start point closes the shape (this is described in shape handling). To add a new control handle to the start of a line: 1. Finish the line using Shift+ click. 2. Click on the start handle. 3. Position the pointer and click.
To the start of a line: If the end point is selected, clicking on the start point closes the shape (this is described in shape handling). To add a new control handle to the start of a line: 1. Finish the line using Shift+ click. 2. Click on the start handle. 3. Position the pointer and click.
Constraining the line When dragging a point handle, holding down the constrain key ("Ctrl") will constrain the movement to multiples of the constrain angle (controlled from the options dialog, general tab). When dragging a curve handle the angle is constrained.
Changing curves Using the curve handle Dragging the curve handle will adjust the curvature of the adjoining curve segments. Move the curve handle towards or away from the point handle to pull the curve in the required direction. Dragging the line segment This applies to the pen and shape editor tools. You can also change the curve by dragging the line segment between points. Notice the difference between dragging the line to change its shape, and clicking on the line to add a new point handle.
Using the curve handle Dragging the curve handle will adjust the curvature of the adjoining curve segments. Move the curve handle towards or away from the point handle to pull the curve in the required direction. Dragging the line segment This applies to the pen and shape editor tools. You can also change the curve by dragging the line segment between points. Notice the difference between dragging the line to change its shape, and clicking on the line to add a new point handle.
Dragging the line segment This applies to the pen and shape editor tools. You can also change the curve by dragging the line segment between points. Notice the difference between dragging the line to change its shape, and clicking on the line to add a new point handle. Dragging a straight line segment changes it to a curved line segment.
Creating rectangles and squares To create a rectangle: Use the Quickshape Tool (described above). Or use the Rectangle Tool ("Shift+ F3", or "M"). This is a simplified version of the Quickshape Tool with only options relevant to rectangles and squares. Creating a square To create a square rather than a rectangle, hold down "Ctrl" while dragging.
Creating a square To create a square rather than a rectangle, hold down "Ctrl" while dragging. Editing rounded corner rectangles There is one special difference when using the Rectangle Tool: Normally, if you create a rectangle with rounded corners, the corners are perfect segments of a circle. If a rectangle is now resized with the Selector Tool so that the aspect ratio is changed, the corners are not circular any more.
Editing rounded corner rectangles There is one special difference when using the Rectangle Tool: Normally, if you create a rectangle with rounded corners, the corners are perfect segments of a circle. If a rectangle is now resized with the Selector Tool so that the aspect ratio is changed, the corners are not circular any more. In the Rectangle Tool, rounded corner rectangles can be resized (including aspect ratio changes) while maintaining the circular corners.
Creating circles and ellipses To create an ellipse or circle: Select Quickshape Tool and select the Create Ellipses button. Or select the Ellipse Tool ("Shift+ F4", or "L"). This is a simplified version of the Quickshape Tool with only options relevant to ellipses and circles. Creating a circle The radius and diameter buttons automatically create circles. With the bounds creation button selected, hold down "Ctrl" while dragging to create a circle rather than an ellipse.
Creating a circle The radius and diameter buttons automatically create circles. With the bounds creation button selected, hold down "Ctrl" while dragging to create a circle rather than an ellipse. You can revert an ellipse into a circle at any time by double clicking on a control handle of an ellipse.
Creating regular polygons (the Quickshape Tool) The Quickshape Tool lets you quickly create almost any regular, symmetrical shape with sharp or rounded corners. You can then drag the edges to bend the sides, and at any time you can change the number of sides or make the object an ellipse, a polygon, or a star. 1. Select the Quickshape Tool ("Shift + F2"). 2. Select Polygon. 3. Select the number of sides either from the menu, or by typing into the text box.
Drag the corner handles. Or select Size & rotation in the Editable Items menu. Type the required values into the text boxes. You can also nudge the values using the buttons to the right. To move: Drag the handle in the center of the polygon. Or use the arrow keys on the keyboard. Or select "Center" in the editable items" menu. Type the required X/Y values into the text boxes. Apply or remove rounded corners by clicking the round corners button.
Polygons with rounded corners Select the Round corners button or double click on a corner point. The polygon has extra handles (radius handles) where the rounding starts. To increase or decrease the radius, drag any of the radius handles. To remove the round corners: Click the Round corners button. Or double click a control handle. Editing a polygon The Selector Tool lets you move, rotate, resize, and skew a polygon as normal (the Selector Tool is described in Object handling .
Change the number of sides by typing the number into the menu or selecting from it.
Editing a polygon The Selector Tool lets you move, rotate, resize, and skew a polygon as normal (the Selector Tool is described in Object handling .) Using the Quickshape Tool, you can resize or rotate: Drag the corner handles. Or select Size & rotation in the Editable Items menu. Type the required values into the text boxes. You can also nudge the values using the buttons to the right. To move: Drag the handle in the center of the polygon. Or use the arrow keys on the keyboard.
Creating stars (polygons with indented sides) Select the Quickshape Tool. To create a star or to make the selected polygon stellated: Stellated/stellation = star shaped. Select the Starred Shapes button . Or double click on a side. Left: polygon with starred off. Right : starred on. Removing stellation Click the starred shapes button. Or double click on the star handle. Note : double click on the star handle, not the control handle.
Removing stellation Click the starred shapes button. Or double click on the star handle. Note : double click on the star handle, not the control handle.
Editing stars You can edit stars in the same ways as ordinary polygons (described earlier). To increase or decrease the depth of stellation: Drag a star handle or select stellation radius & offset on the editable items menu. Type the required values into the text The original shape is on the left. boxes. Or drag the sides to make them curved: The original shape is on the left. You can also nudge the values using the buttons to the right. "Ctrl + drag" one side of a star moves all the sides symmetrically.
Color Handling MAGIX Xtreme Print Studio gives wide control over applying, creating and altering the colors of objects. For simple documents, you can just choose colors from the on-screen color palette, the Color Line. More advanced color operations are described later.
The color line The Color Line is displayed at the bottom of the window. It shows you the current fill and line colors, provides access to the color editor and provides a palette of pre-defined colors including a special "no color". Color swatch: The outer part of the color swatch on the left-hand end of the Color Line shows the line color and the center shows the fill color. These are the colors of any selected objects, otherwise the current color attributes.
Color line context menu Right click on a color on the Color Line to show a context sensitive menu with the following options: Edit Opens the color editor with the selected color (not available for palette colors) Set fill color / Set line Set the fill or line color of the selected object with color this color Rename Rename a named color (not available for palette colors) Delete Delete a named color (not available for palette colors) If the selected object is a bitmap, the fill and line color options are rep
Applying fill & line colors by drag & drop To apply a fill color to an object (selected or unselected), drag a color from the Color Line and drop it into the center of the shape. To set the line or outline color, drop it on the line, not the center. To change the current fill color, drag a color into a blank space. To change the page background color, "Ctrl + drag" a color onto the page background.
Editing an object’s color Select the object of which you wish to change the color. To edit the fill color of the selected object /s Choose Utilities -> Color editor ("Ctrl + E"). Or click the Edit color icon on the Color Line. Or double click on the current fill color panel on the Color Line. To edit the line color of the selected object /s Right click (or Shift+ click) on the Edit color icon Or double click on the current line color panel.
The Color Editor (simple) The color editor has a simple and advanced mode. The easiest way to create a new color is to select the hue along the bottom color strip. All possible shades of this hue are then shown in the top section, so just click or drag in the top section to select the new color. You'll notice the selected objects change color as you adjust them in the color editor (called "live preview").
Previous and Current color As you drag on the color editor the two small color swatches in the upper right of the color editor show the current color and the previous (before you started changing the color). This is useful if you want to make a small change and want to compare the old and new colors.
Using the eye-dropper to pick colors Instead of selecting hues and shades on the color editor you can instead pick a color from any part of the document or any part of the computer screen—even from other windows and programs. To do this just click and drag on the eye dropper icon. As you drag you see the color editor continuously picks up the color under the eye dropper. Release the mouse button when you have the desired color.
Text Handling In this chapter Introduction Terminology The Text Tool The Font Menu Simple text Text in a column Text areas Text along a curve Editing text Tabs, Margins and Indents Repelling text objects Applying text styles Copying text styles Copying/Pasting formatted text (RTF) Page 113
Introduction The text editing facilities of MAGIX Xtreme Print Studio are very like your text editor or word processor, but in addition it provides a range of features you won't find in those programs: You can enlarge or magnify text to a huge degree. You can apply the range of normal MAGIX Xtreme Print Studio attributes and effects: fills, feather, transparency, color fades, bevels, shadows, Live Effects and still continue to edit the text.
Terminology Font or Typeface : A set of characters with a consistent style. Font family : A set of similar fonts. For example Garamond and Garamond Italic are different fonts from the same Garamond family. Justification: An alternative way of describing text alignment. Left aligned text is sometimes called left justified, or flush-left, or ragged right. Fully justified text has text aligned or "flush" to both left and right margins.
The Text Tool Use the Text Tool ("F8") to enter or edit text. MAGIX Xtreme Print Studio supports three basic type of text objects Simple text lines: Click on the page, and type. Text columns: Click and drag to create a column, and type. Text areas: Click and drag diagonally to create a rectangular area, and type. After you've created any text object you can transform it (rotate, scale, skew) and can apply all the normal attributes, fill color, transparency, feather etc, using the normal tools.
The Font Menu The font menu lists all installed fonts, and is split into two sections. The top section displays those fonts that are currently used in the document. The lower section display an alphabetical list of all fonts. Each font name is displayed in the menu using its own typeface, making font selection easier. Those fonts for which multiple font styles are available are shown with small black triangles against them on the right hand side of the menu.
Instant font menu navigation While the font menu is displayed, you can type the initial characters of the font name, and the menu will be scrolled to that section of the list. E.g. if you type "ver" it will instantly scroll and locate the Verdana font Bold, Italic & Synthesized fonts MAGIX Xtreme Print Studio does not allow you to apply italic or bold to text if the necessary italic/bold font is not installed. Xtreme Print Studio 3.
Live Font Preview If you hold the mouse pointer over any entry in the font menu for a fraction of a second, the selected text in the document will be updated to preview this font. This is not a permanent change until you actually click on the required font. Moving the mouse pointer over the menu will revert back to the initial font until you pause over another entry. If you hold down the Shift key while traversing the font menu, then the font selection is updated instantly, with no pause required.
Live Font Size preview Next to the font size menu is a small pop-up slider control, like that used elsewhere in Xtreme Print Studio. This provides a direct, live font size control, and will adjust the font size of the selected text in real-time as you drag the slider. As with the pop-up sliders used elsewhere this can be used two ways. "Click + release" on the arrow and the pop-up will appear and stay on screen.
Instant font menu navigation While the font menu is displayed, you can type the initial characters of the font name, and the menu will be scrolled to that section of the list. E.g. if you type "ver" it will instantly scroll and locate the Verdana font Bold, Italic & Synthesized fonts MAGIX Xtreme Print Studio does not allow you to apply italic or bold to text if the necessary italic/bold font is not installed. Xtreme Print Studio 3.
Bold, Italic & Synthesized fonts MAGIX Xtreme Print Studio does not allow you to apply italic or bold to text if the necessary italic/bold font is not installed. Xtreme Print Studio 3.2 and earlier versions would allow this and would artificially synthesize an italic or bold appearance as required. The results produced by doing this were generally poor quality.
Simple text If you wish to type a small amount of simple text, position the pointer where you want to enter text and click. A red cursor appears where you clicked and you can now start typing on the keyboard. If you make a mistake, use "Delete" and "Backspace" in the usual way. Pressing "Enter" completes the line and starts a new line of text below it. The inter-line spacing is controlled by the line spacing text box on the InfoBar. By default text has no outline color.
Text in a column If you are entering larger amounts of text, over multiple lines, using a column may be more useful. Changing the width of the column will automatically re-flow the text. To type a column of text: 1. Select the Text Tool. 2. Move the mouse pointer where you want the column to start. 3. Drag right to create a horizontal line the width of the column. This red line just shows you the width of the column. It is never printed. 4. Type in the text.
Changing the width of the column Drag either of the two red handles at the ends of the line. Changing the angle of the column "Shift+ drag" either of the red handles at the end of the line to change the angle of the column. Alternatively, "Ctrl + drag" to restrain the line to the constrain angles. Or alternatively you can use the Selector Tool to rotate the object in the usual way. For more on constrain angles, see Introduction to MAGIX Xtreme Print Studio .
Changing the angle of the column "Shift+ drag" either of the red handles at the end of the line to change the angle of the column. Alternatively, "Ctrl + drag" to restrain the line to the constrain angles. Or alternatively you can use the Selector Tool to rotate the object in the usual way. For more on constrain angles, see Introduction to MAGIX Xtreme Print Studio .
Text areas In the Text Tool if you click and drag diagonally on the page you will create a rectangular text area. The blinking cursor will be positioned in the top left corner and you can type or paste text. A text area can contain a "flowing" text story. A text story refers to a single piece of text, flowing from one text area to another. It's called flowing text because, like water, as you add or remove text in one area it overflows into connected text areas or flows back from text areas.
then a resize will resize the text and areas together. But if you resize a text area that is part of a flowing series of text areas, then only the container size is altered and the text inside remains the original size, and will be re-formatted to fit the new size. This is like resizing a text area with the Text Tool. If you want to resize all text in a text story, select it all with "Ctrl + A", and apply the required font size.
Connecting text areas—text flow When text overflows the bottom of the text area, an overflow indicator is shown on the bottom of the area. If you drag this over any other text area, the overflow text will flow into the new text area, and the two areas become connected. This is shown with a flow arrow. Dragging the overflow indicator from one text area to another will connect the two areas so text flows from one to another. You can link as many together as you require.
Text flow is unaffected if you rotate any of the text areas Word count The word and character count total of the current text is shown in the status line. This also shows the number of overflowing words. If any region of text is selected, it shows the count of this selection instead.
Resizing text areas Using the Text Tool, you can click and drag on any of the corner control handles. The text in the area will be reformatted to fit the new size. Alternatively you can use the Selector Tool to resize the text object, but in this case the behavior changes. Usually when you resize and object in the Selector it resizes everything including the text. So, for example, if you resize a simple text object or text column. This is consistent with the normal operation of the Selector Tool.
Word count The word and character count total of the current text is shown in the status line. This also shows the number of overflowing words. If any region of text is selected, it shows the count of this selection instead.
Text along a curve To place text along a curve of your choice: 1. Create either basic text, text in a column or a text area (see above). 2. Select your text object and one curve. 3. Choose Arrange -> Fit text to curve. Alternatively, select a curve or line and then in the Text Tool, click on the line, where you want the text to start, and type. This automatically fits the text along the line.
Create an ellipse. Convert to editable shapes. In the shape editor, select the top half (top three control points) and select the "Break at points" function. Remove the top half to leave just the lower half as seen. In the Text Tool click at about 6 o'clock and type. Right click and select Reverse text on curve to flip the text to the other side. Drag the red margin handles in from either end. Select the center text alignment option.
Adjusting the left and right margin of text on a curve If you just start typing or place a column of text on a curve, you can change the start and end position of the red handles. Just drag them along the curve as required. If you center text it will be between these two margins. Swapping sides of the line Right click on the text and select the Reverse text on curve menu option.
Swapping sides of the line Right click on the text and select the Reverse text on curve menu option. Alternatively, if you reverse the direction of the line (Shape editor Tool, Reverse paths button on the InfoBar), then the text will move to the other side of the line or, in the case of a closed shape, move from the inside to the outside of the shape. An example Create an ellipse. Convert to editable shapes.
An example Create an ellipse. Convert to editable shapes. In the shape editor, select the top half (top three control points) and select the "Break at points" function. Remove the top half to leave just the lower half as seen. In the Text Tool click at about 6 o'clock and type. Right click and select Reverse text on curve to flip the text to the other side. Drag the red margin handles in from either end. Select the center text alignment option.
Editing text Tutorial movie : All the normal word processor-style cursor and mouse operations can be used. For example: Click where you want to place the cursor. Use the left and right arrow keys to move left, right, up or down. Use "Ctrl + left and right arrow keys" to move left or right one word. Press "Home" or "End" to move to the start or end of the line. Press "Ctrl + Home", or "Ctrl + End" to move to the start or end of the text object.
Entering dummy text ('Lorem Ipsum') When creating page layouts, it's common practice to use dummy text, which is a type of pseudo-Latin (it doesn't really mean anything), but has the overall appearance of typical English text (or other similar Latin-based languages). The text begins "Lorem ipsum dolor sit amet...
Selecting the whole text object There is a quick shortcut for selecting the whole text object. Instead of using "Ctrl + A" or dragging across all the text, simply press the "Esc" key. This removes the cursor but selects the whole text (the status line will confirm 1 text object). This makes it easy to apply an effect or attribute to the whole text story. For example, to change the font size of the whole text object, just press "Esc" and select the new size from the InfoBar.
Swap case Pressing "Ctrl + W" will swap the case of the character after the cursor and move the cursor on. So, if you've accidentally typed a section of text with the caps lock key on, just place the cursor at the start and press and hold "Ctrl + W". You can swap the case of a selected region of text, the same way. The cursor will not be moved.
Smart Quotes When you type quote ' or double quote " characters, Xtreme will automatically convert these into the more appropriate and aesthetically accurate opening or closing quotes. So this changes 'this' into ?this? and "quotes" into ?quotes?. It's smart enough to understand the use of single quotes within words to signify missing characters, so that 'don't' becomes ?don?t? . Entering special characters There are a number of useful shortcuts to allow insertion of special characters, like © or ™.
Entering special characters There are a number of useful shortcuts to allow insertion of special characters, like © or ™. See Special characters (in Text Tool) section in "Menus and keyboard shortcuts". All these shortcuts (with the exception of the hard space) are compatible with Microsoft Word.
Entering dummy text ('Lorem Ipsum') When creating page layouts, it's common practice to use dummy text, which is a type of pseudo-Latin (it doesn't really mean anything), but has the overall appearance of typical English text (or other similar Latin-based languages). The text begins "Lorem ipsum dolor sit amet...
Tabs, Margins and Indents Rulers To adjust tabs, margins and indents you need to turn on rulers in your document. To do this: Chose "Windows -> Bars -> Rulers". Or press "Ctrl + Shift+ R" (this is a new shortcut). Or press "Ctrl + L" (when not in the Text Tool). The enhanced text features will only appear on the ruler when you are using the Text Tool and when the text cursor is in a text story or the text object is selected when in the Text Tool.
If you have clicked on the line or fitted a column of text to a curve or line then you have left and right margin indicators (small red squares) that can be dragged along the line to adjust the margins used for justification. Tabs By default, text stories are created with tabs set 0.5 cm apart. This means you can just press "Tab" and your text will be moved along to the next tab stop. You only need to define new tab stop positions if you want alternative tab spacing.
The decimal points in the text will be aligned with the tab. This is useful for lists and, however long the number, the decimal points (periods) will be tab-aligned. How to creating hanging indents Hanging Indents, as they are known, are where the first line of a paragraph has a negative margin or a margin that hangs to the left of the normal left margin. Numbered or bulleted lists are examples of hanging indents. To create hanging indents: 1. Drag the left margin inwards. 2.
Rulers To adjust tabs, margins and indents you need to turn on rulers in your document. To do this: Chose "Windows -> Bars -> Rulers". Or press "Ctrl + Shift+ R" (this is a new shortcut). Or press "Ctrl + L" (when not in the Text Tool). The enhanced text features will only appear on the ruler when you are using the Text Tool and when the text cursor is in a text story or the text object is selected when in the Text Tool.
Tabs By default, text stories are created with tabs set 0.5 cm apart. This means you can just press "Tab" and your text will be moved along to the next tab stop. You only need to define new tab stop positions if you want alternative tab spacing. These default tabs are shown as faint Ls on the ruler: Standard tabs, indicated by faint "L"s Custom tabs To create a custom tab position, just click on the ruler where you wish to place the new tab. It will replace default tabs up to that point on the ruler.
How to creating hanging indents Hanging Indents, as they are known, are where the first line of a paragraph has a negative margin or a margin that hangs to the left of the normal left margin. Numbered or bulleted lists are examples of hanging indents. To create hanging indents: 1. Drag the left margin inwards. 2. Click on the ruler away from the left margin (creates a new tab stop) and drag this tab stop to be exactly over the left margin. 3.
Margins and indents Any changes you make are made to the current paragraph of text. (i.e. the paragraph containing the text cursor) or, if you have a selected region of text, to the paragraphs of the selected region. You can apply changes to all text in a text story by selecting all the text within that story ("Ctrl + A"). To change more than one text story, select the text objects while in the Selector Tool then change to the Text Tool and make the required changes. Left margin .
For example: The triangle indicates a custom tab To set more than one tab click multiple times on the ruler. To move a custom tab drag it along the ruler. To remove a tab drag it off of the ruler (default tabs will come back). Custom tab types You can set different types of custom tab. By default, custom tabs are left align tabs. This means that text will be aligned with the tab on the left of the text. To change the tab type, click the tab icon on the ruler.
"Tab" to move to the left margin. And (as with this paragraph) all subsequent lines of text are indented to the left margin.
Text along a curve If you have fitted a single line of text to the curve using the Fit text to curve option, then the curve line is the margin. If the text is longer than the line it will just flow off the end. Full justification will always fit the text onto the line, if necessary overlapping characters.
Center align: The text will be centered on the tab. Decimal point align: The decimal points in the text will be aligned with the tab. This is useful for lists and, however long the number, the decimal points (periods) will be tab-aligned. How to creating hanging indents Hanging Indents, as they are known, are where the first line of a paragraph has a negative margin or a margin that hangs to the left of the normal left margin. Numbered or bulleted lists are examples of hanging indents.
Tabs By default, text stories are created with tabs set 0.5 cm apart. This means you can just press "Tab" and your text will be moved along to the next tab stop. You only need to define new tab stop positions if you want alternative tab spacing. These default tabs are shown as faint Ls on the ruler: Standard tabs, indicated by faint "L"s Custom tabs To create a custom tab position, just click on the ruler where you wish to place the new tab. It will replace default tabs up to that point on the ruler.
How to creating hanging indents Hanging Indents, as they are known, are where the first line of a paragraph has a negative margin or a margin that hangs to the left of the normal left margin. Numbered or bulleted lists are examples of hanging indents. To create hanging indents: 1. Drag the left margin inwards. 2. Click on the ruler away from the left margin (creates a new tab stop) and drag this tab stop to be exactly over the left margin. 3.
Custom tabs To create a custom tab position, just click on the ruler where you wish to place the new tab. It will replace default tabs up to that point on the ruler. For example: The triangle indicates a custom tab To set more than one tab click multiple times on the ruler. To move a custom tab drag it along the ruler. To remove a tab drag it off of the ruler (default tabs will come back). Custom tab types You can set different types of custom tab. By default, custom tabs are left align tabs.
To create hanging indents: 1. Drag the left margin inwards. 2. Click on the ruler away from the left margin (creates a new tab stop) and drag this tab stop to be exactly over the left margin. 3. Now each line will start outdented—you can insert any special character or number and press "Tab" to move to the left margin. And (as with this paragraph) all subsequent lines of text are indented to the left margin.
Custom tab types You can set different types of custom tab. By default, custom tabs are left align tabs. This means that text will be aligned with the tab on the left of the text. To change the tab type, click the tab icon on the ruler. The following custom tab types are available. You are not limited to just one type in a story, and can choose a different type then set additional tabs. Left align: The text will be aligned with the tab to the left.
How to creating hanging indents Hanging Indents, as they are known, are where the first line of a paragraph has a negative margin or a margin that hangs to the left of the normal left margin. Numbered or bulleted lists are examples of hanging indents. To create hanging indents: 1. Drag the left margin inwards. 2. Click on the ruler away from the left margin (creates a new tab stop) and drag this tab stop to be exactly over the left margin. 3.
Repelling text objects You can make any object in MAGIX Xtreme Print Studio repel text so that text underneath it automatically flows around the object, instead of appearing on top of it. This makes it easy to lay out pages containing long passages of text combined with photos and graphics. Once you've set them to repel, you can adjust the positions of your graphics and photos and the text will automatically adjust and reflow around them.
Making an object repel To make an object repel text, select the "Repel text under..." option in the Arrange menu to bring up the repelling properties dialog. Or right click on the object and select the same option in the right-click menu. If desired, set a repel margin for the object. This determines the size of the margin between the edges of the object and the text that it repels. To close the dialog and turn on the repel text option click on "Repel ".
Applying text styles Changing the font size There are four ways to change the font size: Type a new value into the size text box on the InfoBar and press ¿. Or select from the Font size dropdown list on the InfoBar. Or manually increase/decrease font size with the "Ctrl + Shift+ >" and "Ctrl + Shift+ <" keyboard shortcuts. This applies only if all selected text parts are of the same font size. Or use the Selector Tool to scale the whole text object.
When using simple text the initial click position on the page is taken as the origin for text justification. Left justification: Align the left-hand edge of the text to the initial click position. Center justification: Centers the text around the click position. Right justification: Align the right-hand edge of the text to the initial click position. Full justification: This only applies when text is along a curve or in a column and when there is at least one full line of text to justify.
in the text box, or click the arrows to nudge the values. It shares the same key shortcuts as above. If there is just a cursor, it alters the kerning, but if there's a selected range of text, then it alters the tracking. Each key press alters it by 10/1000ths of a em. Baseline shift Baseline shift allows you to move part of a line up or down. Positive values move the text upwards, negative downwards. The baseline is the imaginary line at the bottom of characters.
Changing the font size There are four ways to change the font size: Type a new value into the size text box on the InfoBar and press ¿. Or select from the Font size dropdown list on the InfoBar. Or manually increase/decrease font size with the "Ctrl + Shift+ >" and "Ctrl + Shift+ <" keyboard shortcuts. This applies only if all selected text parts are of the same font size. Or use the Selector Tool to scale the whole text object.
Left justification: Align the left-hand edge of the text to the initial click position. Center justification: Centers the text around the click position. Right justification: Align the right-hand edge of the text to the initial click position. Full justification: This only applies when text is along a curve or in a column and when there is at least one full line of text to justify. Subscript & superscript Click the appropriate button on the InfoBar .
Baseline shift Baseline shift allows you to move part of a line up or down. Positive values move the text upwards, negative downwards. The baseline is the imaginary line at the bottom of characters. Select the characters for which you wish to change the baseline shift then enter a value in the Baseline shift text box. The effect of selecting AG and then applying a downwards baseline shift (i.e. -5pt).
Condensing and expanding characters (aspect ratio) The aspect ratio is the ratio between the height and width of the text. Ratios over 100% make the text wider than normal; under 100% make the text narrower. To change the aspect ratio: Type a new value into the Aspect text box on the InfoBar and press " ¿". Or use the Selector Tool to stretch or squash the complete line of text. It is not recommended to use values below 80% or above 130%.
Subscript & superscript Click the appropriate button on the InfoBar . Normal text subscript superscript Line spacing Line spacing allows you to change the space between two lines (so affects vertical spacing). Line spacing is measured in percentages (120%) or points (12pt). You can either type the line space value in the text box or click the arrows to nudge the values. A percentage setting has the benefit of scaling accordingly if you change your font size.
text box. The effect of selecting AG and then applying a downwards baseline shift (i.e. -5pt). Baseline shift is measured in points but you can use any of Xtreme Print Studio's standard measurement units. Note that baseline shift is an absolute value, in points, and does not change if you change the font size. Paragraph Spacing The last two fields on the end of the Text Tool InfoBar allow you to set the spacing above and/or below paragraphs.
Bold & Italic Click the Bold or Italic button on the InfoBar ("Ctrl + B" or "Ctrl + I") This applies the bold or italic variant of the current font. Attention: MAGIX Xtreme Print Studio does not allow you to apply italic or bold to text if the necessary italic/bold font is not installed. However you can easily emulate the same effect. To embolden a font, just give it a small line width and apply a line color. To slant a font, use the skew / slant feature of the Selector Tool.
applied to a line of text with more than one font size, the largest font size is used. For example, if a line contains 90% and 100% text, the line spacing is calculated on 100%. Tracking Whereas kerning (see below) changes the spacing between two characters, tracking changes the spacing equally within a region of text. An EM is the width of the capital letter "M" in the current font and font size. It is therefore relative to the font size and not a fixed value. 1.
paragraphs is whichever is the greater value (it's not cumulative). Paragraph spacing above paragraphs will move the first paragraph down in a frame of text.
Text Underlining Click the underline button on the InfoBar to apply an underline to the selected text. The underline color and size is automatically derived from the text color and size. Underlining links When you add a web address URL to some text, see the Web address dialog. You can decide to automatically underline all links. This is a check box option on the web address dialog ("Ctrl + Shift + W").
1. Select the region to which you want to apply tracking. 2. Type a value into the Tracking text box (values are in 1/1000ths of ems). From the keyboard you can increase or decrease the tracking by pressing "Alt + Right arrow", or "Alt + Left arrow". Each key press changes the tracking by 10/1000. Kerning Kerning lets you alter the space between two characters (so affects horizontal spacing).
Justification or text alignment Justification always applies to the complete line. Any selected region is ignored. When using simple text the initial click position on the page is taken as the origin for text justification. Left justification: Align the left-hand edge of the text to the initial click position. Center justification: Centers the text around the click position. Right justification: Align the right-hand edge of the text to the initial click position.
Auto-kerning off Auto-kerning on Manual kerning Kerning is measured in "ems" (enter values in 1/1000ths of "ems".) You can either type the kerning value in the text box, or click the arrows to nudge the values. It shares the same key shortcuts as above. If there is just a cursor, it alters the kerning, but if there's a selected range of text, then it alters the tracking. Each key press alters it by 10/1000ths of a em. Baseline shift Baseline shift allows you to move part of a line up or down.
Subscript & superscript Click the appropriate button on the InfoBar . Normal text subscript superscript Line spacing Line spacing allows you to change the space between two lines (so affects vertical spacing). Line spacing is measured in percentages (120%) or points (12pt). You can either type the line space value in the text box or click the arrows to nudge the values. A percentage setting has the benefit of scaling accordingly if you change your font size.
text box. The effect of selecting AG and then applying a downwards baseline shift (i.e. -5pt). Baseline shift is measured in points but you can use any of Xtreme Print Studio's standard measurement units. Note that baseline shift is an absolute value, in points, and does not change if you change the font size. Paragraph Spacing The last two fields on the end of the Text Tool InfoBar allow you to set the spacing above and/or below paragraphs.
Line spacing Line spacing allows you to change the space between two lines (so affects vertical spacing). Line spacing is measured in percentages (120%) or points (12pt). You can either type the line space value in the text box or click the arrows to nudge the values. A percentage setting has the benefit of scaling accordingly if you change your font size. If a percentage is applied to a line of text with more than one font size, the largest font size is used.
size. Paragraph Spacing The last two fields on the end of the Text Tool InfoBar allow you to set the spacing above and/or below paragraphs. This is particularly useful where you want half line spaces between paragraphs. Like Microsoft Word, when you use both spacing above and below paragraphs, the spacing between paragraphs is whichever is the greater value (it's not cumulative). Paragraph spacing above paragraphs will move the first paragraph down in a frame of text.
Tracking Whereas kerning (see below) changes the spacing between two characters, tracking changes the spacing equally within a region of text. An EM is the width of the capital letter "M" in the current font and font size. It is therefore relative to the font size and not a fixed value. 1. Select the region to which you want to apply tracking. 2. Type a value into the Tracking text box (values are in 1/1000ths of ems).
Kerning Kerning lets you alter the space between two characters (so affects horizontal spacing). Most good fonts have auto-kerning which means they already move appropriate pairs of characters together slightly, as you can see from this diagram: Auto-kerning off Auto-kerning on Manual kerning Kerning is measured in "ems" (enter values in 1/1000ths of "ems".) You can either type the kerning value in the text box, or click the arrows to nudge the values. It shares the same key shortcuts as above.
Baseline shift Baseline shift allows you to move part of a line up or down. Positive values move the text upwards, negative downwards. The baseline is the imaginary line at the bottom of characters. Select the characters for which you wish to change the baseline shift then enter a value in the Baseline shift text box. The effect of selecting AG and then applying a downwards baseline shift (i.e. -5pt).
Paragraph Spacing The last two fields on the end of the Text Tool InfoBar allow you to set the spacing above and/or below paragraphs. This is particularly useful where you want half line spaces between paragraphs. Like Microsoft Word, when you use both spacing above and below paragraphs, the spacing between paragraphs is whichever is the greater value (it's not cumulative). Paragraph spacing above paragraphs will move the first paragraph down in a frame of text.
Copying text styles It's easy to copy the style of any text to any other region of text using the Paste attributes feature: Select the source region from where you want to copy the style. This can be as little as a word (just double click). Select "Edit -> Copy" ("Ctrl + C"). Select the region of text to which you want to apply the style. Select "Edit -> Paste attributes" ("Ctrl + Shift+ A").
Applying attributes to whole text stories When you have the cursor in a simple or column text object, pressing "Esc" will select the whole text object. You can then apply an attribute, say a color, and the whole text object is altered. This is often quicker than performing "Select all" ("Ctrl + A"). With text areas this method only works if all text areas of the story are selected. You can do this in the Selector Tool clicking and "Shift + clicking" on the different text areas to select them.
Copying/Pasting formatted text (RTF) You can copy "rich text" (as it's sometimes known) from other applications such as word processors or editors and paste into MAGIX Xtreme Print Studio as text, and the fonts, margins, line spacing will be preserved. This makes it dramatically easier to retain the style and appearance of your text.
Printing In this chapter Show print borders Selecting and setting up a printer The print dialog box Print Options: Output tab Print Options: Print Layout tab Page 191
Show print borders The "Window -> Show Print Borders" menu shows a yellow and red line around the page (non-printing) showing the print margins and borders. The page boundary is shown by a yellow rectangle and the printing area by a red rectangle. The printing area is determined by the margins on the currently selected printer. Some printers let you adjust the margins, but few let you print right up to the edge of the page.
Selecting and setting up a printer "File -> Printer Setup" opens the standard Windows Print Setup dialog: Selecting a printer also selects a suitable paper size and paper orientation. Note that these are the size and orientation of the sheets of paper used in the printer. They are separate from the size/orientation of the document. Portrait prints the page without rotation. Landscape prints the page turned through 90° (these buttons are duplicated in the Print options dialog box, described later).
Properties button This displays a dialog box letting you set options for the selected type of printer. This dialog box is not controlled by Xtreme Print Studio. Network button If your computer is connected to a network, this lets you connect to shared printers on the network. This dialog box is not controlled by Xtreme Print Studio.
Network button If your computer is connected to a network, this lets you connect to shared printers on the network. This dialog box is not controlled by Xtreme Print Studio.
The print dialog box Choose "File -> Print" ("Ctrl + P"). Print button When you have selected the required options click this to start printing. Printer… button This opens the "Print Setup" dialog box (described earlier). Options button This opens a tabbed dialog box that lets you set additional print options. These are described later . Pages All Pages: Prints every page of the document. Current Page(s): Prints the selected page or spread.
will print just page 2. 1,3,5-7 will print pages 1, 3, 5, 6 and 7. 2,3,6-8,11-12 will print pages 2,3,6,7, 8,11 and 12. The Options section of the dialog will indicate if your page range is OK or invalid. Double page spreads If the document comprises a double-page spread, you can print both sides or just the left or just the right page. This option is dimmed when the spread comprizes a single page (see Document Handling for how to select single or double-page spreads).
Print button When you have selected the required options click this to start printing. Printer… button This opens the "Print Setup" dialog box (described earlier). Options button This opens a tabbed dialog box that lets you set additional print options. These are described later . Pages All Pages: Prints every page of the document. Current Page(s): Prints the selected page or spread. Selected Objects: This option is available when any objects in the document are selected.
Save dialog box so you can specify a file name and drive for the file. Print files have a default extension of .prn. If you want to create a PDF file we recommend selecting the "File -> Export…" option and selecting PDF. This produces a higher quality, and usually more compact PDF file than you'd get from printing to a PDF file. For more information on exporting as PDF refer to Importing and Exporting. Number of copies Sets how many copies of the document to print.
Printer… button This opens the "Print Setup" dialog box (described earlier). Options button This opens a tabbed dialog box that lets you set additional print options. These are described later . Pages All Pages: Prints every page of the document. Current Page(s): Prints the selected page or spread. Selected Objects: This option is available when any objects in the document are selected. When active, only selected objects are printed.
PDF. This produces a higher quality, and usually more compact PDF file than you'd get from printing to a PDF file. For more information on exporting as PDF refer to Importing and Exporting. Number of copies Sets how many copies of the document to print. Collated This is dimmed except when printing multiple copies of a double-page spread as two separate pages. With this option selected, pages are printed as left-right-left-right, etc.
Options button This opens a tabbed dialog box that lets you set additional print options. These are described later . Pages All Pages: Prints every page of the document. Current Page(s): Prints the selected page or spread. Selected Objects: This option is available when any objects in the document are selected. When active, only selected objects are printed.
Number of copies Sets how many copies of the document to print. Collated This is dimmed except when printing multiple copies of a double-page spread as two separate pages. With this option selected, pages are printed as left-right-left-right, etc. With this option deselected, all the left-hand pages are printed then all the right-hand pages. Printers that hold a page image in memory take some time to process the image. The printer can then print multiple copies at its maximum speed.
Pages All Pages: Prints every page of the document. Current Page(s): Prints the selected page or spread. Selected Objects: This option is available when any objects in the document are selected. When active, only selected objects are printed. When you print selected objects, this means that the selected objects are printed, not that all the objects within the bounds of the selection are printed. Objects in the background layers and the guides layer never print. See Layer Gallery for more details.
This is dimmed except when printing multiple copies of a double-page spread as two separate pages. With this option selected, pages are printed as left-right-left-right, etc. With this option deselected, all the left-hand pages are printed then all the right-hand pages. Printers that hold a page image in memory take some time to process the image. The printer can then print multiple copies at its maximum speed. For such printers it is often faster to manually collate the pages after printing.
Double page spreads If the document comprises a double-page spread, you can print both sides or just the left or just the right page. This option is dimmed when the spread comprizes a single page (see Document Handling for how to select single or double-page spreads). Or the "Print/export individual pages " is active in the Page Options, so that the two pages of a double-page spread are treated as individual single pages.
Print to File You can select the Print to File option to create a document that you can give to a printing company (if they are able to accept this type of file). After checking this option, when you click Print Xtreme Print Studio displays the standard Windows Save dialog box so you can specify a file name and drive for the file. Print files have a default extension of .prn. If you want to create a PDF file we recommend selecting the "File -> Export…" option and selecting PDF.
Number of copies Sets how many copies of the document to print. Collated This is dimmed except when printing multiple copies of a double-page spread as two separate pages. With this option selected, pages are printed as left-right-left-right, etc. With this option deselected, all the left-hand pages are printed then all the right-hand pages. Printers that hold a page image in memory take some time to process the image. The printer can then print multiple copies at its maximum speed.
Collated This is dimmed except when printing multiple copies of a double-page spread as two separate pages. With this option selected, pages are printed as left-right-left-right, etc. With this option deselected, all the left-hand pages are printed then all the right-hand pages. Printers that hold a page image in memory take some time to process the image. The printer can then print multiple copies at its maximum speed. For such printers it is often faster to manually collate the pages after printing.
Print Options: Output tab Print layers There are two options: Print All Foreground Layers. Print only the currently Visible Foreground Layers. Note that only foreground layers are printed. Background layers are never printed. Print As Normal is suitable for most types of document. However some printers do not reproduce consistent colors when printing bitmaps or vector objects that are the same color (this is a fault with the printer driver).
current printer. This might be unsuitable if printing to a very high resolution printer such as image setting devices. In this case you may wish to control the print resolution manually by entering the desired value. Note that modern printers often claim to be able to print at over 1000 dots-per-inch, but this is not the same thing as "pixels-per-inch", which is what you see on screen.
Print layers There are two options: Print All Foreground Layers. Print only the currently Visible Foreground Layers. Note that only foreground layers are printed. Background layers are never printed. Print As Normal is suitable for most types of document. However some printers do not reproduce consistent colors when printing bitmaps or vector objects that are the same color (this is a fault with the printer driver).
Print As Normal is suitable for most types of document. However some printers do not reproduce consistent colors when printing bitmaps or vector objects that are the same color (this is a fault with the printer driver). This is noticeable if objects overlap onto bitmaps or onto objects with transparency applied to them. In this case, select Bitmap or Anti-Aliased Bitmap and retry. The choice between Bitmap and Anti-Aliased Bitmap depends on the printer and personal preference.
Transparency resolution When printing, MAGIX Xtreme Print Studio's transparency effects are created using bitmaps. This option controls the resolution of those bitmaps when sent to the printer. Automatic is suitable for most drawings, and means MAGIX Xtreme Print Studio automatically selects a resolution suitable for the current printer. This might be unsuitable if printing to a very high resolution printer such as image setting devices.
Fill quality Using this option, you can choose how many steps make up the graduated fills in your document when it is printed. The Normal setting is suitable for most purposes. This option is dimmed for PostScript printers. Text options If your printer has problems reproducing fonts, select the Print All Text as Shapes option. All text is then converted to vector shapes before the document is sent to the printer. This may be slower, but will reproduce exactly what you see on screen.
Text options If your printer has problems reproducing fonts, select the Print All Text as Shapes option. All text is then converted to vector shapes before the document is sent to the printer. This may be slower, but will reproduce exactly what you see on screen.
Print Options: Print Layout tab Most options in print layout are dimmed if you have Best Fit or Automatic Fit selected. We recommend using these options as they are the easiest way to print. However you can choose custom options (see "custom fit" below). Automatic fit Your design will be orientated as necessary, but Xtreme Print Studio will not change the size.
Multiple fit To print multiple copies on one page, choose Multiple Fit , enter a value for the number of copies needed across the page (rows), the number down the page (columns), and the distance between each (gutter).
Automatic fit Your design will be orientated as necessary, but Xtreme Print Studio will not change the size. We recommend this option if you are having any difficulty getting the orientation right (there are at least four places where you can set the page orientation, sometimes more for some printer drivers). This option is best if you have a set size for your design and don't want it altered.
Best fit Your design will be moved to the center of the page and it will be expanded or shrunk to suit the paper size. This option is best if you have a large or small design and want it to fit on one page. Custom fit Allows you to have control over your print out, including orientation, size and margins. The Orientation buttons can be used to choose the orientation of the printout. The scale can be altered using the Scale field.
Custom fit Allows you to have control over your print out, including orientation, size and margins. The Orientation buttons can be used to choose the orientation of the printout. The scale can be altered using the Scale field. The top and left margin fields can be changed (these set where the top left-hand corner of the page appears on the printer's paper).
Multiple fit To print multiple copies on one page, choose Multiple Fit , enter a value for the number of copies needed across the page (rows), the number down the page (columns), and the distance between each (gutter).
Customizing In this chapter Options in the Utilities menu General tab Grid and Ruler tab Mouse tab Page tab Page 223
Options in the Utilities menu Keyboard shortcut: "Ctrl + Shift+ O". This menu option opens the Options dialog box. This lets you set various options for Xtreme Print Studio. The OK button at the bottom of the dialog box implements any changes you have made and closes the dialog box. The Apply button implements any changes but keeps the dialog box on screen. This lets you make further changes.
General tab This page describes the General tab of the Utilities, Options dialog Save settings now This saves the current settings and overwrites the existing defaults. This button is useful if Save settings on exit is not selected. Clicking Save Settings Now makes the current settings the defaults (they apply whenever you run Xtreme Print Studio). Save settings on exit With this option selected, the current settings are saved on exit and apply when you next load Xtreme Print Studio.
Save settings now This saves the current settings and overwrites the existing defaults. This button is useful if Save settings on exit is not selected. Clicking Save Settings Now makes the current settings the defaults (they apply whenever you run Xtreme Print Studio). Save settings on exit With this option selected, the current settings are saved on exit and apply when you next load Xtreme Print Studio. Recent file list size The File menu shows a list of the most recently loaded or saved files.
Save settings on exit With this option selected, the current settings are saved on exit and apply when you next load Xtreme Print Studio. Recent file list size The File menu shows a list of the most recently loaded or saved files. This list gives a quick way to reload any of these files. This option lets you change the number of files listed (between 1 and 9 files). Marquee Object Selection This option enables you to change this default setting for marquee selection .
Recent file list size The File menu shows a list of the most recently loaded or saved files. This list gives a quick way to reload any of these files. This option lets you change the number of files listed (between 1 and 9 files). Marquee Object Selection This option enables you to change this default setting for marquee selection . So you can choose to have objects touching the selection rectangle selected or only the objects wholly inside the rectangle.
Marquee Object Selection This option enables you to change this default setting for marquee selection . So you can choose to have objects touching the selection rectangle selected or only the objects wholly inside the rectangle.
Grid and Ruler tab This page describes the Grid and Ruler tab of the Utilities, Options dialog Grid and Ruler spacing Major Spacing defines the distance between the major grid and ruler divisions. The units used for the grid and rulers are defined by the units you use for the major spacing. For example entering a major grid spacing of 2cm will set the grid and ruler units to centimeters regardless of the page units specified in the units options.
Grid and Ruler spacing Major Spacing defines the distance between the major grid and ruler divisions. The units used for the grid and rulers are defined by the units you use for the major spacing. For example entering a major grid spacing of 2cm will set the grid and ruler units to centimeters regardless of the page units specified in the units options. Grid type MAGIX Xtreme Print Studio allows the use of a standard Rectangular grid or an Isometric grid.
Grid type MAGIX Xtreme Print Studio allows the use of a standard Rectangular grid or an Isometric grid. Origin (0,0 point) Normally, the origin for the grid and rulers is at the bottom left-hand corner of the page. If you wish to move it to a different location, change the origin value. Coordinate Direction Here you can change the direction of page coordinates so that, for example, Y values increase as you go down the page.
Origin (0,0 point) Normally, the origin for the grid and rulers is at the bottom left-hand corner of the page. If you wish to move it to a different location, change the origin value. Coordinate Direction Here you can change the direction of page coordinates so that, for example, Y values increase as you go down the page. This is useful when you want the 0,0 point to be the top left corner and increase down the page like it does for HTML.
Coordinate Direction Here you can change the direction of page coordinates so that, for example, Y values increase as you go down the page. This is useful when you want the 0,0 point to be the top left corner and increase down the page like it does for HTML.
Mouse tab This page describes the Mouse tab of the Utilities, Options dialog Mouse button function Xtreme Print Studio gives you a range of possible actions when you click either the left or right mouse buttons. For example, if you're left-handed, you may prefer to use the right-hand button as the normal button. You would therefore assign the normal click to the right mouse button (you can also set both buttons to have the same action if you wish).
You can change the mouse wheel action here between Scrolling and Zooming. Click Reset Defaults to return to the original button assignments. This has immediate effect; you don't need to click OK or Apply Now . The Windows Control Panel also lets you swap the left and right mouse buttons. Magnetic Snap Radii Snapping is described in Object Handling. These text boxes define how close you can drag an object before it snaps to a magnetic object.
Mouse button function Xtreme Print Studio gives you a range of possible actions when you click either the left or right mouse buttons. For example, if you're left-handed, you may prefer to use the right-hand button as the normal button. You would therefore assign the normal click to the right mouse button (you can also set both buttons to have the same action if you wish). Possible actions: Normal click - At least one button should always be assigned as the normal click. "Shift+ click".
Magnetic Snap Radii Snapping is described in Object Handling. These text boxes define how close you can drag an object before it snaps to a magnetic object. These are distances on the screen and independent of any document scaling.
Page tab This page describes the Page tab of the Utilities, Options dialog These options apply only to the selected document. Paper size A0 84.0 x 118.8cm 33.07 x 46.77inches A1 59.4 x 84.0 23.39 x 33.07 A2 42.0 x 59.4 16.54 x 23.39 A3 29.7 x 42.0 11.69 x 16.54 A4 21.0 x 29.7 8.27 x 11.69 A5 14.85 x 21.0 5.85 x 8.27 A6 10.5 x 14.85 4.13 x 5.85 US legal 35.56 x 21.59 14 x 8.5 US letter 27.94 x 21.59 11 x 8.5 Fanfold 30.48 x 20.955 12 x 8.
landscape turns the page sideways.
Paper size A0 84.0 x 118.8cm 33.07 x 46.77inches A1 59.4 x 84.0 23.39 x 33.07 A2 42.0 x 59.4 16.54 x 23.39 A3 29.7 x 42.0 11.69 x 16.54 A4 21.0 x 29.7 8.27 x 11.69 A5 14.85 x 21.0 5.85 x 8.27 A6 10.5 x 14.85 4.13 x 5.85 US legal 35.56 x 21.59 14 x 8.5 US letter 27.94 x 21.59 11 x 8.5 Fanfold 30.48 x 20.955 12 x 8.25 For other sizes, click custom and type in the required width and height. Orientation Portrait orientation displays the longest sides vertically.
Orientation Portrait orientation displays the longest sides vertically. Landscape orientation displays the longest sides horizontally. If you entered a custom page size, landscape turns the page sideways.
Menus and Keyboard Shortcuts In this chapter Introduction File menu Edit menu Arrange menu Utilities menu Window menu Help menu Page 243
Introduction This chapter describes the operations available on each of the menus and those available via keyboard shortcuts. In many cases the operations described in this chapter apply to the selected object. In most cases, the described action also applies when you have several selected objects. We use selected object as shorthand for selected object or objects. Often you can select options from either a menu, a control bar or a keyboard shortcut.
File menu New (Standard control bar or Ctrl+N) Opens a new document. Open (Standard control bar or Ctrl+O) Opens a new editing window and loads a file into it. This file can be: An Xtreme Print Studio .xar file to view or edit an existing Xtreme Print Studio document, Or any of the other import formats (see Importing & Exporting for a list of formats). This opens a new document showing the drawing in the file. Close (Ctrl+W) Closes the current editing window. Xtreme Print Studio remains loaded.
Recent Files A list of the most recently loaded or saved files. Provides a quick way to reload any of these files. You can change the number of files in this list (refer to Customizing Xtreme Print Studio for details). Exit Closes all windows and removes Xtreme Print Studio from memory. You are warned if any files have unsaved changes.
New (Standard control bar or Ctrl+N) Opens a new document. Open (Standard control bar or Ctrl+O) Opens a new editing window and loads a file into it. This file can be: An Xtreme Print Studio .xar file to view or edit an existing Xtreme Print Studio document, Or any of the other import formats (see Importing & Exporting for a list of formats). This opens a new document showing the drawing in the file. Close (Ctrl+W) Closes the current editing window. Xtreme Print Studio remains loaded.
A list of the most recently loaded or saved files. Provides a quick way to reload any of these files. You can change the number of files in this list (refer to Customizing Xtreme Print Studio for details). Exit Closes all windows and removes Xtreme Print Studio from memory. You are warned if any files have unsaved changes.
Open (Standard control bar or Ctrl+O) Opens a new editing window and loads a file into it. This file can be: An Xtreme Print Studio .xar file to view or edit an existing Xtreme Print Studio document, Or any of the other import formats (see Importing & Exporting for a list of formats). This opens a new document showing the drawing in the file. Close (Ctrl+W) Closes the current editing window. Xtreme Print Studio remains loaded. You are warned if the file has unsaved changes.
Exit Closes all windows and removes Xtreme Print Studio from memory. You are warned if any files have unsaved changes.
Close (Ctrl+W) Closes the current editing window. Xtreme Print Studio remains loaded. You are warned if the file has unsaved changes. Save (Standard control bar or Ctrl+S) Saves the selected document. Save As Lets you save the selected document under a different name or to a different directory or drive. Save All Saves all loaded documents. Import (Ctrl+Shift+I) Loads a file into the selected document. The file can be any of the import formats (see Importing & Exporting for more information).
Save (Standard control bar or Ctrl+S) Saves the selected document. Save As Lets you save the selected document under a different name or to a different directory or drive. Save All Saves all loaded documents. Import (Ctrl+Shift+I) Loads a file into the selected document. The file can be any of the import formats (see Importing & Exporting for more information). Note the difference between Open and Import: both load a variety of file formats but Open opens a new document.
Save As Lets you save the selected document under a different name or to a different directory or drive. Save All Saves all loaded documents. Import (Ctrl+Shift+I) Loads a file into the selected document. The file can be any of the import formats (see Importing & Exporting for more information). Note the difference between Open and Import: both load a variety of file formats but Open opens a new document. Impor t loads the file into the existing open document.
Save All Saves all loaded documents. Import (Ctrl+Shift+I) Loads a file into the selected document. The file can be any of the import formats (see Importing & Exporting for more information). Note the difference between Open and Import: both load a variety of file formats but Open opens a new document. Impor t loads the file into the existing open document. Page Options Alter the page layout, size, etc.
Import (Ctrl+Shift+I) Loads a file into the selected document. The file can be any of the import formats (see Importing & Exporting for more information). Note the difference between Open and Import: both load a variety of file formats but Open opens a new document. Impor t loads the file into the existing open document. Page Options Alter the page layout, size, etc. Print Setup Sets options relating to the current printer or print file (refer to Printing for more information).
Page Options Alter the page layout, size, etc. Print Setup Sets options relating to the current printer or print file (refer to Printing for more information). Print Options Alter the various options when printing, including orientation and scaling (refer to Printing for more information). Print (Ctrl+P) Sets options relating to printing the document and lets you print the document (refer to Printing for more information). Recent Files A list of the most recently loaded or saved files.
Print Setup Sets options relating to the current printer or print file (refer to Printing for more information). Print Options Alter the various options when printing, including orientation and scaling (refer to Printing for more information). Print (Ctrl+P) Sets options relating to printing the document and lets you print the document (refer to Printing for more information). Recent Files A list of the most recently loaded or saved files. Provides a quick way to reload any of these files.
Print Options Alter the various options when printing, including orientation and scaling (refer to Printing for more information). Print (Ctrl+P) Sets options relating to printing the document and lets you print the document (refer to Printing for more information). Recent Files A list of the most recently loaded or saved files. Provides a quick way to reload any of these files. You can change the number of files in this list (refer to Customizing Xtreme Print Studio for details).
Print (Ctrl+P) Sets options relating to printing the document and lets you print the document (refer to Printing for more information). Recent Files A list of the most recently loaded or saved files. Provides a quick way to reload any of these files. You can change the number of files in this list (refer to Customizing Xtreme Print Studio for details). Exit Closes all windows and removes Xtreme Print Studio from memory. You are warned if any files have unsaved changes.
Recent Files A list of the most recently loaded or saved files. Provides a quick way to reload any of these files. You can change the number of files in this list (refer to Customizing Xtreme Print Studio for details). Exit Closes all windows and removes Xtreme Print Studio from memory. You are warned if any files have unsaved changes.
Exit Closes all windows and removes Xtreme Print Studio from memory. You are warned if any files have unsaved changes.
Edit menu This section covers Undo (Standard control bar or Ctrl+Z) Redo (Standard control bar or Ctrl+Y) Cut (Edit control bar or Ctrl+X) Copy (Edit control bar or Ctrl+C) Paste (Edit control bar or Ctrl+V) Paste in place (Ctrl+Shift+V) Paste Attributes (Ctrl+Shift+A) Delete (Edit & Standard control bars or Delete) Select All (Ctrl+A) Clear Selection (Esc) Duplicate (Edit control bar or Ctrl+D) Clone (Ctrl+K) Undo (Standard control bar or Ctrl+Z) Undo the previous operation.
Paste Attributes (Ctrl+Shift+A) This option lets you copy attributes (such as the line pattern or fill color) between objects. It is a quick way of applying multiple attributes. When you Paste Attributes, the attributes of the objects on the clipboard are applied to all the objects currently selected (refer to Object Handling). Delete (Edit & Standard control bars or Delete) Delete the selected object. The description of this option reflects the type of object selected (refer to Object Handling ).
Undo (Standard control bar or Ctrl+Z) Undo the previous operation. The description of this option reflects the last operation performed. For example, Undo Cut (refer to Undo & Redo ). Redo (Standard control bar or Ctrl+Y) Cancel the last Undo command. The description of this option reflects the last Undo operation (refer to Undo & Redo). Cut (Edit control bar or Ctrl+X) Cut the selected object to the clipboard.
Duplicate (Edit control bar or Ctrl+D) Copy the selected object placing the copy slightly offset from the original. The copy becomes the selected object. The offset distance can be customized (see Customizing Xtreme Print Studio). Clone (Ctrl+K) Like Duplicate copies the selected object, but places the copy directly over the original. The copy becomes the selected object.
Redo (Standard control bar or Ctrl+Y) Cancel the last Undo command. The description of this option reflects the last Undo operation (refer to Undo & Redo). Cut (Edit control bar or Ctrl+X) Cut the selected object to the clipboard. The description of this option reflects the type of object selected (refer to Object Handling ). Copy (Edit control bar or Ctrl+C) Copy the selected object to the clipboard. The description of this option reflects the type of object selected.
Clone (Ctrl+K) Like Duplicate copies the selected object, but places the copy directly over the original. The copy becomes the selected object.
Cut (Edit control bar or Ctrl+X) Cut the selected object to the clipboard. The description of this option reflects the type of object selected (refer to Object Handling ). Copy (Edit control bar or Ctrl+C) Copy the selected object to the clipboard. The description of this option reflects the type of object selected. The object remains in place in the document (refer to Object Handling ). Paste (Edit control bar or Ctrl+V) Paste the clipboard contents into the selected document.
Copy (Edit control bar or Ctrl+C) Copy the selected object to the clipboard. The description of this option reflects the type of object selected. The object remains in place in the document (refer to Object Handling ). Paste (Edit control bar or Ctrl+V) Paste the clipboard contents into the selected document. The wording of this option reflects the contents of the clipboard (refer to Object Handling ).
Paste (Edit control bar or Ctrl+V) Paste the clipboard contents into the selected document. The wording of this option reflects the contents of the clipboard (refer to Object Handling ). Sometimes, when you paste the contents of the clipboard into a document, it could be inserted using several different formats. If this is the case the Paste Special dialog box will appear so you can choose a format.
Paste in place (Ctrl+Shift+V) The same as Paste, except your object will be pasted in the exact same position from which you copied it. Paste Attributes (Ctrl+Shift+A) This option lets you copy attributes (such as the line pattern or fill color) between objects. It is a quick way of applying multiple attributes. When you Paste Attributes, the attributes of the objects on the clipboard are applied to all the objects currently selected (refer to Object Handling).
Paste Attributes (Ctrl+Shift+A) This option lets you copy attributes (such as the line pattern or fill color) between objects. It is a quick way of applying multiple attributes. When you Paste Attributes, the attributes of the objects on the clipboard are applied to all the objects currently selected (refer to Object Handling). Delete (Edit & Standard control bars or Delete) Delete the selected object. The description of this option reflects the type of object selected (refer to Object Handling ).
Delete (Edit & Standard control bars or Delete) Delete the selected object. The description of this option reflects the type of object selected (refer to Object Handling ). Select All (Ctrl+A) Select all objects in editable layers (editable and locked layers are described in Layers). Clear Selection (Esc) Deselect all objects. Duplicate (Edit control bar or Ctrl+D) Copy the selected object placing the copy slightly offset from the original. The copy becomes the selected object.
Select All (Ctrl+A) Select all objects in editable layers (editable and locked layers are described in Layers). Clear Selection (Esc) Deselect all objects. Duplicate (Edit control bar or Ctrl+D) Copy the selected object placing the copy slightly offset from the original. The copy becomes the selected object. The offset distance can be customized (see Customizing Xtreme Print Studio). Clone (Ctrl+K) Like Duplicate copies the selected object, but places the copy directly over the original.
Clear Selection (Esc) Deselect all objects. Duplicate (Edit control bar or Ctrl+D) Copy the selected object placing the copy slightly offset from the original. The copy becomes the selected object. The offset distance can be customized (see Customizing Xtreme Print Studio). Clone (Ctrl+K) Like Duplicate copies the selected object, but places the copy directly over the original. The copy becomes the selected object.
Duplicate (Edit control bar or Ctrl+D) Copy the selected object placing the copy slightly offset from the original. The copy becomes the selected object. The offset distance can be customized (see Customizing Xtreme Print Studio). Clone (Ctrl+K) Like Duplicate copies the selected object, but places the copy directly over the original. The copy becomes the selected object.
Clone (Ctrl+K) Like Duplicate copies the selected object, but places the copy directly over the original. The copy becomes the selected object.
Arrange menu This section covers Bring to Front (Arrange control bar or Ctrl+F) Move Forwards (Arrange control bar or Ctrl+Shift+F) Move Backwards (Arrange control bar or Ctrl+Shift+B) Put to Back (Arrange control bar or Ctrl+B) Bring to Front (Arrange control bar or Ctrl+F) Move the selected object to the front of all other objects in the same layer. See Object Handling for more information.
Bring to Front (Arrange control bar or Ctrl+F) Move the selected object to the front of all other objects in the same layer. See Object Handling for more information. Move Forwards (Arrange control bar or Ctrl+Shift+F) Move the selected object one step towards the front (refer to Object Handling ). Move Backwards (Arrange control bar or Ctrl+Shift+B) Move the selected object one step towards the back (refer to Object Handling).
Move Forwards (Arrange control bar or Ctrl+Shift+F) Move the selected object one step towards the front (refer to Object Handling ). Move Backwards (Arrange control bar or Ctrl+Shift+B) Move the selected object one step towards the back (refer to Object Handling). Put to Back (Arrange control bar or Ctrl+B) Move the selected object behind all others in the same layer (refer to Object Handling ).
Move Backwards (Arrange control bar or Ctrl+Shift+B) Move the selected object one step towards the back (refer to Object Handling). Put to Back (Arrange control bar or Ctrl+B) Move the selected object behind all others in the same layer (refer to Object Handling ).
Put to Back (Arrange control bar or Ctrl+B) Move the selected object behind all others in the same layer (refer to Object Handling ).
Utilities menu This section covers Color Editor (Ctrl+Shift+E) Options (Ctrl+Shift+O) Color Editor (Ctrl+Shift+E) Opens the Color Editor (refer to Color Handling). Options (Ctrl+Shift+O) Opens the Options dialog box (described in Customizing Xtreme Print Studio ).
Color Editor (Ctrl+Shift+E) Opens the Color Editor (refer to Color Handling). Options (Ctrl+Shift+O) Opens the Options dialog box (described in Customizing Xtreme Print Studio ).
Options (Ctrl+Shift+O) Opens the Options dialog box (described in Customizing Xtreme Print Studio ).
Window menu This section covers Arrange Views Cascade Arrange Icons Full Screen (8 on numeric keypad) Show Grid (#) Snap to Grid (. on numeric keypad) Documents Loaded Arrange Views Displays all Xtreme Print Studio windows as tiles. Cascade Displays all Xtreme Print Studio windows stacked behind each other so that the title bars are visible. Arrange Icons Tidies up any icons for minimized Xtreme Print Studio windows. Full Screen (8 on numeric keypad) Toggles between full-screen and normal screen modes.
Arrange Views Displays all Xtreme Print Studio windows as tiles. Cascade Displays all Xtreme Print Studio windows stacked behind each other so that the title bars are visible. Arrange Icons Tidies up any icons for minimized Xtreme Print Studio windows. Full Screen (8 on numeric keypad) Toggles between full-screen and normal screen modes. Show Grid (#) Makes the on-screen grid visible (see Document Handling ). Snap to Grid (.
Cascade Displays all Xtreme Print Studio windows stacked behind each other so that the title bars are visible. Arrange Icons Tidies up any icons for minimized Xtreme Print Studio windows. Full Screen (8 on numeric keypad) Toggles between full-screen and normal screen modes. Show Grid (#) Makes the on-screen grid visible (see Document Handling ). Snap to Grid (. on numeric keypad) With this option set, an object snaps to any grid point it is dragged close to (see Document Handling).
Arrange Icons Tidies up any icons for minimized Xtreme Print Studio windows. Full Screen (8 on numeric keypad) Toggles between full-screen and normal screen modes. Show Grid (#) Makes the on-screen grid visible (see Document Handling ). Snap to Grid (. on numeric keypad) With this option set, an object snaps to any grid point it is dragged close to (see Document Handling). Documents Loaded A list of the currently loaded documents.
Full Screen (8 on numeric keypad) Toggles between full-screen and normal screen modes. Show Grid (#) Makes the on-screen grid visible (see Document Handling ). Snap to Grid (. on numeric keypad) With this option set, an object snaps to any grid point it is dragged close to (see Document Handling). Documents Loaded A list of the currently loaded documents. Clicking on a name makes that document the selected document ("Ctrl + F6" also switches between open documents).
Show Grid (#) Makes the on-screen grid visible (see Document Handling ). Snap to Grid (. on numeric keypad) With this option set, an object snaps to any grid point it is dragged close to (see Document Handling). Documents Loaded A list of the currently loaded documents. Clicking on a name makes that document the selected document ("Ctrl + F6" also switches between open documents). A "*" after the document name indicates that it currently has unsaved changes.
Snap to Grid (. on numeric keypad) With this option set, an object snaps to any grid point it is dragged close to (see Document Handling). Documents Loaded A list of the currently loaded documents. Clicking on a name makes that document the selected document ("Ctrl + F6" also switches between open documents). A "*" after the document name indicates that it currently has unsaved changes.
Documents Loaded A list of the currently loaded documents. Clicking on a name makes that document the selected document ("Ctrl + F6" also switches between open documents). A "*" after the document name indicates that it currently has unsaved changes.
Help menu This section covers help About Update help Use the command "MAGIX Xtreme Print Studio Help" in the "Help" menu to open the start page of the program Help. Here you can work through the Help step-by-step and jump to specific sections via the tree structure on the right-hand side. About Displays copyright info and version number of MAGIX Xtreme Print Studio. Update Connects directly to the online update page where you can get the latest version of your program.
help Use the command "MAGIX Xtreme Print Studio Help" in the "Help" menu to open the start page of the program Help. Here you can work through the Help step-by-step and jump to specific sections via the tree structure on the right-hand side. About Displays copyright info and version number of MAGIX Xtreme Print Studio. Update Connects directly to the online update page where you can get the latest version of your program.
About Displays copyright info and version number of MAGIX Xtreme Print Studio. Update Connects directly to the online update page where you can get the latest version of your program.
Update Connects directly to the online update page where you can get the latest version of your program.
The help system Help guide Press "F1", or click "Help -> MAGIX Xtreme Print Studio Help" for a comprehensive help guide. Status line This is displayed at the bottom of the editing window and tells you about the current selection, available options and the pointer position. It is constantly updated telling you what you can do next and what options are available. The quickest way to learn about Xtreme Print Studio is to frequently look at the status line.
Help guide Press "F1", or click "Help -> MAGIX Xtreme Print Studio Help" for a comprehensive help guide. Status line This is displayed at the bottom of the editing window and tells you about the current selection, available options and the pointer position. It is constantly updated telling you what you can do next and what options are available. The quickest way to learn about Xtreme Print Studio is to frequently look at the status line.
Status line This is displayed at the bottom of the editing window and tells you about the current selection, available options and the pointer position. It is constantly updated telling you what you can do next and what options are available. The quickest way to learn about Xtreme Print Studio is to frequently look at the status line. Tooltips When you move over a button, the tooltip tells you the function of the button. About Choose "Help -> About MAGIX Xtreme Print Studio" .
Tooltips When you move over a button, the tooltip tells you the function of the button. About Choose "Help -> About MAGIX Xtreme Print Studio" . This displays general information about the program. If you contact Xara support, you may be asked for this information.
About Choose "Help -> About MAGIX Xtreme Print Studio" . This displays general information about the program. If you contact Xara support, you may be asked for this information.