
7.0
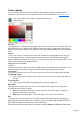

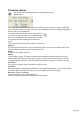
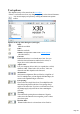
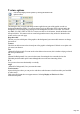
Table Of Contents
- Welcome to Xara 3D Maker 7
- Purchasing and unlocking Xara 3D Maker
- What's New in Xara 3D Maker Version 7
- Other Xara products
- Getting Help
- Working with Xara 3D Maker
- How To ...
- Quick overview
- Open a new document
- Change the text
- Rotate and position the graphic
- Light the graphic
- Color the graphic
- Resize the graphic
- Add bevels & extrude
- Select characters
- Add shadows
- Create animations
- Creating cursor (CUR & ANI) files
- Importing 2D objects
- Apply the style of an existing graphic
- Create buttons, boards, boards + holes and borders
- Create screen savers
- Create Flash files
- Save and export
- Export options for GIF, PNG or BMP files
- Export options for JPG
- Export options for animated cursors (ANI)
- Export options for animated GIFs
- Export options for AVIs (movies and screen savers)
- Export options for screen savers (SCR)
- Export options for Flash bitmap format (SWF) files
- Export options for Flash vector format (SWF) files
- General info on AVI videos
- Exporting transparent title animations for movies
- Customize Xara 3D Maker
- Reference Section
- Legal

Extrusion options
You can also display extrusion options by clicking this button in the
options toolbar.
The extrude is the depth of the sides - the more extrude, the deeper the object. An object with a high
level of extrude will have a very large 3D effect. You can change the extrude by clicking and dragging on
the side of the text or board/border.
For quick, interactive extrusion on your design just hover
your cursor over the side of your text or board/border so
that your cursor changes to the extrusion tool (see right).
You can then just click and drag the extrusion of the
object.
These extrusion options offer greater control over extrusion.
Apply to:
If you are using a board, board + holes or border design then you can choose whether to apply these
extrusion settings to just the text, the board/border or both.
Depth:
Controls the size (depth) of the sides.
Outline:
Creates a hollow graphic. The difference between outline and turning off the front/back face is that
outlined graphics have thick sides and the bevel appears on both inside and outside edges of the side.
Turning off display of the faces creates wafer-thin sides and the bevel appears on only the outer edge.
Matt/Gloss:
Lets you give the graphic either a non-reflective or shiny surface.
Front face (
Dimmed for buttons): Selecting this makes the face of the graphic transparent so you see inside the sides.
For shallow angles (text almost face-on) you can see through to the back of the graphic.
Back face: Similar to Front face
but makes the back of the graphic transparent.
All options in this dialog box are available in Flash vector format.
Page 145