
MX
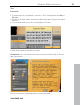
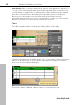
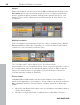
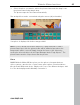
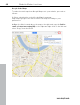
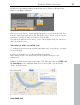
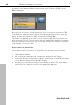
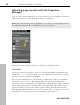
Table Of Contents
- Copyright
- Preface
- Customer service
- Before You Start
- Introduction
- What is MAGIX Website Maker MX?
- Definition of concepts: Webpage or website?
- Features
- What's new in MAGIX Website Maker MX
- Manage web uploads yourself
- Subpages with drop-down navigation and external links in the navigation.
- Insert HTML code:
- Adjust browser background and favicons
- Image viewing with the image slider.
- Your domain name of choice
- Create animated widgets
- Interactive photo & video gallery with impressive effects
- Create your own buttons
- Add Google Static Map
- The new, extra-fast multi-file upload function
- Quick start
- Interface – The layout of MAGIX Website Maker MX
- Website Maker functions
- Control Center functions
- MAGIX services in detail
- Glossary
- Index

48 Website Maker functions
3.
Switch to the Website Maker window and select "Extras > HTML" in the
Object Manager.
4. If you click on "Insert" a dialog pops up, here you have to insert the HTML
code from the clipboard: right-click in the dialog and select "Paste" from the
menu. Confirm by clicking on "OK". Confirm by clicking "OK".
The map now appears as an object on the current page. Now you can move
and customize it freely. The interactive Google map will be displayed complete
with the full range of functions, e.g. zoom and satellite view when you preview
your website, or once it is live.
Delete entries in guestbooks
If you want to delete an entry in your guestbook, then proceed as follows:
1. Start Website Maker.
2. Go to the particular page that contains the guestbook via "Pages".
3. Select the guestbook among the objects on this page. A small button with a
cross appears behind every guestbook entry.
4. Click the cross behind the entry you would like to delete. The entry will be
deleted if you confirm the action in the dialog that appears.
www.magix.com