
5.0
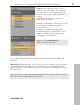
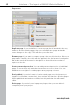
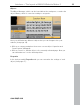
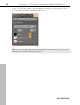
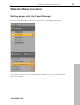
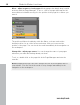
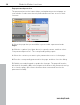
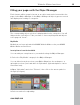
Table Of Contents
- Copyright
- Preface
- Customer Service
- Before you start
- Introduction
- What is MAGIX Website Maker 5?
- Definition of concepts: Webpage or website?
- Features
- What's new in MAGIX Website Maker 5
- Your domain name of choice
- Add Google Static Map
- Link to Facebook & Twitter
- Create animated Flash® widgets
- Upload and play animated GIFs
- Interactive photo & video gallery with impressive effects
- Photos presented as filmstrips or photo tables
- Create your own buttons
- Table templates for precise text management
- The new, extra-fast multi-file upload function
- 36 great visitor counters for your website
- FTP access to your webspace
- Quick start
- Interface – The layout of MAGIX Website Maker 5
- Website Maker functions
- Control Center functions
- MAGIX services in detail
- Glossary
- Index

Website Maker functions 39
Filling your pages with the Object Manager
Each element within a page is known as an object and can be inserted into the
page via the Object Manager. In the Object Manager all object types are sorted
and displayed according to categories.
The corresponding object selection is displayed below the categories. You will
find previews of all objects. Take your time to view everything and add objects
to the page via "Insert".
My Media
Media that you have uploaded via MAGIX Website Maker or via your MAGIX
Online Album are listed here.
Insert pictures from the hard disk
You can add your own pictures to your website using the Object Manager.
1. Select the "My Media" category in the Object Manager.
www.magix.com
You can eith
er insert photos from your Online Album into the workspace, or
upload photos from your hard drive via "Uploaded". (Uploaded photos can be
found here later).
2. Open "Uploaded" and select "Pictures"; then click on the arrow symbol to
the right (see figure).
3. Select a method for uploading: