
User manual

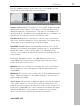
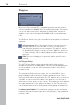
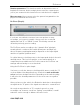

Table Of Contents
- Copyright
- Preface
- Table of Contents
- Support
- More about MAGIX
- Introduction
- Overview of the program screen
- Track window and constant control elements
- Import
- Cut sound – Working with objects
- Remove
- Enhance
- Export
- File Menu
- Edit Menu
- Effects Menu
- Options menu
- Standard mouse mode
- Cut mouse mode
- Zoom mode
- "Delete objects" mode
- Draw volume curve mouse mode
- 2 tracks
- Stereo display
- Comparisonics waveform display
- Activate Volume Curves
- Overview track
- Lock all objects
- Play parameter
- Units of measurement
- Mouse Grid Active
- Auto crossfade mode active
- Display values scale
- Path settings
- Tasks menu
- Online menu
- Help menu
- Keyboard layout and mouse-wheel support
- Activate additional functions
- Appendix: MPEG Encoder Settings
- MPEG glossary
- MPEG-4 encoder settings
- Index

Remove 71
www.magix.com
Noise must be marked as such for it to be removed. This is
done by using the marking tool.
You can mark as many noises in the editor window as you like, and
remove these "in a single step".
Three buttons are visible on the marker.
Delete: Deletes the marker.
Show noise: The result of the noise removal is usually
displayed within the marked range. If this button is depressed,
however, the original signal containing the noise is displayed.
Bypass: Under normal circumstances the result of the noise
removal is played back when playing in the Spectral Cleaning
Editor. The original sound is played when clicking this button.
In order to perfect the result you can now position the play cursor in
front of the marked noise and listen to it very carefully (see "Playback"
section). If necessary, change the noise marker. This should always
be selected as small as possible.
However, it will sometimes also be necessary to modify the
parameters (see Operator Controls, Edit marked range). If you are
satisfied with the result, click on the "Calculate" button.
The result of the Spectral Cleaning is now saved in the original file
and the editor is closed.
Controls
Toolbar
You can assign a different tool to the left and right mouse buttons by
clicking on the corresponding button in the toolbar. The selected
tools are marked in blue for the left mouse button, in red for the right
mouse button.
Selection tool: Use this tool to modify selections.
Drawing tool: Use this tool to select distortions or to modify
the selection.
Double-clicking on the selection applies it to the entire frequency range.
Navigation tool: You can move the displayed range by
holding down the mouse button and moving the mouse.