
User manual

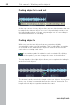
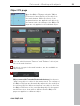
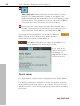
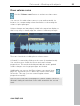

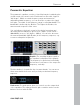
Table Of Contents
- Copyright
- Preface
- Table of Contents
- Support
- More about MAGIX
- Introduction
- Overview of the program screen
- Track window and constant control elements
- Import
- Cut sound – Working with objects
- Remove
- Enhance
- Export
- File Menu
- Edit Menu
- Effects Menu
- Options menu
- Standard mouse mode
- Cut mouse mode
- Zoom mode
- "Delete objects" mode
- Draw volume curve mouse mode
- 2 tracks
- Stereo display
- Comparisonics waveform display
- Activate Volume Curves
- Overview track
- Lock all objects
- Play parameter
- Units of measurement
- Mouse Grid Active
- Auto crossfade mode active
- Display values scale
- Path settings
- Tasks menu
- Online menu
- Help menu
- Keyboard layout and mouse-wheel support
- Activate additional functions
- Appendix: MPEG Encoder Settings
- MPEG glossary
- MPEG-4 encoder settings
- Index

Cut sound – Working with objects 55
www.magix.com
Draw volume curve
Use the "Volume curve" button to activate a volume curve.
You can use it to add volume curves to your audio material, for
instance, for compensating volume fluctuations or increasing the
volume of quiet passages.
Volume changes are immediately visible in the waveform display so
that is very easy to visually align the volume of different passages.
There are 2 methods of editing these volume curves:
A "handle" is created by clicking on the curve (in standard mode).
You can then move it with the mouse and create volume
progressions. This method should preferably be used if gradual
volume changes over longer passages are needed.
Additionally, you can use the Draw volume curve mode (view
page 42). This allows you to "draw" any volume curve using
the mouse. This way, you can create irregular volume
progressions quickly.
Tip: The voice over effect (view page 55) creates volume curves for
automatic fading in/out based on the audio material in the second
track.