
User manual

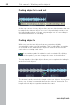
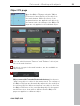
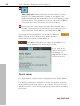
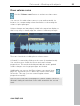

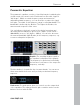
Table Of Contents
- Copyright
- Preface
- Table of Contents
- Support
- More about MAGIX
- Introduction
- Overview of the program screen
- Track window and constant control elements
- Import
- Cut sound – Working with objects
- Remove
- Enhance
- Export
- File Menu
- Edit Menu
- Effects Menu
- Options menu
- Standard mouse mode
- Cut mouse mode
- Zoom mode
- "Delete objects" mode
- Draw volume curve mouse mode
- 2 tracks
- Stereo display
- Comparisonics waveform display
- Activate Volume Curves
- Overview track
- Lock all objects
- Play parameter
- Units of measurement
- Mouse Grid Active
- Auto crossfade mode active
- Display values scale
- Path settings
- Tasks menu
- Online menu
- Help menu
- Keyboard layout and mouse-wheel support
- Activate additional functions
- Appendix: MPEG Encoder Settings
- MPEG glossary
- MPEG-4 encoder settings
- Index

52 Cut sound – Working with objects
www.magix.com
Fading objects in and out
At the top corners of every object there are two fade handles that can
be adjusted to fade an object in or out. It is particularly useful to use
the fade handles when you have cut passages out of a recording to
avoid hard transitions or crackling.
Fading objects
With every cut the two objects that are created are slightly
crossfaded in order to avoid crackling. This is called Auto crossfade.
A crossfade is also added if two objects in a track are moved into
each other or overlap each other.
A crossfade symbol is added to each crossfade. By clicking
on the symbol, you can change the curve of the transition.
The top handle of the right object allows you to regulate the fading in
and out of both objects.
The bottom handle controls the length of the two objects. If you move
them, one of them is extended whereas the other is shortened. The
length of both objects together remains the same.