
11.0

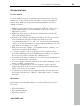

Table Of Contents
- Copyright
- Preface
- Support
- Before you start
- MAGIX News Center
- Introduction
- Tutorial
- Program desktop overview
- Mouse functions and mouse modes
- Button overview
- Functional overview
- Effects and effect plug-ins
- What effects are there, and how are they used?
- Saving effect parameters (preset mechanism)
- Dehisser
- Sound FX (object editor, mixer channels, mixmaster)
- Parametric equalizer (mixer channels, mix master)
- MAGIX Mastering Suite
- Vintage Effects Suite (track effects, mixer channels, mix ma
- Essential FX
- Vandal
- Track dynamics (track effects, mixer channels)
- Track delay/reverb (track effects)
- Elastic Audio easy
- Installation of VST plug-ins
- Effect calculations
- Samplitude 11 Producer as an external effects device
- Automation
- Mixer
- MIDI in Samplitude 11 Producer
- MIDI editor
- Software / VST instruments
- Installation of VST plug-ins
- Load instruments
- Routing settings during software instrument loading
- Load effects plug-ins
- Route MIDI instrument inputs
- Instruments with multi-channel outputs
- Adjust instrument parameters
- Play and monitor instruments live
- Routing of VST instruments using the VSTi manager.
- Preset management
- Freezing instruments (freeze)
- Tips on handling virtual instruments
- ReWire
- Synth objects
- Auto Jam Session
- Managers
- Surround sound
- Burning CDs
- File menu
- New Virtual Project (VIP)
- Open
- Load / Import
- Save project
- Save project as
- Save complete VIP in
- Save project as template
- Burn project backup on CD
- Save object
- Save session
- Rename project
- Delete HD wave project
- Delete virtual projects
- Export audio
- Make podcast
- Batch processing
- Connect to the Internet
- FTP download
- Send project via email
- Close project
- Exit
- Edit menu
- Menu view
- Track menu
- Object menu
- Range menu
- Effects menu
- Tools menu
- Playback / Record menu
- Menu tempo
- MIDI menu
- New MIDI object
- New MIDI track
- MIDI editor
- MIDI object editorCtrl + O
- Glue MIDI objects
- Trim MIDI objects
- MIDI bouncing
- Separate MIDI objects according to channels
- MIDI quantization (start and length)
- MIDI start quantization
- MIDI length quantization
- Cancel MIDI quantization
- Track information
- Track MIDI record
- VST instrument editor
- Metronome active
- Metronome settings
- MIDI settings
- MIDI record modes
- MIDI panic – All notes off
- CD menu
- Load audio CD track(s)
- Set track
- Set subindex
- Set pause
- Set CD end
- Set track markers automatically
- Set track indices on object edges
- Remove index
- Remove all indices
- Make CD
- Show CD-R drive information
- Show CD-R disc information
- CD track options
- CD disc options
- CD text / MPEG ID3 editor
- Set pause time
- Set start pause time
- CD arrange mode
- Get CD info (FreeDB Internet)
- FreeDB options
- Audio ID
- Options menu
- Window menu
- Tasks menu
- Online menu
- Help menu
- Preset keyboard shortcuts
- General settings
- Project settings
- Index

88 Functional overview
www.magix.com
Microphone: Microphone signals must first be amplified before the
sound card modifier can record them. Most sound cards have
separate microphone inputs that pre-amplify signals, but the results
are rarely professional.
Quality: Connection to an external mixer or external microphone
amplifier produces far better results.
Amplifier: If, for example, you possess a guitar amplifier that has a
line-out output, you can connect it with the line-in input on the sound
card.
Stereo system: The stereo system’s amplifier usually has a separate
line-out. If instead, you see ”Aux. out sockets,” then you should use
these. Connect them with the input on the sound card (usually shown
in red). Normally, a high-fidelity (hi-fi) amplifier has cinch sockets and
sound card mini-stereo catch sockets. You must have the
corresponding cable to connect these properly.
If the amplifier doesn’t have separate outputs (other than the loud
speakers), then you can use the headphones socket for recording. In
this case, you need a cable with two mini-stereo headphone
connectors. This process has an advantage: you can control the
signal level through the phones input. The disadvantage is that
phones outputs are normally not very good. With cassette
recordings, always use the cassette deck line out. Record transfers
often leave you no other choice... Never connect a record player’s
outputs directly to the sound card, because the phono signal must
be pre-amplified first. If you don’t have a pre-amplifier, the only way
to do this is via the phones output or an external amplifier
Adjusting the signal
Digital recordings through the sound card need optimal control in
order to obtain the best sound quality.
Once the recording source is connected to the sound card, open the
recording dialog with the "Record" button and start the recording
source.
You can check the control on the LED displays in the recording
dialog.
If the level is too high, reduce the incoming signal. If the recording
source is connected through the amplifier or tape deck’s line out